| Haru Okumura | Gallery | Quotes | Confidant | Party |
This article covers information about Haru Okumura as a party member, including uses and strategies in Persona 5 and its spinoffs.
Overview[]
Persona 5[]
Haru joins at Level 36 as early as September 19th, while the group is infiltrating Okumura's Palace, and is the final permanent member to join in Persona 5. She specializes in Psy and Gun skills, single-target or situational support, exploiting most ailments via Technical damage, and overall freedom in variety.
Haru's stats in terms of offense and defense are evenly distributed towards one another (specifically between Strength and Magic, as well as Endurance and Agility), making Haru a versatile ally. Much of her playstyle revolves around switching between Psy and Gun skills, with a variety of emergency support: there isn't enough room to fit all of her abilities in one, or at least not to their fullest potential, suggesting that her playstyle needs to be personalized.
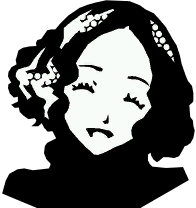
One-shot Kill, a strong skill with a high Critical rate.
She can use Triple Down to slowly shred all of the opponents' HP, by striking them with Light damage 3 times. Haru's Luck stat is moderate, but as her attack has an emphasis on targeting all enemies, she is efficient in landing Critical hits easily, giving an opening for a 1 More! or even a Baton Pass. Later on, she can also learn One-shot Kill, a severe single-target attack that has a high Critical rate, which can help swiftly kill enemies.
Gun skills are a special affinity in the sense that although they share the core mechanics of Physical skills, meaning they utilize the Strength stat over Magic and focus on exploiting Criticals over Weaknesses, they have the properties and offensive utilities of Magic skills, in the sense that they emphasize on accuracy over damage and also include Boost and Amp passives. This hybrid between Physical and Magic has Haru rely on blind luck to build an edge over the enemy, especially when there is no opportunity for Technical exploitation.

Mapsiodyne can exploit unique mental ailments.
Because of Haru's diverse offensive set-up, she is able to exploit almost all of the ailments in the game for Technical damage. As she uses Psy skills, it's possible for her to inflict Technical damage against enemies that have been inflicted with a mental ailment, a trait that is unique to her. Aside from Dizzy and Sleep, which can be exploited by all elements, Haru's Gun skills also allow her to induce Technical damage against Shock and Freeze. The only ailment she cannot exploit is Burn. Additionally, mental ailments don't have many opportunities to be afflicted by the party, as they either have less of a focus on using them or cannot inflict them to begin with, so it is recommended to have the protagonist open up on exploiting any remaining ailments to make the most out of Haru's role.
Aside from that, Haru has Boost and Amp skills for both her Psy and Gun skills, suggesting that her 2nd half of her movepool could be used for those, depending on one's preference.
Otherwise, it is recommended to improvise by reducing her variety of offense to give room for support: one extreme minimalistic example would be to preserve only a single-target Gun attack together with a multi-target Psy attack (specifically One-shot Kill and Mapsiodyne,) ensuring freedom in both affinity and range. Not only does One-Shot Kill guarantee raw damage with possibility of exploiting One More, Mapsiodyne gives room for dealing faction-wide damage while exploiting Technical damage from any afflicted enemies.

Amrita Shower heals any and all status ailments.
Although she has an emphasis on offense, Haru has a catalogue of support skills that serve to protect against certain abilities. She is able to cure her allies from any non-special status ailments with learning both Amrita Drop and Amrita Shower, helping them overcome numerous specific, but potentially dangerous disadvantages in battle, including vulnerability to Technical damage. This also protects from the ailments' effects of blocking users from performing various base combat abilities, such as being recipients of Baton Passes, participating in All-out Attacks or even switching out of battle.
Haru may otherwise use Fast Heal, a passive skill which helps her recover from her own ailments faster, which may act as a countermeasure when she is herself afflicted with an ailment, even worse if the entire party succumbs.

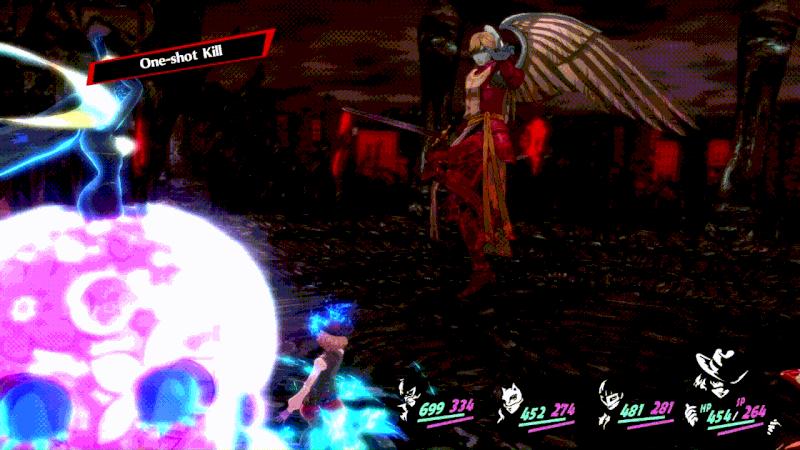
Tetrakarn protects 1 user against a single Physical or Gun attack, repelling it back.
Haru is able to use Tetrakarn and Makarakarn to erect a shield on an ally, repelling a single physical or magical attack, respectively, which will remain on the field until activated. They can be used to protect allies and damage attackers, and can be especially effective against powerful attacks. Makarakarn also reflects ailments, further letting her protect the party from status changes. The ability can be useful if utilized properly, so it's recommended to analyze and strategize in advance. Although Makarakarn may be exploited as means to protect afflicted allies against Technical damage, and Tetrakarn can be used against enemies specifically afflicted with Rage, the shields cannot deal Criticals, Technicals and so on back at the attacker and only inflict pure damage, so the shields are primarily a strictly defensive maneuver.
However, using shields is generally costly when compared to simply healing allies with Amrita Shower or just attacking enemies, especially if it's against weak ones, so it is recommended to be wary of using them. These can be most effective against powerful enemies, especially ones that target everyone with their attacks, as the shields might be hit-or-miss otherwise.
The protective elements of the shields can be made use of in less complex battles, e.g. when against fewer enemies (and hence having to withstand fewer attacks), or when the affinity of enemies (between Phys and magical) match. In the case that attack types are divided between enemies, even though they won't be as accurate in protection, it is still possible to divide Haru's attention towards a specific group of enemies, depending on their attack types. However, these skills can be difficult to use against enemies with both attack types in their arsenal, especially if they're in a horde. Regardless, Almighty skills ignore shields.
From another perspective, Fast Heal and Makarakarn can both be used as a substitute to Amrita Shower if one is willing to endure having the party experience various ailments, as long as the movement of the entire party isn't disabled.
Haru is able to learn Climate Decorum, a passive skill which requires certain weather conditions, meaning it can only work under certain moments in the story. When active, Haru's evasiveness will be doubled.

Heat Riser is a concentrated buff with deep undertones.
Haru can also learn Heat Riser which allows her to buff one ally with attack, defense and agility for three turns. Compared to the buffs and debuffs of other party members, Haru's is concentrated, increasing all of a single party member's stats. Past the straightforward aspect of giving allies a party boost, buffs also give allies proper flexibility when it comes to their playstyle: as support skills in Persona 5 give party members the opportunity to switch gears from primary to emergency skills, or to delay said switch. The examples are as follows:
- For Ryuji, his attack boost allows him to switch to using Electricity skills at the chance of afflicting the Shock ailment, while covering for the reduced damage that Ryuji would otherwise deal;
- For Morgana, his evasion boost gives him the excuse to stay on the defensive through attacking instead of healing, which is only reserved for emergencies;
- For Ann, she focuses on offense and afflicting Burn, and only protects herself in emergencies;
- For Yusuke, his agility boost is a necessity for him to switch gears to Physical skills;
- For Makoto, increasing her defense is necessary to have her withdraw from healing and emphasize on Nuclear skills, as well as giving her the opportunity to exploit Technical damage;
- For Akechi, maintaining his attack power lets him stick to damage-based attacks instead of having to resort to Insta-Kill spells.
- If Haru were to use the buff on herself, it would enforce her to default to an offensive stance via Gun and Psy skills.
Overall, Haru's playstyle, although exploits vital weaknesses and ensures freedom of movement to the most basic extent, it is heavily reliant on luck. Aside from augmented properties like the accuracy and Critical rate of her attacks, as well as the luck-based element of the mental ailments which allow for Technical hits, her support skills such as her shields are also a gamble, as although powerful, they can only be applied to a specific user and can be activated only once, especially when pit against an unpredictable set of foes. Amrita Shower in a sense can be interpreted as a countermeasure against bad luck involving ailments, granting the party a sense of clarity.

Haru's gun attack strikes all enemies at once. Only 1 round can be used per turn.
Haru is resistant to Psy, and is weak against Nuclear. Because Weakness and Technical multipliers don't stack, she cannot be dealt Technical damage from Burn, Freeze and Shock via Nuke, but she'll still be Downed.
If Haru uses her ranged weapon instead of a skill, she'll be able to hit all enemies with 1 round of ammunition, although she can only use it once, and her weapons' accuracy is lower than those of other members'.
| See also: Confidant/Haru Okumura |
If the protagonist maxes out Haru's Confidant, her Persona will evolve into Astarte, adding resistance to Ice, and completely block Psy. She can also learn Evade Nuke, making it easier for her to evade Nuclear attacks.
Haru's strongest melee weapon is Fleurs du Mal, which is created by performing an Electric Chair Execution on Beelzebub. It gives her Ma+5 and a high chance of inflicting Dizzy on her foes. Haru's strongest ranged weapon is Yagrush, which is created by itemizing on Baal, and has a medium chance of inflicting Shock.
| Pool | Explanation | |
|---|---|---|
| All-purpose combatant that doubles between offense, Technical exploitation as well as protection and purification. | ||
Persona 5 Royal[]

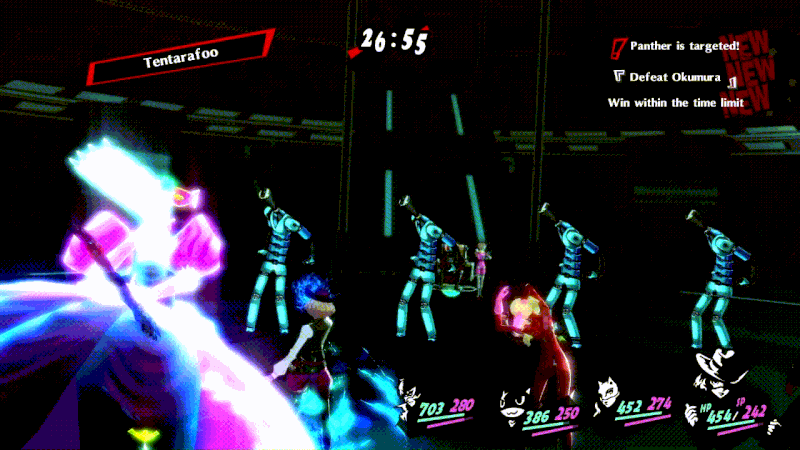
Haru can now cast Tentarafoo for quick Technical exploitation.
In Persona 5 Royal, Haru learns Tentarafoo when joining the party. This skill gives her a medium chance of Confusing all enemies, and can also be used in succession with her Gun skills to perform Technical damage, only if Knowing the Heart has been read. However, the ailment now lasts 2 turns, and hitting the enemy wears off the ailment instantly. The ailment can be treated as a swift way to stall enemies (at least mid-battle when compared to Sleep), and also as a quick way to open a Baton Pass streak.
Haru has a Showtime with Morgana and Makoto Niijima. Her Showtime with Morgana is unlocked from September 20th, and Makoto's on October 30th.
Haru's special Persona Trait is Icy Glare, decreasing allies' chances of getting inflicted by status ailments. This indirectly reduces the need to use Amrita Shower, or makes it more likely not to use Amrita Drop excessively. Otherwise, this trait encourages not to have Haru rely on Amrita Shower and give room for other skills, if not gives freedom for Fast Heal.

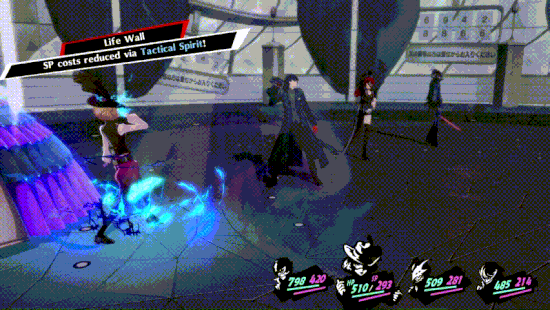
Haru's unique skill, Life Wall.
If Haru's Confidant has been maxed out, starting from January 18th, a special Third Awakening scene will become available, where her Persona will merge into Lucy. This will give her the skill Life Wall, erecting a shield for the entire group that can repel 1 attack, regardless of type (excluding Almighty.) Additionally, her Persona Trait will change into Cool Customer, further increasing the chances of allies avoiding status ailments.
Also, on the properties of Heat Riser on new party members introduced during Maruki's Palace:
- Akechi with Loki functions the same way as his Robin Hood counterpart in terms of being defensive first and foremost, except that Akechi is an opportunist that tries to find the right moment to exploit the enemy's weakness through more powerful attacks. That being said, Akechi's preferences and aims do not align, so Haru's Heat Riser might not do much to support Akechi;
- Sumire, similar to Akechi, has conflicted preferences and aims, leaning towards Bless skills as a safety net but switching towards boosting her Critical rate to take a risk with Physical skills. Similarly to Akechi, Haru's Heat Riser doesn't have much use for Sumire past a power buff.
One unique thing about Haru's ranged weapons are that, although she can only fire once per battle, customizing her guns with elemental camo won't have her ammo halved unlike other party members, and will only cut down her attack power. This can be made use of in combat, considering her gun fires at all enemies. For most of the game, she can only upgrade her gun to afflict Burn, but her gun accessible during Maruki's Palace and her respective ultimate weapon both afflict Shock instead. Both variants can be used to exploit Technical combinations in battle, the latter of which Haru can make use of herself.
Her early electric chair weapons can afflict Confuse as well, which can serve as a great follow-up in the case that should an enemy or more have already been confused, allowing for Technical damage while potentially afflicting even more enemies, all the while conserving SP.
Haru's strongest weapons remain the same, though a fusion alarm must be active when creating them for the best results. Fleurs du Mal becomes Fleurs du Mal R which retains the high chance of inflicting Dizzy but has Ma+6 instead. Yagurush becomes Yagrush EX which has a high chance of inflicting Shock on her foes.
Persona 5 Strikers[]
Haru's stats and skills in Persona 5 Strikers are comparable to those in Persona 5, meaning she still plays the same in Strikers.
Haru now has Technical Adept, which increases damage inflicted by technical hits. She can make use of that with Hysterical Slap, Evil Touch, Evil Smile, and her Vertigo Slash Master Art, each having the chance to inflict the enemy with a Mental ailment (Rage, Fear, or Dizzy), with Evil Smile working in a wide range. She also possesses Gun attacks with high critical hit rates. However, Haru can no longer erect shields, as those aren't part of the game.
Haru's primary gimmick is her ability to extend combo finishers by holding down the heavy attack button (top button on PS4/Switch). While risky, and will also leave her open to retaliation, careful players who pay attention to the battlefield and enemy actions will be able to inflict massive damage across wide areas of the field; in particular, she can extend Psiodyne into a tornado capable of shredding the down gauges of anything weak to Psy or which currently has a Mental ailment. Overall, Haru is most effective against large crowds of weak enemies, or large bosses who cannot easily avoid the wide area her highly damaging attacks cover and who have large down gauges to wear down.
Strategies[]
With Party Members[]
Haru & Morgana[]
| See also: Party/Morgana#Morgana & Haru |
Haru and Morgana both put an emphasis on exploiting Technical damage, Morgana in particular excelling in exploiting Burn, with Haru being able to take care of the rest of the ailments.
Morgana and Haru have proper chemistry in controlling enemies according to their range, where Haru specializes in smaller groups of enemies due to her shields, whereas Morgana can take care of large hordes of enemies with Masukunda. On the offensive, Morgana can take care of small encounters with Miracle Punch, while Haru can take care of multiple enemies: Morgana's Masukunda also covers for the chaos that comes with her low accuracy.
In Persona 5 Royal, Haru can team up with Morgana to inflict Confuse on enemies, as they have Tentarafoo and Pulinpa respectively, which is especially potent should Knowing the Heart been read, allowing the two to deal Technical damage with Gun and Wind skills. As the effect now wears off in 2 turns or instantly upon being hit, it can primarily be used as a quick means to open up Baton Passes via Technical damage, letting each-other or other party members access Baton Pass with less difficulty.
Haru in particular can have her guns customized to inflict Burn on enemies, letting Morgana follow-up with Technical damage of his own. Otherwise, her early electric chair Grenade Launchers can inflict Confuse as well. This strategy may be ineffective during Maruki's Palace, however, as Haru's Yagrush inflicts Shock, which is more oriented towards Strength-based party-members.
During Maruki's Palace, should Morgana have his ultimate ranged weapon (either Sudarshana or Sudarshana EX), Haru may team up with him by having him inflict the enemy with Dizzy, while Haru protects the party with Life Wall, scoring a Technical hit in the process should the enemy try to attack.
Both Haru and Morgana have access to a Showtime attack that can be made use of when they're together in combat.
Haru & Ryuji[]
| See also: Party/Ryuji Sakamoto#Ryuji & Haru |
Ryuji's Electric skills may Shock enemies, allowing Haru to deal Techncial Damage via her Gun skills.
In Persona 5 only, Ryuji can inflict Despair, which Haru can use to exploit Technicals via her Psychic skills.
In Persona 5 Royal, Ryuji is able to inflict Forget via Headbutt or Memory Blow, which Haru can use to exploit Technical Damage via Psychic skills.
If Haru's Grenade Launchers are customized to inflict Shock, or she is using the Yagrush, Ryuji can use his Physical skills to deal Technical damage.
Haru & Ann[]
| See also: Party/Ann Takamaki#Ann & Haru |
Haru's shield skills and Ann's single-target healing skills allows for proper protection between multiple (but not all) party members in need of healing, letting Haru stall for one while Ann heals another, instead of healing everyone at once and wasting SP. Ann's single-target healing in particular may open up flexibility for other party members with more powerful healing skills, giving them room for other roles.
Additionally, if against specifically enemies that use Wind or Nuclear attacks, Ann can rely on burning them and have Haru reflect their attacks with Makarakarn, having them deal damage on their own. In the scenario of Nuclear, this can serve as a major upset if Haru protects herself, as she's weak to Nuke.
In Persona 5 only, Ann can use Tentarafoo to inflict enemies with Confuse and have Haru deal Technical damage while they're stunned.
Haru & Yusuke[]
Yusuke may use Sukukaja or Masukukaja to support both Haru or himself in raising their attacks' accuracy, as they both work under reduced hit rates, whether from their stats or from their attacks.
In Persona 5 only, Yusuke's Mind Slice can inflict Confuse, which Haru can make use of to deal Technical damage.
In Persona 5 Royal, during Maruki's Palace, Haru may use a Grenade Launcher enhanced with Shock to let Yusuke deal Technical damage.
Haru & Makoto[]
| See also: Party/Makoto Niijima#Makoto & Haru |
As both Haru and Makoto are efficient in different aspects of defense, their roles can be used in unison to support the party. Makoto emphasizes on general defense reduction, while Haru covers for ailments and exploiting weaknesses with shields.
In Persona 5 Royal only, almost all of Haru's Grenade Launchers can be customized to inflict Burn or Shock, which can be used to set-up enemies for Makoto deal Technical damage with her Nuclear attacks. Haru's Yagrush is able to inflict Shock without taking a penalty to damage.
Makoto is able to inflict Forget, which Haru can exploit for Technical damage with her Psychic skills.
Additionally, Makoto and Haru can initiate a Showtime attack if they're paired in battle.
In Persona 5 Strikers only, Makoto's Sledgehammer, which can make enemies Dizzy, can be exploited by Haru further, by setting up a shield and having the enemy reflect the attack back at themselves. This can be useful against powerful enemies, though otherwise it is recommended to have Haru simply afflict Technical damage herself.
Haru & the protagonist[]
| See also: Party/Ren Amamiya#With Haru |
The protagonist is the only party member that can heal Haru from Burn, Shock and Freeze, as he's the only one that can learn Baisudi and Mabaisudi, and as Shock and Freeze prevent her from acting, he's the only other party member that can learn Amrita Drop and Amrita Shower.
For both games, the protagonist is the only party member that has access to most mental ailment skills: in Persona 5, the pool consists of Rage, Fear and Brainwash, where Persona 5 Royal also includes Despair.
Haru, Morgana & Ryuji[]
This set-up emphasizes on Technical damage as well as ensure the most is made out of it.
Haru and Morgana alone are able to cover Technical damage for every ailment, and even if Ryuji is unable to contribute to Burn and mental ailments, he can cast Tarukaja on either Haru or Morgana to ensure they make the most out of their incoming attacks.
Haru, Ryuji & Makoto[]
The set-up puts an emphasis on exploiting Technical damage via Shock. With Ryuji emphasizing on afflicting Shock, all three party members are able to join in and deal Technical damage, whether it's through Physical, Gun or Nuclear attacks.
Base Stats[]
Persona 5 / Royal[]
Note: These are the base stats for Level 99.
| |||||||||||||||||||||||||||||||||||||||||||||||||||||||||||||||||||||||||||||||||||||||||||||||||||||||||||||||||||||
| |||||||||||||||||||||||||||||||||||||||||||||||||||||||||||||||||||||||||||||||||||||||||||||||||||||||||||||||||||||||||
| |||||||||||||||||||||||||||||||||||||||||||||||||||||||||||||||||||||||||||||||||||||||||||||||||||||||||||||||||||||||||||
| |||||||||||||||||||||||||||||||||||||||||||||||||||||||||||||||||||||||||||||||||||||||||||||||||||||||||||||||||||||||||||||||
| |||||||||||||||||||||||||||||||||||||||||||||||||||||||||||||||||||||||||||||||||||||||||||||||||||||||||||||||||||||||||||||||||||
Persona 5 Strikers[]
| |||||||||||||||||||||||||||||||||||||||||||||||||||||||||||||||||||||||||||||||||||||||||||||||||||||||||||||||||||||||||||||||||||||||||||||||||
Combo Attacks[]
| Button input | Effect |
|---|---|
(S4) |
A chain of 4 axe slashes. |
(C1) |
Summon Milady for an explosive crossfire. |
(C2) |
Downward slice. |
(C3) |
Summon Milady to use a Psychokinesis skill. |
(C4) |
Giant spin attack. |
| Midair (C1) |
Vertical spin attack. Hold |
Equipment[]
Persona 5 / Royal[]
Melee Weapons[]
| Weapon | Attack | Accuracy | Effect | Price | Location |
|---|---|---|---|---|---|
| Axe | 134 | 90 | - | ¥19,200 | Default Untouchable (Okumura's Palace) |
| Death Contract | 140 | 86 | +Despair (low) | - | Electric Chair Execution - Mitra |
| Bardiche | 166 | 90 | - | ¥28,800 | Untouchable, (Okumura's Palace) |
| Mega Axe | 188 | 90 | - | ¥34,600 | Untouchable, (Niijima's Palace) |
| Crescent Axe | 208 | 90 | - | ¥36,600 | Untouchable, (Niijima's Palace) |
| Lethe Axe | 216 | 84 | +Forget (med) | - | Chest - Mementos, Path of Sheriruth |
| Ice Axe | 226 | 84 | +Freeze (med) | ¥40,400 | Untouchable, (Shido's Palace) |
| Gilgamesh Axe | 250 | 92 | - | ¥45,200 | Untouchable, (Shido's Palace) Locked chest - Shido's Palace, Entertainment Hall |
| Celtis | 256 | 90 | - | ¥48,000 | Untouchable (12/22) |
| Amazon Axe | 284 | 92 | St+3 | ¥53,600 | Untouchable (12/22) |
| Fleurs du Mal | 308 | 86 | Ma+5/+Dizzy (high) | - | Electric Chair Execution - Beelzebub |
| Weapon | Attack | Accuracy | Effect | Price | Location |
|---|---|---|---|---|---|
| Axe | 159 | 90 | - | ¥23,300 | Default Untouchable (Okumura's Palace) |
| Bardiche | 175 | 92 | - | ¥26,700 | Untouchable (Okumura's Palace) |
| Big Bang Axe | 183 | 92 | - | - | Locked chest – Okumura's Palace: Export Line |
| Mega Axe | 189 | 90 | St+3 | ¥30,500 | Untouchable (Niijima's Palace) |
| Death Contract | 190 | 80 | Low Despair | - | Electric Chair Execution - Mitra |
| Death Promise | 200 | 80 | Med Despair | - | Electric Chair Execution - Mitra (fusion alarm) |
| Crescent Axe | 209 | 92 | - | ¥33,500 | Untouchable (Niijima's Palace) |
| Ice Axe | 223 | 90 | Med Freeze | ¥38,100 | Untouchable (Shido's Palace) |
| Kintaro Axe | 235 | 92 | +30 HP | - | Trade 1 Moon Dango to Trader Sakai in Kichijoji (11/13 - 11/17) |
| Gilgamesh Axe | 243 | 92 | - | ¥41,400 | Untouchable (Shido's Palace) |
| Amazon Axe | 257 | 90 | St+3 | ¥46,200 | Untouchable (12/22) |
| Celtis | 285 | 92 | - | ¥50,100 | Untouchable (12/22) |
| Death Axe | 293 | 92 | Low Despair | - | Chest - Qliphoth World, Path to the Holy Grail |
| Taiji Axe | 301 | 90 | En+5 | ¥56,700 | Untouchable (1/13) |
| Crusader | 321 | 92 | - | ¥61,500 | Untouchable (1/13) |
| Fleurs du Mal | 325 | 86 | Ma+5 / High Dizzy | - | Electric Chair Execution - Beelzebub |
| Fleurs du Mal R | 345 | 86 | Ma+6 / High Dizzy | - | Electric Chair Execution - Beelzebub (fusion alarm) |
Ranged Weapons[]
- ↳ (P5) - Ranged weapons marked with this symbol are a customization of unmarked weapon above.
| Weapon | Attack | Accuracy | Rounds | Effect | Price | Location |
|---|---|---|---|---|---|---|
| GL Replica | 132 | 86 | 1 | - | ¥24,200 | Default Untouchable, (Okumura's Palace) |
| ↳GL Replica II | 182 | 78 | 1 | - | ¥21,000 ¥10,500 |
Customize GL Replica |
| Pawzooka | 140 | 89 | 1 | +Confuse (med) | - | Electric Chair Execution - Nekomata |
| Scorcher | 170 | 82 | 1 | - | ¥30,800 | Untouchable, (Okumura's Palace) |
| ↳Scorcher SP | 194 | 72 | 1 | +Confuse (med) | ¥21,800 ¥10,900 |
Customize Scorcher |
| Multiple GL | 196 | 86 | 1 | - | ¥38,000 | Untouchable, (Niijima's Palace) |
| ↳Multiple GL II | 268 | 88 | 1 | - | ¥30,200 ¥15,100 |
Customize Multiple GL |
| Town Burner | 214 | 86 | 1 | - | ¥42,600 | Untouchable, (Niijima's Palace) |
| ↳Town Burner HP | 246 | 78 | 1 | - | ¥26,200 ¥13,100 |
Customize Town Burner |
| ↳Town Burner SP | 236 | 76 | 1 | +Burn (med) | ¥29,000 ¥14,500 |
Customize Town Burner |
| Eraser | 222 | 80 | 1 | - | ¥43,200 | Untouchable, (Shido's Palace) |
| ↳Eraser SP | 244 | 68 | 1 | +Forget (med) | ¥29,200 ¥14,600 |
Customize Eraser |
| Flame Ocean | 242 | 84 | 1 | +Burn (low) | ¥43,800 | Untouchable, (Shido's Palace) |
| ↳Flame Ocean II | 310 | 88 | 1 | - | ¥34,200 ¥17,100 |
Customize Flame Ocean |
| Magma Bucket | 284 | 84 | 1 | +Burn (low) | ¥50,200 | Untouchable (12/22) |
| ↳Magma Bucket SP | 290 | 68 | 1 | +Burn (high) | ¥33,200 ¥16,600 |
Customize Magma Bucket |
| Pandemonium | 294 | 88 | 1 | - | ¥57,000 | Untouchable (12/22) |
| ↳Pandemonium SP | 310 | 72 | 1 | +Confuse (med) | ¥33,200 ¥16,600 |
Customize Pandemonium |
| Yagrush | 330 | 80 | 1 | +Shock (med) | - | Electric Chair Execution - Baal |
| Weapon | Attack | Accuracy | Rounds | Effect | Price | Location |
|---|---|---|---|---|---|---|
| GL Replica | 176 | 70 | 1 | - | ¥24,200 | Default Untouchable, (Okumura's Palace) |
| Scorcher | 200 | ¥28,000 | Untouchable, (Okumura's Palace) | |||
| Pawzooka | 200 | Med Confuse | - | Electric Chair Execution - Nekomata | ||
| Paw-omber | 220 | Med Confuse | - | Electric Chair Execution - Nekomata (fusion alarm) | ||
| Town Burner | 230 | - | ¥35,400 | Untouchable, (Niijima's Palace) | ||
| Eraser | 260 | ¥43,800 | Untouchable, (Shido's Palace) | |||
| Pandemonium | 300 | ¥53,400 | Untouchable (12/22) | |||
| Milkor | 340 | ¥64,000 | Untouchable, (1/13) | |||
| Yagrush | 345 | Med Shock | - | Electric Chair Execution - Baal | ||
| Yagrush EX | 360 | High Shock | Electric Chair Execution - Baal (fusion alarm) |
Armor[]
List does not include dirty/sooty armor.
| Name | Defense | Evasion | Effect | For | Price | Location |
|---|---|---|---|---|---|---|
| Baseball Jacket | 23 | 6 | - | Females | - | Ann Default |
| Padded Shirt | 27 | 4 | En+2 | Unisex | ¥2,400 | Untouchable |
| Battle Camisole | 29 | 7 | +10 HP | Females | ¥2,400 | Untouchable |
| Moonlight Robe | 30 | 30 | Repel Physical dmg (high) | Females | - | Electric Chair Execution - Kaguya |
| Lynx Camo Vest | 36 | 5 | +Resist Sleep | Unisex | ¥4,400 | Untouchable |
| Magic Camisole | 38 | 9 | Ma+2 | Females | ¥4,600 | Untouchable |
| Ancient Shirt | 43 | 8 | En+3 | Unisex | - | Wash Grimy Gear |
| Old Camisole | 45 | 13 | - | Females | - | Wash Grimy Gear |
| Worn Chainmail | 50 | 9 | - | Unisex | - | Wash Soiled Armor |
| Retro Camisole | 52 | 14 | Ma+3 | Females | - | Wash Soiled Armor |
| Chain Vest | 57 | 5 | - | Unisex | ¥8,800 | Chest - Mementos, Path of Qimranut Untouchable, (Madarame's Palace) |
| Robust Apron | 59 | 9 | - | Females | ¥9,000 | Chest - Mementos, Path of Qimranut Chest - Mementos, Path of Aiyatsbus Untouchable, (Madarame's Palace) |
| Silk Dress | 60 | 10 | +Evade Magic (low) | Females | - | Electric Chair Execution - Silky |
| Austere Haori | 65 | 6 | +Resist Dizzy | Unisex | ¥12,200 | Untouchable, (Madarame's Palace) |
| Lady's Dress | 68 | 10 | +Resist Confuse | Females | ¥12,600 | Untouchable, (Madarame's Palace) |
| Elegant Shirt | 72 | 9 | - | Unisex | - | Wash Acrylic-coated Gear |
| Courbet Apron | 75 | 14 | - | Females | - | Wash Acrylic-coated Gear |
| Army Vest | 77 | 6 | St+1 | Unisex | ¥12,400 | Locked chest - Mementos, Path of Qimranut Locked chest - Mementos, Path of Aiyatsbus Chest - Mementos, Path of Chemdah Untouchable, (Kaneshiro's Palace) |
| Pollock Vest | 81 | 10 | +Resist Fear | Unisex | - | Wash Paint-flecked Armor |
| Power Camisole | 81 | 10 | St+2 | Females | ¥12,800 | Locked chest - Mementos, Path of Qimranut Chest - Mementos, Path of Chemdah Untouchable, (Kaneshiro's Palace) |
| Scream Dress | 85 | 15 | +Resist Confuse | Females | - | Wash Paint-flecked Armor |
| Turtleneck | 88 | 12 | - | Females | - | Makoto Default |
| Reckless Vest | 89 | 7 | +Resist Fear | Unisex | ¥17,000 | Untouchable, (Kaneshiro's Palace) |
| Glaring Cape | 93 | 11 | +Resist Dizzy | Females | ¥17,200 | Untouchable, (Kaneshiro's Palace) |
| Gilded Vest | 94 | 10 | St+2 | Unisex | - | Wash Tarnished Gear |
| Sponge Camisole | 99 | 15 | St+5 | Females | - | Wash Tarnished Gear |
| Papal Robes | 100 | 7 | +Evade Bless (low) | Unisex | ¥17,800 | Locked chest - Mementos, Path of Chemdah Untouchable, (Futaba's Palace) |
| Elysian Robe | 104 | 11 | +Reduce Curse dmg (low) | Females | ¥18,200 | Locked chest - Mementos, Path of Chemdah Chest - Kaneshiro's Palace Chest - Mementos, Path of Kaitul Untouchable, (Futaba's Palace) |
| Bookkeeper Wrap | 108 | 11 | Ag+3 | Unisex | - | Wash Gold-tainted Armor |
| Pink Top | 108 | 12 | - | Females | - | Haru Default |
| Hope Shirt | 112 | 8 | +Resist Despair | Unisex | ¥23,200 | Untouchable, (Futaba's Palace) |
| Accountant Cape | 113 | 17 | +Resist Dizzy | Females | - | Wash Gold-tainted Armor |
| Dogwatch Kimono | 117 | 12 | +Resist Sleep | Females | ¥23,600 | Untouchable, (Futaba's Palace) Locked chest - Futaba's Palace, Chamber of Sanctuary |
| Pyramid Jacket | 119 | 11 | +30 HP | Unisex | - | Wash Dust-crusted Gear |
| Brigandine | 124 | 8 | - | Unisex | ¥23,800 | Locked chest - Mementos, Path of Kaitul Chest - Mementos, Path of Akzeriyyuth Untouchable (Okumura's Palace) |
| Rosetta Corset | 125 | 17 | - | Females | - | Wash Dust-crusted Gear |
| Loose Cutsew | 128 | 19 | - | Females | - | Futaba Default |
| Spiked Bra | 129 | 12 | +Repel Physical (low) | Females | ¥24,600 | Chest - Mementos, Path of Akzeriyyuth Untouchable (Okumura's Palace) |
| Royal Haori | 132 | 12 | +Resist Dizzy | Unisex | - | Wash Timeworn Armor |
| Dieting Wrap | 137 | 8 | +Resist Hunger | Unisex | ¥29,400 | Untouchable, (Okumura's Palace) |
| Pyramid Shawl | 138 | 19 | +Resist Sleep | Females | - | Wash Timeworn Armor |
| King Frost Cape | 140 | 16 | +Reduce Ice dmg (high) | Unisex | - | Electric Chair Execution - King Frost |
| Maillot | 144 | 13 | Ag+3 | Females | ¥30,000 | Untouchable, (Okumura's Palace) |
| Ghillie Vest | 149 | 8 | +Evade Physical (low) | Unisex | ¥32,000 | Locked chest - Mementos, Path of Akzeriyyuth Untouchable, (Niijima's Palace) Chest - Niijima's Palace, Slot Room main floor |
| Rune Dress | 156 | 13 | Ma+3 | Females | ¥32,800 | Locked chest - Mementos, Path of Akzeriyyuth Chest - Mementos, Path of Adyeshach Untouchable, (Niijima's Palace) |
| Tapsuan | 160 | 12 | +Evade Wind (high) | Females | - | Electric Chair Execution - Arahabaki |
| Weird Wrap | 160 | 20 | +Null Fear | Unisex | - | Complete the "Shady Deal in the Shadows" request |
| Akashic Shirt | 161 | 13 | +Resist Forget | Unisex | - | Wash Fragmented Armor |
| Space Suit | 162 | 12 | - | Unisex | - | Wash Spyware-laden Gear |
| Egoist Shirt | 167 | 9 | +Resist Brainwash | Unisex | ¥33,800 | Untouchable, (Niijima's Palace) |
| Zero-G Undies | 168 | 20 | Ag+5 | Females | - | Wash Fragmented Armor |
| Astro Bra | 170 | 19 | - | Females | - | Wash Spyware-laden Gear |
| Unyielding Vest | 173 | 13 | Lu+5 | Unisex | - | Wash Seedy Gear |
| Yama Dress | 174 | 14 | +Evade Curse (med) | Females | ¥34,400 | Untouchable, (Niijima's Palace) |
| Life Jacket | 179 | 9 | +20 HP | Unisex | - | Locked chest - Shido's Palace, Pool Deck Locked chest - Mementos, Path of Adyeshach Chest - Mementos, Path of Sheriruth Untouchable, (Shido's Palace) |
| Tsubofuri Wrap | 182 | 20 | En+5 | Females | - | Wash Seedy Gear |
| Kotodama Cape | 187 | 14 | +Resist Brainwash | Females | ¥36,200 | Locked chest - Mementos, Path of Adyeshach Chest - Mementos, Path of Sheriruth Untouchable, (Shido's Palace) |
| Gambler Shirt | 193 | 14 | +Resist Despair | Unisex | - | Wash Smokestained Armor |
| Best Vest | 194 | 10 | - | Unisex | ¥40,400 | Untouchable, (Shido's Palace) |
| Archangel Bra | 200 | 18 | +Reduce Elec dmg (high) | Females | - | Electric Chair Execution - Sraosha |
| Gambler Dress | 202 | 21 | +Evade Curse (high) | Females | - | Wash Smokestained Armor |
| Mizuha Doumaru | 203 | 15 | +Reduce Fire dmg (med) | Females | ¥41,400 | Untouchable, (Shido's Palace) |
| Silver Vest | 206 | 11 | - | Unisex | ¥44,200 | Locked chest - Mementos, Path of Sheriruth Untouchable (12/22) |
| Magellan Robe | 206 | 14 | - | Unisex | - | Wash Corrupt Gear |
| Titanium Set | 216 | 17 | +Resist Hunger | Females | ¥45,200 | Locked chest - Mementos, Path of Sheriruth Untouchable (12/22) |
| Aristocrat Cape | 216 | 21 | +Evade Magic (low) | Females | - | Wash Corrupt Gear |
| Black Wing Robe | 220 | 20 | +Reduce Nuke dmg (med) | Unisex | - | Electric Chair Execution - Yatagarasu |
| Steel Chef Vest | 223 | 15 | +Resist Burn | Unisex | - | Wash Classified Armor |
| Soul Vest | 230 | 12 | +20 SP | Unisex | 10,000 points ¥49,600 |
Reward at Ichigaya fishing pond Untouchable (12/22) |
| Millionaire Doumaru | 234 | 22 | - | Females | - | Wash Classified Armor |
| Silver Vest+ | 236 | 16 | - | Unisex | - | Wash Desecrated Gear |
| Haten Robe | 243 | 18 | Ma+3 | Females | ¥50,600 | Complete the request "Swindling Old Folk is Pretty Low." Untouchable (12/22) |
| Empathy Cape | 246 | 12 | +50 SP | Unisex | - | Chest - Qliphoth World, Path to the Holy Grail |
| Titanium Set+ | 247 | 24 | +Resist Hunger | Females | - | Wash Desecrated Gear |
| Lucifer Guard | 250 | 10 | +Reduce Magic dmg (high) | Unisex | - | Electric Chair Execution - Messiah* |
| Soul Vest+ | 263 | 16 | +40 SP | Unisex | - | Wash Unholy Armor |
| Haten Robe+ | 275 | 25 | Ma+5 | Females | - | Wash Unholy Armor |
| Name | Defense | Evasion | Effect | For | Price | Location |
|---|---|---|---|---|---|---|
| Baseball Jacket | 23 | 6 | - | Females | - | Ann default |
| Lynx Camo Vest | 28 | 4 | +Resist Sleep | Unisex | ¥2,400 | Untouchable (Kamoshida's Palace) |
| Confident Camisole | 38 | 7 | +Resist Forget | Females | ¥4,500 | Untouchable (Kamoshida's Palace) |
| Moonlight Robe | 50 | 30 | +Repel Physical dmg (high) | Females | - | Electric Chair Execution - Kaguya |
| Old Pajamas | 57 | 15 | +Resist Sleep | Unisex | - | Wash Sooty Ghastly Gear |
| Amulet Shirt | 58 | 5 | +Evade Curse (low) | Unisex | ¥8,400 | Untouchable (Madarame's Palace) |
| Robust Apron | 59 | 9 | +Resist Freeze | Females | ¥9,300 | Untouchable (Madarame's Palace) |
| Old Angel's Cape | 60 | 11 | +Evade Magic (low) | Females | - | Wash Sooty Ladies' Armor |
| Succubus Pajamas | 68 | 15 | +Null Sleep | Unisex | - | Wash Sooty Ghastly Gear |
| Lady's Dress | 68 | 10 | - | Females | ¥10,300 | Untouchable (Madarame's Palace) |
| Moonlight Robe R | 70 | 30 | +Repel Physical dmg (high) | Females | - | Electric Chair Execution - Kaguya (fusion alarm) |
| Angel's Cape | 71 | 11 | +Evade Magic (med) | Females | - | Wash Sooty Ladies' Armor |
| Night Shift Haori | 79 | 6 | +Resist Sleep | Unisex | ¥12,300 | Untouchable (Kaneshiro's Palace) |
| Lightning Blouse | 81 | 10 | +Resist Shock | Females | ¥13,600 | Untouchable (Kaneshiro's Palace) |
| Zen Outfit | 86 | 12 | Ag+3 | Unisex | - | Locked Chest - Madarame's Palace: Main Treasure Hall |
| Turtleneck | 88 | 12 | - | Females | - | Makoto default |
| Old Cheongsam | 88 | 12 | Ag+1 | Females | - | Wash Sooty Cheongsam Clothing Grab Bag (Madarame's Palace post-deadline) |
| Silk Dress | 95 | 10 | +Evade Magic (low) | Females | - | Electric Chair Execution - Silky |
| Power Camisole | 99 | 11 | - | Females | ¥15,900 | Untouchable (Kaneshiro's Palace) |
| Fine Silk Dress | 100 | 14 | +Evade Magic (med) | Females | - | Electric Chair Execution - Silky (fusion alarm) |
| Papal Robes | 102 | 7 | +Evade Bless (low) | Unisex | ¥16,900 | Untouchable (Futaba's Palace) |
| Elysian Robe | 104 | 11 | +Resist Fear | Females | ¥18,700 | Untouchable (Futaba's Palace) |
| Fairy Cheongsam | 104 | 12 | Ag+3 | Females | - | Wash Sooty Cheongsam |
| Heavensent Dress | 105 | 14 | Ma+4 | Females | - | Electric Chair Execution - Phoenix |
| Pink Top | 108 | 12 | - | Females | - | Haru default |
| Godsent Dress | 110 | 14 | Ma+6 | Females | - | Electric Chair Execution - Phoenix (fusion alarm) |
| Old Fiery Apron | 111 | 13 | +10 HP | Females | - | Wash Sooty Ogress' Gear Clothing Grab Bag (Kaneshiro's Palace) |
| Golden Vest | 114 | 7 | En+3 | Unisex | - | Locked Chest - Kaneshiro's Palace: Vault: 2F |
| Hard Corset | 125 | 12 | - | Females | ¥21,200 | Untouchable (Futaba's Palace) |
| Hope Shirt | 126 | 8 | +Resist Despair | Unisex | ¥22,100 | Untouchable (Futaba's Palace) |
| Loose Cutsew | 128 | 19 | - | Females | - | Futaba default |
| Robe of Hatred | 129 | 12 | Prevents Curse insta-kills | Females | - | Locked Chest – Futaba's Palace: Chamber of Sanctuary 1F |
| Titanium Corset | 129 | 12 | +Resist Hunger | Females | ¥24,500 | Untouchable (Okumura's Palace) |
| Fiery Apron | 132 | 13 | +30 HP | Females | - | Wash Sooty Ogress' Gear |
| Old Robe | 137 | 15 | +10 SP | Females | - | Wash Sooty Divine Armor Clothing Grab Bag (Futaba's Palace) |
| Maillot | 153 | 14 | Ag+2 | Females | ¥29,100 | Untouchable (Okumura's Palace) |
| Rune Vest | 153 | 8 | +Evade Curse (low) | Unisex | ¥28,100 | Untouchable (Niijima's Palace) |
| Yama Dress | 156 | 13 | +Resist Fear | Females | ¥31,100 | Untouchable (Niijima's Palace) |
| Weird Wrap | 160 | 20 | +Null Fear | Unisex | - | Complete the request, "Shady Deal in the Shadows" |
| Arcane Robe | 161 | 15 | +30 SP | Females | - | Wash Sooty Divine Armor |
| Old Undershirt | 164 | 16 | +Resist Brainwash | Females | - | Wash Sooty Astro Armor Clothing Grab Bag (Okumura's Palace) |
| Tapsuan | 170 | 12 | +Evade Wind (high) | Females | - | Electric Chair Execution - Arahabaki |
| Royal Holy Shroud | 171 | 10 | +30 SP | Unisex | - | Wash Sooty Wolf's Coat |
| Space Suit | 172 | 8 | - | Unisex | - | Locked Chest – Okumura's Palace: Weapon Production |
| Panzer Dress | 182 | 15 | - | Females | ¥34,300 | Untouchable (Niijima's Palace) |
| Egoist Shirt | 183 | 9 | +Resist Brainwash | Unisex | ¥35,000 | Untouchable (Niijima's Palace) |
| Glaring Cape | 187 | 14 | +Resist Dizzy | Females | ¥38,800 | Untouchable (Kaneshiro's Palace) |
| Lil Devil Undershirt | 193 | 16 | +Null Brainwash | Females | - | Wash Sooty Astro Armor |
| Old Tights | 194 | 17 | En+1 | Females | - | Wash Sooty Grifter's Garb Clothing Grab Bag (Niijima's Palace) |
| Fine Tapsuan | 195 | 15 | +Evade Wind (high) | Females | - | Electric Chair Execution - Arahabaki (fusion alarm) |
| Lucky Robe | 210 | 18 | Lu+5 | Females | - | Electric Chair Execution - Fortuna |
| Akashic Shirt | 213 | 11 | +Resist Forget | Unisex | ¥42,500 | Untouchable (12/22) |
| Tomoe's Doumaru | 216 | 17 | - | Females | ¥42,400 | Untouchable (Shido's Palace) |
| Cozy Dress | 218 | 17 | +Resist Freeze | Females | ¥47,000 | Untouchable (12/22) |
| Super Lucky Robe | 220 | 18 | Lu+10 | Females | - | Electric Chair Execution - Fortuna (fusion alarm) |
| Old Khamrai Tao | 226 | 19 | +Reduce Fire dmg (low) | Females | - | Wash Sooty Regalia Clothing Grab Bag (Shido's Palace) |
| Divine Black Tights | 228 | 17 | En+6 | Females | - | Wash Sooty Grifter's Garb |
| Immovable Shirt | 240 | 10 | +Repel Physical (low) | Unisex | - | Locked Chest – Shido's Palace: Pool Deck |
| Light Undershirt | 241 | 20 | - | Females | - | Sumire default |
| Black Wing Robe | 250 | 20 | +Reduce Nuke dmg (med) | Unisex | - | Electric Chair Execution - Yatagarasu |
| Haten Robe | 250 | 19 | - | Females | ¥51,400 | Complete the request, "Swindling Old Folk is Pretty Low." Untouchable (12/22) |
| Bodhi Haori | 251 | 12 | +Resist Fear | Unisex | ¥52,200 | Untouchable (1/9) |
| Tao Robe | 257 | 18 | +Resist Brainwash | Females | ¥57,800 | Untouchable (1/13) |
| King Frost Cape | 260 | 16 | +Reduce Ice dmg (high) | Unisex | - | Electric Chair Execution - King Frost |
| Khamrai Tao | 265 | 19 | +Reduce Fire dmg (high) | Females | - | Wash Sooty Regalia |
| Black Wing Robe R | 270 | 20 | +Reduce Nuke dmg (high) | Unisex | - | Electric Chair Execution - Yatagarasu (fusion alarm) |
| Vest of Life | 280 | 12 | +50 HP | Unisex | - | Chest - Qliphoth World, Path to the Holy Grail |
| King Frost Cape EX | 280 | 16 | +Reduce Ice dmg (high) | Unisex | - | Electric Chair Execution - King Frost (fusion alarm) |
| Unio Dress | 293 | 20 | - | Females | ¥62,900 | Untouchable (1/13) |
| Old Sinful Bikini | 298 | 20 | +10 SP | Females | - | Sooty Rogue's Garb |
| Archangel Bra | 300 | 18 | +Reduce Elec dmg (high) | Females | - | Electric Chair Execution - Sraosha |
| Sirius Armor | 10 | 305 | +Reduce Magic dmg (high) | Unisex | - | Electric Chair Execution - Messiah* |
| Golden Dress | 306 | 19 | Ag+5 | Females | - | Locked Chest - Maruki's Palace: Research Ward |
| Old Witch's Robe | 307 | 20 | Ma+1 | Females | - | Wash Sooty Dark Armor Clothing Grab Bag (Maruki's Palace) |
| Sinful Bikini | 311 | 20 | +50 SP | Females | - | Sooty Rogue's Garb |
| Lovely Witch's Robe | 324 | 20 | Ma+8 | Females | - | Wash Sooty Dark Armor |
| High Archangel Bra | 325 | 20 | +Reduce Elec dmg (high) | Females | - | Electric Chair Execution - Sraosha (fusion alarm) |
| Sirius Armor EX | 330 | 10 | +Reduce Magic dmg (high) | Unisex | - | Electric Chair Execution - Messiah* (fusion alarm) |
Persona 5 Strikers[]
Weapons[]
| Weapon | Attack | Effect | Price (¥) | Location |
|---|---|---|---|---|
| Axe | 48 | - | Initial | |
| Felling Axe | 60 | 2,200 | Sophia's Shop | |
| Battle Axe | 64 | 2,600 | ||
| Bardiche | 82 | 4,000 | Sophia's Shop (8/2) | |
| Halberd | 92 | 5,200 | ||
| Enchanting Axe | 96 | +Dizzy (low) | - | Chest - Sendai Jail, Sendai World Center |
| Mega Axe | 106 | 8,200 | Sophia's Shop Complete the request, "Sophia's Weapon Shop" | |
| Crescent Axe | 130 | 10,600 | ||
| Death Contract S | 134 | +Fear (low) | - | Complete the request, "Psychokinetic Siege" |
| Great Axe | 144 | St +2 | 13,600 | Sophia's Shop (Okinawa) |
| Beheading Axe | 154 | 15,400 | ||
| Ice Axe | 196 | +Freeze (low) | 29,600 | Sophia's Shop Complete the request, "Sophia's Weapon Shop Redux" |
| Gilgamesh Axe | 224 | 34,200 | ||
| Tabar | 230 | Ag +2 | - | Lock Lv 2 Chest - Osaka Jail, Mt. Chashiro |
| Celtis | 254 | 36,400 | Sophia's Shop (Yokohama, 8/28) | |
| Amazon Axe | 276 | St +2 | 42,000 | |
| Fleurs du Mal S | 308 | Ma +5 | - | Complete the request, "Painful Past+: Mariko Hyodo" |
| Parashu | 348 | Ma +5/+Fear (med) | Defeat Dire Shadow in Osaka Jail on Merciless difficulty (NG+ only) |
Armor[]
| Name | Defense | Price (¥) | Effect |
|---|---|---|---|
| Pink Dress | 24 | - | |
| Padded Shirt | 34 | 1,600 | En +3 |
| Lynx Camo Vest | 44 | 2,600 | +Null Sleep |
| Battle Camisole | 34 | 1,800 | +10 HP |
| Magic Camisole | 44 | 2,800 | Ma +3 |
| Chain Vest | 56 | 3,200 | |
| Reckless Vest | 68 | 4,600 | +Null Fear |
| Robust Apron | 56 | 3,600 | |
| Lady’s Dress | 68 | 5,000 | +Null Rage |
| Army Vest | 82 | 6,000 | St +3 |
| Austere Haori | 96 | 8,400 | +Null Dizzy |
| Power Camisole | 84 | 6,600 | St +3 |
| Glaring Cape | 98 | 9,000 | +Null Dizzy |
| Papal Robes | 114 | 12,200 | +Reduce Bless dmg (low) |
| Hope Shirt | 128 | 15,800 | +Reduce Psy dmg (low) |
| Elysian Robe | 114 | 13,200 | +Reduce Curse dmg (low) |
| Dogwatch Kimono | 128 | 16,800 | +Null Sleep |
| Ghillie Vest | 150 | 25,200 | +Reduce Phys dmg (low) |
| Egoist Shirt | 170 | 28,400 | +Null Brainwash |
| Rune Dress | 152 | 26,400 | Ma +3 |
| Kotodama Cape | 172 | 29,800 | +Null Brainwash |
| Silver Vest | 204 | 33,600 | +20 HP |
| Soul Vest | 230 | 38,600 | +20 SP |
| Titanium Corset | 206 | 35,200 | +25 HP |
| Haten Robe | 232 | 40,400 | Ma +3 |
| Silver Vest+ | 258 | 47,400 | +40 HP |
| Titanium Corset+ | 260 | 49,200 | +50 HP |
Goro AkechiP5/Royal - Sumire YoshizawaRoyal - SophiaStrikers - Zenkichi HasegawaStrikers | |