(→Profile: Added the choice and the results.) |
|||
| (8 intermediate revisions by 4 users not shown) | |||
| Line 1: | Line 1: | ||
[[File:Nemesis Tower.png|thumb|right|Nemesis Tower]] |
[[File:Nemesis Tower.png|thumb|right|Nemesis Tower]] |
||
| − | '''Nemesis Tower''' is a location in ''Megami Ibunroku Persona''. |
+ | '''Nemesis Tower''' {{kana|ネメシスの塔|Nemeshisu no Tō}} is a location in ''Megami Ibunroku Persona''. |
==Appearances== |
==Appearances== |
||
| Line 6: | Line 6: | ||
==Profile== |
==Profile== |
||
| − | Nemesis Tower is one of the towers the party must conquer during the [[Snow Queen Quest]] |
+ | Nemesis Tower is one of the towers the party must conquer during the [[Snow Queen Quest]] governed by [[Michiko Matsudaira]]. There is no completion time required for this tower, however the more time passes, the more floors the party must climb and the stronger the boss. If this tower is conquered second or third, the party receives one [[Ultimate Persona|Ambrosia]], but none if it is conquered first. |
| + | |||
| + | In the middle of exploring the tower, the party will find Toro and Tsutomu being tortured. Michiko then reveals herself and offers the two choices; continue up the tower without delay, or go through the door behind her to acquire a [[Demon Mirror|Mirror Shard]]. |
||
The higher floors open up after the following amount of time, and also determines the level of the boss: |
The higher floors open up after the following amount of time, and also determines the level of the boss: |
||
| Line 12: | Line 14: | ||
* 6F - 20-60 minutes |
* 6F - 20-60 minutes |
||
* 8F - more than 60 minutes (strongest) |
* 8F - more than 60 minutes (strongest) |
||
| + | |||
| + | If you hurry, it's possible to collect the Shard and still reach the fifth floor within 20 minutes. However, should you choose to not delay in rescuing Toro and Tsutomu, you can receive two Shards from the former at the Cafeteria after conquering Nemesis Tower. |
||
==Treasures== |
==Treasures== |
||
* 5F - [[Nike|Gottabe Shoes]] x1, Fuuma's Wakizashi x1, Dubthach Lance x1, Queen's Whip x1. |
* 5F - [[Nike|Gottabe Shoes]] x1, Fuuma's Wakizashi x1, Dubthach Lance x1, Queen's Whip x1. |
||
* 7F - [[Urd|Present]] x1, Twin Bird x1, Luna Blade x1, Sol Blade x1. |
* 7F - [[Urd|Present]] x1, Twin Bird x1, Luna Blade x1, Sol Blade x1. |
||
| + | |||
| + | ==Shops== |
||
| + | ===Weapons=== |
||
| + | {|class="table p1" align="center" style="text-align:center; margin:auto" |
||
| + | !Name |
||
| + | !Type |
||
| + | !Price |
||
| + | !For |
||
| + | !Attack |
||
| + | !Hit |
||
| + | !Strikes |
||
| + | !Ailment |
||
| + | |- |
||
| + | |Gray Ghost |
||
| + | |Handgun |
||
| + | |30,400 |
||
| + | |Ayase |
||
| + | |18 |
||
| + | |42 |
||
| + | |3 |
||
| + | | - |
||
| + | |- |
||
| + | |Strike Gun |
||
| + | |Handgun |
||
| + | |34,000 |
||
| + | |Ayase |
||
| + | |38 |
||
| + | |48 |
||
| + | |1-3 |
||
| + | | - |
||
| + | |- |
||
| + | |Hien Renhappou |
||
| + | |Automatic |
||
| + | |24,800 |
||
| + | |Protagonist, Brown |
||
| + | |25 |
||
| + | |33 |
||
| + | |0-7 |
||
| + | | - |
||
| + | |- |
||
| + | |Phantom Killer |
||
| + | |Automatic |
||
| + | |29,600 |
||
| + | |Protagonist, Brown |
||
| + | |11 |
||
| + | |40 |
||
| + | |6 |
||
| + | | - |
||
| + | |- |
||
| + | |SPAS-15 |
||
| + | |Shotgun |
||
| + | |36,800 |
||
| + | |Yukino |
||
| + | |32 |
||
| + | |40 |
||
| + | |All |
||
| + | | - |
||
| + | |- |
||
| + | |MADMAX |
||
| + | |Shotgun |
||
| + | |40,000 |
||
| + | |Yukino |
||
| + | |39 |
||
| + | |46 |
||
| + | |All |
||
| + | | - |
||
| + | |- |
||
| + | |Steyr AUG A1 |
||
| + | |Rifle |
||
| + | |30,000 |
||
| + | |Nanjo, Elly |
||
| + | |12 |
||
| + | |34 |
||
| + | |4-6 |
||
| + | | - |
||
| + | |- |
||
| + | |FA-MAS Carbine |
||
| + | |Rifle |
||
| + | |36,000 |
||
| + | |Nanjo, Elly |
||
| + | |14 |
||
| + | |40 |
||
| + | |4-6 |
||
| + | | - |
||
| + | |- |
||
| + | |Tranquilizers |
||
| + | |Ammo |
||
| + | |6,400 |
||
| + | |All |
||
| + | |23 |
||
| + | |255 |
||
| + | | - |
||
| + | |Sleep |
||
| + | |- |
||
| + | |Mage Killers |
||
| + | |Ammo |
||
| + | |9,000 |
||
| + | |All |
||
| + | |30 |
||
| + | |255 |
||
| + | | - |
||
| + | |Mute |
||
| + | |} |
||
| + | |||
| + | ===Armor=== |
||
| + | {|class="table p1" align="center" style="text-align:center; margin:auto" |
||
| + | !Name |
||
| + | !Type |
||
| + | !Price |
||
| + | !For |
||
| + | !Defense |
||
| + | !Evasion |
||
| + | !Bonus |
||
| + | |- |
||
| + | |Kazeyomi Kabuto |
||
| + | |Helm |
||
| + | |10,000 |
||
| + | |Females |
||
| + | |20 |
||
| + | |3 |
||
| + | |Ag +2, Lu +3 |
||
| + | |- |
||
| + | |Parade Helm |
||
| + | |Helm |
||
| + | |12,800 |
||
| + | |All |
||
| + | |15 |
||
| + | |12 |
||
| + | |Lu +5 |
||
| + | |- |
||
| + | |Daybreak Helmet |
||
| + | |Helm |
||
| + | |16,000 |
||
| + | |Females |
||
| + | |18 |
||
| + | |17 |
||
| + | |Vi +3, Lu +3 |
||
| + | |- |
||
| + | |Golden Armor |
||
| + | |Armor |
||
| + | |26,000 |
||
| + | |Females |
||
| + | |30 |
||
| + | |12 |
||
| + | |All +1 |
||
| + | |- |
||
| + | |Parade Armor |
||
| + | |Armor |
||
| + | |31,200 |
||
| + | |All |
||
| + | |30 |
||
| + | |15 |
||
| + | |Vi +5 |
||
| + | |- |
||
| + | |Daybreak Armor |
||
| + | |Armor |
||
| + | |34,400 |
||
| + | |Females |
||
| + | |33 |
||
| + | |30 |
||
| + | |Vi+3, Lu+3 |
||
| + | |- |
||
| + | |Hamagari Gauntlet |
||
| + | |Gauntlet |
||
| + | |9,200 |
||
| + | |Females |
||
| + | |10 |
||
| + | |9 |
||
| + | |St +1, Vi +3, Dx +1 |
||
| + | |- |
||
| + | |Parade Guard |
||
| + | |Gauntlet |
||
| + | |12,000 |
||
| + | |All |
||
| + | |13 |
||
| + | |11 |
||
| + | |Dx +5 |
||
| + | |- |
||
| + | |Daybreak Gauntlet |
||
| + | |Gauntlet |
||
| + | |14,800 |
||
| + | |Females |
||
| + | |18 |
||
| + | |16 |
||
| + | |Dx +3, Ag +3 |
||
| + | |- |
||
| + | |Bell Geaves |
||
| + | |Leg Gear |
||
| + | |8,400 |
||
| + | |Females |
||
| + | |11 |
||
| + | |8 |
||
| + | |Vi +2, Ag +3 |
||
| + | |- |
||
| + | |Parade Boots |
||
| + | |Leg Gear |
||
| + | |10,800 |
||
| + | |All |
||
| + | |12 |
||
| + | |11 |
||
| + | |Ag +5 |
||
| + | |- |
||
| + | |Daybreak Greaves |
||
| + | |Leg Gear |
||
| + | |14,000 |
||
| + | |Females |
||
| + | |19 |
||
| + | |14 |
||
| + | |Dx +3, Ag +3 |
||
| + | |} |
||
==Enemies== |
==Enemies== |
||
| − | * '''<span style="color:#A9A9A9">Grey</span>''' boxes indicate bosses. |
+ | * '''<span style="color:#A9A9A9">Light Grey</span>''' boxes indicate bosses. |
{|class="table p1" align="center" style="text-align:center; margin:auto" |
{|class="table p1" align="center" style="text-align:center; margin:auto" |
||
!Demon |
!Demon |
||
| Line 62: | Line 276: | ||
|- |
|- |
||
|[[Megaera]] |
|[[Megaera]] |
||
| − | |[[Raptor]]||25||170||Fire, Ice, Earth|| -|| -||100% Wind|| -||Longinus |
+ | |[[Raptor]]||25||170||Fire, Ice, Earth|| -|| -||100% Wind|| -||[[Longinus]] |
|- |
|- |
||
|[[Tokebi]] |
|[[Tokebi]] |
||
|[[Brute]]||25||250||Axe, Death, Curse||Element, Force|| -|| -|| -||Paraladi Stone |
|[[Brute]]||25||250||Axe, Death, Curse||Element, Force|| -|| -|| -||Paraladi Stone |
||
|- |
|- |
||
| − | |[[Hanako]] |
+ | |[[Hanako (demon)|Hanako]] |
|[[Spirit]]||25||250||Sword, Fire, Expel|| -||Gun, Tech, Rush|| -|| -||Life Stone |
|[[Spirit]]||25||250||Sword, Fire, Expel|| -||Gun, Tech, Rush|| -|| -||Life Stone |
||
|- |
|- |
||
| Line 119: | Line 333: | ||
|-title="First or second tower, under 20 minutes" |
|-title="First or second tower, under 20 minutes" |
||
![[Nemesis|<span style="color:black">Nemesis</span>]] * |
![[Nemesis|<span style="color:black">Nemesis</span>]] * |
||
| − | |rowspan="6"|[[Femme]]||31||2230||rowspan="6"| -||rowspan="6"| -||rowspan="6"| -||rowspan="6"|Blast||rowspan="6"|Elec||rowspan="6"|Mirror Shard |
+ | |rowspan="6"|[[Femme]]||31||2230||rowspan="6"| -||rowspan="6"| -||rowspan="6"| -||rowspan="6"|Blast||rowspan="6"|Elec||rowspan="6"|[[Demon Mirror|Mirror Shard]] x1 |
|-title="First or second tower, between 20 and 60 minutes" |
|-title="First or second tower, between 20 and 60 minutes" |
||
![[Nemesis|<span style="color:black">Nemesis</span>]] * |
![[Nemesis|<span style="color:black">Nemesis</span>]] * |
||
| Line 137: | Line 351: | ||
|} |
|} |
||
| + | ==Gallery== |
||
| + | {{gallery |
||
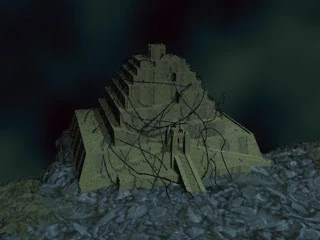
| + | |File:Nemesis Tower ps1.jpg|Nemesis Tower (PS1) |
||
| + | }} |
||
| + | {{-}} |
||
{{P1}} |
{{P1}} |
||
| − | [[Category: |
+ | [[Category:Persona Locations]] |
Revision as of 17:14, 11 August 2019
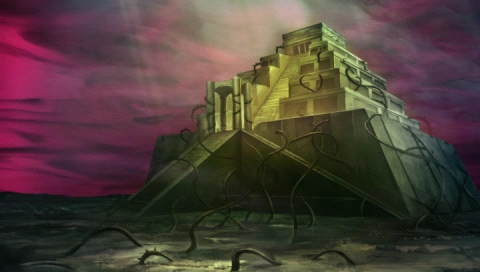
Nemesis Tower
Nemesis Tower (ネメシスの塔?) is a location in Megami Ibunroku Persona.
Appearances
Profile
Nemesis Tower is one of the towers the party must conquer during the Snow Queen Quest governed by Michiko Matsudaira. There is no completion time required for this tower, however the more time passes, the more floors the party must climb and the stronger the boss. If this tower is conquered second or third, the party receives one Ambrosia, but none if it is conquered first.
In the middle of exploring the tower, the party will find Toro and Tsutomu being tortured. Michiko then reveals herself and offers the two choices; continue up the tower without delay, or go through the door behind her to acquire a Mirror Shard.
The higher floors open up after the following amount of time, and also determines the level of the boss:
- 5F - less than 20 minutes (weakest)
- 6F - 20-60 minutes
- 8F - more than 60 minutes (strongest)
If you hurry, it's possible to collect the Shard and still reach the fifth floor within 20 minutes. However, should you choose to not delay in rescuing Toro and Tsutomu, you can receive two Shards from the former at the Cafeteria after conquering Nemesis Tower.
Treasures
- 5F - Gottabe Shoes x1, Fuuma's Wakizashi x1, Dubthach Lance x1, Queen's Whip x1.
- 7F - Present x1, Twin Bird x1, Luna Blade x1, Sol Blade x1.
Shops
Weapons
| Name | Type | Price | For | Attack | Hit | Strikes | Ailment |
|---|---|---|---|---|---|---|---|
| Gray Ghost | Handgun | 30,400 | Ayase | 18 | 42 | 3 | - |
| Strike Gun | Handgun | 34,000 | Ayase | 38 | 48 | 1-3 | - |
| Hien Renhappou | Automatic | 24,800 | Protagonist, Brown | 25 | 33 | 0-7 | - |
| Phantom Killer | Automatic | 29,600 | Protagonist, Brown | 11 | 40 | 6 | - |
| SPAS-15 | Shotgun | 36,800 | Yukino | 32 | 40 | All | - |
| MADMAX | Shotgun | 40,000 | Yukino | 39 | 46 | All | - |
| Steyr AUG A1 | Rifle | 30,000 | Nanjo, Elly | 12 | 34 | 4-6 | - |
| FA-MAS Carbine | Rifle | 36,000 | Nanjo, Elly | 14 | 40 | 4-6 | - |
| Tranquilizers | Ammo | 6,400 | All | 23 | 255 | - | Sleep |
| Mage Killers | Ammo | 9,000 | All | 30 | 255 | - | Mute |
Armor
| Name | Type | Price | For | Defense | Evasion | Bonus |
|---|---|---|---|---|---|---|
| Kazeyomi Kabuto | Helm | 10,000 | Females | 20 | 3 | Ag +2, Lu +3 |
| Parade Helm | Helm | 12,800 | All | 15 | 12 | Lu +5 |
| Daybreak Helmet | Helm | 16,000 | Females | 18 | 17 | Vi +3, Lu +3 |
| Golden Armor | Armor | 26,000 | Females | 30 | 12 | All +1 |
| Parade Armor | Armor | 31,200 | All | 30 | 15 | Vi +5 |
| Daybreak Armor | Armor | 34,400 | Females | 33 | 30 | Vi+3, Lu+3 |
| Hamagari Gauntlet | Gauntlet | 9,200 | Females | 10 | 9 | St +1, Vi +3, Dx +1 |
| Parade Guard | Gauntlet | 12,000 | All | 13 | 11 | Dx +5 |
| Daybreak Gauntlet | Gauntlet | 14,800 | Females | 18 | 16 | Dx +3, Ag +3 |
| Bell Geaves | Leg Gear | 8,400 | Females | 11 | 8 | Vi +2, Ag +3 |
| Parade Boots | Leg Gear | 10,800 | All | 12 | 11 | Ag +5 |
| Daybreak Greaves | Leg Gear | 14,000 | Females | 19 | 14 | Dx +3, Ag +3 |
Enemies
- Light Grey boxes indicate bosses.
| Demon | Order | Lvl | HP | Weak (Vulnerable) | Resist | Null | Absorb | Repel | Item |
|---|---|---|---|---|---|---|---|---|---|
| Bukimi | Spirit | 19 | 170 | Sword, Fire, Expel | - | Guns, Tech, Rush | - | - | Majou-Sen |
| Kobold | Jirae | 20 | 200 | Wind, Blast | - | - | Earth | - | Life Stone |
| Archangel | Divine | 21 | 210 | Physical | - | Element, Force | - | - | Kokuteki Bow |
| Enku | Haunt | 21 | 210 | Magic | - | - | - | 200% Gun | Malachite |
| Yato no Kami | Snake | 22 | 308 | Element, Force | Physical | - | - | - | Iron Claw |
| Cath Palug | Wilder | 22 | 193 | Whip, Gun | - | Tech, Rush | - | - | Rattle Drink |
| Dark Elf | Fairy | 23 | 138 | Force | - | - | - | 50% Wind | Physical Guard |
| Wyvern | Drake | 23 | 345 | Fire, Ice, Earth | - | - | 100% Wind | - | Moon Stone |
| Siren | Femme | 23 | 230 | Element | Force | - | - | - | Magry Stone |
| Kokkuri | Foul | 24 | 264 | Element, Force | - | - | - | - | Mail Breaker |
| Megaera | Raptor | 25 | 170 | Fire, Ice, Earth | - | - | 100% Wind | - | Longinus |
| Tokebi | Brute | 25 | 250 | Axe, Death, Curse | Element, Force | - | - | - | Paraladi Stone |
| Hanako | Spirit | 25 | 250 | Sword, Fire, Expel | - | Gun, Tech, Rush | - | - | Life Stone |
| Haokah | Yoma | 26 | 182 | Force | - | - | - | 50% Ice | Topaz |
| Malphas | Fallen | 26 | 260 | Physical | - | Magic | - | - | Silver Prayer Wheel |
| Teketeke | Grave | 26 | 260 | Element, Force | - | Gun | - | - | Dis-Stone |
| Pairika | Night | 27 | 189 | Physical | - | - | 100% Element, Force | - | Metal Card |
| Sarashina-hime | Jaki | 27 | 270 | Force | - | - | - | 50% Fire | Rattle Drink |
| Ocypete | Flight | 28 | 170 | Force | - | - | - | 50% Wind | Aquamarine |
| Carrie | Haunt | 28 | 280 | - | Magic | - | - | 200% Gun | Slick Drop |
| Principality | Divine | 29 | 290 | Physical | - | Element, Force | - | - | Magical Guard |
| Iwate | Femme | 29 | 290 | Element | - | - | - | 50% Nuclear | Silver Prayer Wheel |
| Genkuro | Beast | 29 | 232 | Whip, Gun | - | Tech, Rush | - | - | Spike Somai |
| Nozuchi | Snake | 30 | 420 | -- (Wind) | - | - | 100% Earth, Expel | - | Metal Card |
| Black Widow | Wilder | 31 | 255 | Whip, Gun | - | Tech, Rush | - | - | Physical Guard |
| Polisun | Fairy | 31 | 186 | Force | - | - | - | 50% Earth | Garnet |
| Duergar | Jirae | 32 | 320 | Wind, Blast | - | - | 100% Earth | - | Mamagnara Stone |
| Picollus | Brute | 32 | 320 | Death, Curse | Element, Force | - | - | - | Hexa Drive |
| Anatomy | Foul | 32 | 343 | Element, Force | - | - | - | - | Twin Bird |
| Nemesis * | Femme | 31 | 2230 | - | - | - | Blast | Elec | Mirror Shard x1 |
| Nemesis * | 36 | 2580 | |||||||
| Nemesis * | 38 | 2730 | |||||||
| Nemesis * | 41 | 2740 | |||||||
| Nemesis * | 45 | 2940 | |||||||
| Nemesis * | 52 | 3237 |
Gallery
 |