m (→Demons) |
No edit summary |
||
| (20 intermediate revisions by 7 users not shown) | |||
| Line 1: | Line 1: | ||
| + | [[File:Manipura_DDS1.jpg|thumb|Official Artwork of Manipura.]] |
||
| − | '''Manipura''' is the city in the [[Junkyard]] where the [[Maribel]] have their headquarters. This area is home to two dungeons: '''Maribel Base''' and the '''Manipura Waterways'''. |
||
| + | '''Manipura''' {{J|マニプラ}} is the city in the [[Junkyard]] where the [[Maribel]] have their headquarters. This area is home to two dungeons: '''Maribel Base''' and the '''[[Samsara Tunnels]]'''. |
||
| + | ==Profile== |
||
| − | The [[Embryon]] visit the Maribel Base to form an alliance with the Maribel, so they can defeat the [[Solids]]. At first, [[Jinana]], leader of the Maribel, is skeptical about the alliance, so the Embryon have to fight their way through the city to meet her. Inside the city there are seven gates that need to be opened through switches, each of which is normally found near the corresponding gate. At the end of the dungeon, Jinana's lieutenant, [[Bat]], challenges the Embryon in his [[Atma Avatar]] form, [[Camazotz]]. Once he is defeated, Jinana agrees to the alliance, and the Embryon and Maribel travel to the Solids' base at [[Anahata]]. |
||
| + | The [[Embryon]] visit the Maribel Base to form an alliance with the Maribel, so that the two tribes can defeat the [[Solids]]. At first, [[Jinana]], leader of the Maribel, is skeptical about the alliance, so the Embryon have to fight their way through the city to meet her. Inside the city, there are seven gates that need to be opened through switches, each of which is normally found near the corresponding gate. At the end of the dungeon, Jinana's lieutenant, [[Bat]], challenges the Embryon in his [[Atma Avatar]] form, [[Camazotz]]. Once he is defeated, [[Argilla]] convinces [[Heat]] to let Bat live; he is left weakened and bleeding in the floor, vowing revenge against Argilla for humiliating him. Jinana agrees to the alliance, and the Embryon and Maribel travel to the Solids' base at [[Anahata]]. |
||
| − | After the assault on Anahata, during which Jinana goes mad and is killed by the Embryon in self-defense, the Embryon return to Manipura while looking for [[ |
+ | After the assault on Anahata, during which Jinana goes mad and is killed by the Embryon in self-defense, the Embryon return to Manipura while looking for Bat, who betrayed Jinana to the Solids. Upon arriving, the Embryon are joined by [[Gale (Avatar Tuner)|Gale]], who has recovered from the madness induced by his hunger. Enraged by the discovery Bat had overheard Agrilla's words to the dying Jinana and devoured her corpse, Argilla, in a fit of rage, let Bat go away after a brief scuffle, having no way to pursue. The Solids trap the Embryon in the Maribel Base while the rest of the Solids go to the Embryon Base at [[Muladhara]] to kidnap [[Sera]]. The Embryon fight their way out, defeating more powerful enemies, ending with an [[Atavaka]], who is guarding the exit. |
| − | Much later, after defeating [[Beelzebub]] in his |
+ | Much later, after defeating [[Beelzebub]] in his humanoid form in [[Svadhisthana]] and defeating [[Ravana]] in [[Ajna]], the entrance to the [[Samsara Tunnels]], which connect to [[Muladhara]], opens. Here, the Embryon can defeat Beelzebub in his Fly form. Finally, once the Embryon have reached the topmost level of the [[Karma Temple]], [[Baihu]] of the Four Guardian Beasts can be found and defeated in the Maribel Base. |
==Demons== |
==Demons== |
||
===Maribel Base, first visit=== |
===Maribel Base, first visit=== |
||
| + | ====Demons==== |
||
| − | *[[Blob]] |
||
| + | {|class="customtable ddsaga1" style="text-align:center; margin:auto; width:100%" |
||
| − | *[[Cockatrice]] |
||
| + | !Demon |
||
| − | *[[Empusa]] |
||
| + | !Level |
||
| − | *[[Ghoul]] |
||
| + | !HP |
||
| − | *[[Ikusa]] x 2 (in an Ammo Node) |
||
| + | !MP |
||
| − | *[[Macha]] |
||
| + | !Wk |
||
| − | *[[Nozuchi]] |
||
| + | !Rpl |
||
| − | *[[Preta]] |
||
| + | !Drn |
||
| − | *[[Yaka]] |
||
| + | !Nul |
||
| − | *[[Camazotz]] (boss) |
||
| + | !Str |
||
| + | |- |
||
| + | |[[Preta]] |
||
| + | |3 |
||
| + | |36 |
||
| + | |16 |
||
| + | |Fire, Earth |
||
| + | | - |
||
| + | | - |
||
| + | | - |
||
| + | | - |
||
| + | |- |
||
| + | |[[Empusa]] |
||
| + | |6 |
||
| + | |35 |
||
| + | |60 |
||
| + | |Fire |
||
| + | | - |
||
| + | | - |
||
| + | |Ice |
||
| + | | - |
||
| + | |- |
||
| + | |[[Cockatrice]] |
||
| + | |8 |
||
| + | |120 |
||
| + | |40 |
||
| + | |Gun, Ice |
||
| + | | - |
||
| + | | - |
||
| + | | - |
||
| + | |Force |
||
| + | |- |
||
| + | |[[Ghoul]] |
||
| + | |10 |
||
| + | |74 |
||
| + | |72 |
||
| + | |Fire, Earth |
||
| + | | - |
||
| + | | - |
||
| + | | - |
||
| + | | - |
||
| + | |- |
||
| + | |[[Nozuchi]] |
||
| + | |10 |
||
| + | |88 |
||
| + | |76 |
||
| + | |Electricity |
||
| + | | - |
||
| + | |Force |
||
| + | | - |
||
| + | | - |
||
| + | |- |
||
| + | |[[Blob]] |
||
| + | |12 |
||
| + | |96 |
||
| + | |128<sup>1</sup> |
||
| + | |Ice, Earth, Expel |
||
| + | | - |
||
| + | | - |
||
| + | |Death |
||
| + | |Physical |
||
| + | |- |
||
| + | |[[Macha]] |
||
| + | |12 |
||
| + | |96 |
||
| + | |120 |
||
| + | |Gun, Electricity |
||
| + | | - |
||
| + | |Force |
||
| + | | - |
||
| + | |Earth |
||
| + | |- |
||
| + | |[[Yaka]] |
||
| + | |13 |
||
| + | |100 |
||
| + | |104 |
||
| + | |Ice, Expel |
||
| + | | - |
||
| + | | - |
||
| + | |Fire |
||
| + | | - |
||
| + | |- |
||
| + | |[[Gyu-Ki]]<sup>2</sup> |
||
| + | |16 |
||
| + | |200 |
||
| + | |120 |
||
| + | |Earth |
||
| + | | - |
||
| + | | - |
||
| + | |Death |
||
| + | | - |
||
| + | |- |
||
| + | |<abbr title="x 2 (in an Ammo Node)">[[Yomotsu-Ikusa|Ikusa]]</abbr> |
||
| + | |17 |
||
| + | |148 |
||
| + | |120 |
||
| + | |Force |
||
| + | | - |
||
| + | | - |
||
| + | |Death, Nerve |
||
| + | | - |
||
| + | |- |
||
| + | |<abbr title="x 3 (in a Field Hunt)">[[Ara Mitama]]*</abbr> |
||
| + | |? |
||
| + | |300 |
||
| + | |999 |
||
| + | |Ice |
||
| + | | - |
||
| + | | - |
||
| + | |Phys, Expel, Death, Gun |
||
| + | |Elec, Force |
||
| + | |} |
||
| + | #Blob starts with 9 MP, and will try to drain more to use Teradyne |
||
| + | #Special encounter |
||
| + | |||
| + | ====Boss==== |
||
| + | {|class="customtable ddsaga1" style="text-align:center; margin:auto; width:100%" |
||
| + | !Demon |
||
| + | !Level |
||
| + | !HP |
||
| + | !MP |
||
| + | !Wk |
||
| + | !Rpl |
||
| + | !Drn |
||
| + | !Nul |
||
| + | !Str |
||
| + | |- |
||
| + | |[[Camazotz]] |
||
| + | | ? |
||
| + | |~700 |
||
| + | | - |
||
| + | |Earth<sup>1</sup> |
||
| + | | - |
||
| + | | - |
||
| + | |Earth, Ailment, Death, Expel |
||
| + | | - |
||
| + | |} |
||
| + | #Only while in guard stance |
||
| + | |||
===Maribel Base, second visit=== |
===Maribel Base, second visit=== |
||
| + | ====Demons==== |
||
| − | *[[Camazotz]] (boss) |
||
| + | {|class="customtable ddsaga1" style="text-align:center; margin:auto; width:100%" |
||
| − | *[[Kelpie]] |
||
| + | !Demon |
||
| − | *[[Nekomata]] |
||
| + | !Level |
||
| − | *[[Nue]] |
||
| + | !HP |
||
| − | *[[Onkot]] |
||
| + | !MP |
||
| − | *[[Succubus]] |
||
| + | !Weak |
||
| − | *[[Tarrasque]] |
||
| + | !Resist |
||
| − | *[[Turdak]] |
||
| + | !Null |
||
| − | *[[Valkyrie]] |
||
| + | !Repel |
||
| − | *[[Atavaka]] (boss) |
||
| + | !Drain |
||
| − | *[[Baihu]] (optional boss, behind a Yellow Wall) |
||
| + | !Drop |
||
| − | ===Manipura Waterways=== |
||
| + | |- |
||
| − | *[[Arahabaki]] |
||
| − | + | |[[Nekomata]] |
|
| + | |15 |
||
| − | *[[Kikuri-Hime]] |
||
| + | |122 |
||
| − | *[[Kushinada]] |
||
| + | |120 |
||
| − | *[[Laksmi]] |
||
| + | |Elec |
||
| − | *[[Lilim]] |
||
| + | | - |
||
| − | *[[Parvati]] |
||
| + | |Charm |
||
| − | *[[Pixie]] |
||
| + | | - |
||
| − | *[[Sati]] |
||
| + | | - |
||
| − | *[[Senri]] |
||
| + | |Revival Gem |
||
| − | *[[Shiki-Ouji]] x 3 (in an Ammo Node behind a Blue Wall) |
||
| + | |- |
||
| − | *[[Succubus]] |
||
| − | + | |[[Tarrasque]] |
|
| + | |16 |
||
| − | *[[Uzume]] |
||
| + | |210 |
||
| − | *[[Beelzebub|Fly Beelzebub]] (optional boss, behind a Yellow Wall and a Red Wall) |
||
| + | |136 |
||
| + | |Fire, Earth |
||
| + | |Physical |
||
| + | |Elec |
||
| + | | - |
||
| + | | - |
||
| + | | - |
||
| + | |- |
||
| + | |[[Succubus]] |
||
| + | |19 |
||
| + | |122 |
||
| + | |181 |
||
| + | |Elec, Expel, Mute, Panic, Mute |
||
| + | |Earth |
||
| + | |Charm |
||
| + | | - |
||
| + | | - |
||
| + | | Panacea / Active Cell |
||
| + | |- |
||
| + | |[[Onkot]] |
||
| + | |20 |
||
| + | |136 |
||
| + | |184 |
||
| + | |Elec, Charm, Nerve |
||
| + | |Physical |
||
| + | | - |
||
| + | | - |
||
| + | | - |
||
| + | | - |
||
| + | |- |
||
| + | |[[Valkyrie]] |
||
| + | |20 |
||
| + | |192 |
||
| + | |152 |
||
| + | |Mute, Panic |
||
| + | |Physical |
||
| + | |Fire, Expel |
||
| + | | - |
||
| + | | - |
||
| + | | Error Cell |
||
| + | |- |
||
| + | |[[Kelpie]] |
||
| + | |21 |
||
| + | |188 |
||
| + | |144 |
||
| + | |Fire |
||
| + | |Earth |
||
| + | |Elec |
||
| + | | - |
||
| + | | - |
||
| + | |Brave Ration / Thunder Rod |
||
| + | |- |
||
| + | |[[Nue]] |
||
| + | |23 |
||
| + | |212 |
||
| + | |168 |
||
| + | |Force, Charm |
||
| + | | - |
||
| + | |Ice, Death |
||
| + | | - |
||
| + | | - |
||
| + | |Dark Veil |
||
| + | |- |
||
| + | |[[Turdak]] |
||
| + | |23 |
||
| + | |171 |
||
| + | |180 |
||
| + | |Expel, Panic |
||
| + | | - |
||
| + | |Fire, Death |
||
| + | | - |
||
| + | | - |
||
| + | |Dis-Curse / Revival Gem |
||
| + | |- |
||
| + | |<abbr title="x 3 (in a Field Hunt)">[[Ara Mitama]]*</abbr> |
||
| + | |? |
||
| + | |300 |
||
| + | |999 |
||
| + | |Ice |
||
| + | | - |
||
| + | | - |
||
| + | |Phys, Expel, Death, Gun |
||
| + | |Elec, Force |
||
| + | |} |
||
| + | |||
| + | ====Bosses / Compulsory Battles==== |
||
| + | {|class="customtable ddsaga1" style="text-align:center; margin:auto; width:100%" |
||
| + | !Demon |
||
| + | !HP |
||
| + | !MP |
||
| + | !Weak |
||
| + | !Resist |
||
| + | !Null |
||
| + | !Repel |
||
| + | !Drain |
||
| + | !Drop |
||
| + | |- |
||
| + | |[[Camazotz]] |
||
| + | |~700 |
||
| + | | - |
||
| + | | - |
||
| + | | - |
||
| + | | Earth, Ailment, Death, Expel |
||
| + | | - |
||
| + | | - |
||
| + | | Great Chakra |
||
| + | |- |
||
| + | |[[Atavaka]] |
||
| + | |1500 |
||
| + | |10000 |
||
| + | |Earth |
||
| + | |Physical |
||
| + | |Panic |
||
| + | |Expel, Death |
||
| + | | - |
||
| + | |Revival Gem |
||
| + | |- |
||
| + | |[[Byakko|Baihu]] |
||
| + | |6200 |
||
| + | | - |
||
| + | | - |
||
| + | |Physical, Ice, Elec |
||
| + | |Ailment, Death, Expel |
||
| + | | - |
||
| + | |Force |
||
| + | |Soma Drop |
||
| + | |} |
||
==Items== |
==Items== |
||
| Line 72: | Line 340: | ||
*Power Noise (behind a Yellow Wall) |
*Power Noise (behind a Yellow Wall) |
||
*Soma Drop (behind a Blue Wall and a Yellow Wall) |
*Soma Drop (behind a Blue Wall and a Yellow Wall) |
||
| + | |||
| − | ===Manipura Waterways=== |
||
| + | ==Trivia== |
||
| − | *Power Noise x 2 |
||
| + | *Manipura is named after the third primary chakra in Hindu tradition. |
||
| − | *Vital Noise x 2 |
||
| − | *Charm Shot |
||
| − | *Logic Cell |
||
| − | *Fusion Cell |
||
| − | *Theory Cell (behind a Blue Wall) |
||
| − | *MP Noise (behind a Blue Wall) |
||
| − | *Logic Cell (behind a Blue Wall) |
||
| − | *Fusion Cell (behind a Blue Wall) |
||
{{SMTDDS}} |
{{SMTDDS}} |
||
Revision as of 22:07, 9 March 2020
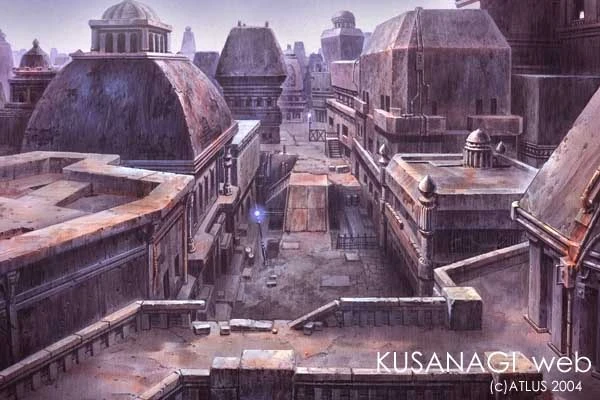
Official Artwork of Manipura.
Manipura (マニプラ*)? is the city in the Junkyard where the Maribel have their headquarters. This area is home to two dungeons: Maribel Base and the Samsara Tunnels.
Profile
The Embryon visit the Maribel Base to form an alliance with the Maribel, so that the two tribes can defeat the Solids. At first, Jinana, leader of the Maribel, is skeptical about the alliance, so the Embryon have to fight their way through the city to meet her. Inside the city, there are seven gates that need to be opened through switches, each of which is normally found near the corresponding gate. At the end of the dungeon, Jinana's lieutenant, Bat, challenges the Embryon in his Atma Avatar form, Camazotz. Once he is defeated, Argilla convinces Heat to let Bat live; he is left weakened and bleeding in the floor, vowing revenge against Argilla for humiliating him. Jinana agrees to the alliance, and the Embryon and Maribel travel to the Solids' base at Anahata.
After the assault on Anahata, during which Jinana goes mad and is killed by the Embryon in self-defense, the Embryon return to Manipura while looking for Bat, who betrayed Jinana to the Solids. Upon arriving, the Embryon are joined by Gale, who has recovered from the madness induced by his hunger. Enraged by the discovery Bat had overheard Agrilla's words to the dying Jinana and devoured her corpse, Argilla, in a fit of rage, let Bat go away after a brief scuffle, having no way to pursue. The Solids trap the Embryon in the Maribel Base while the rest of the Solids go to the Embryon Base at Muladhara to kidnap Sera. The Embryon fight their way out, defeating more powerful enemies, ending with an Atavaka, who is guarding the exit.
Much later, after defeating Beelzebub in his humanoid form in Svadhisthana and defeating Ravana in Ajna, the entrance to the Samsara Tunnels, which connect to Muladhara, opens. Here, the Embryon can defeat Beelzebub in his Fly form. Finally, once the Embryon have reached the topmost level of the Karma Temple, Baihu of the Four Guardian Beasts can be found and defeated in the Maribel Base.
Demons
Maribel Base, first visit
Demons
| Demon | Level | HP | MP | Wk | Rpl | Drn | Nul | Str |
|---|---|---|---|---|---|---|---|---|
| Preta | 3 | 36 | 16 | Fire, Earth | - | - | - | - |
| Empusa | 6 | 35 | 60 | Fire | - | - | Ice | - |
| Cockatrice | 8 | 120 | 40 | Gun, Ice | - | - | - | Force |
| Ghoul | 10 | 74 | 72 | Fire, Earth | - | - | - | - |
| Nozuchi | 10 | 88 | 76 | Electricity | - | Force | - | - |
| Blob | 12 | 96 | 1281 | Ice, Earth, Expel | - | - | Death | Physical |
| Macha | 12 | 96 | 120 | Gun, Electricity | - | Force | - | Earth |
| Yaka | 13 | 100 | 104 | Ice, Expel | - | - | Fire | - |
| Gyu-Ki2 | 16 | 200 | 120 | Earth | - | - | Death | - |
| Ikusa | 17 | 148 | 120 | Force | - | - | Death, Nerve | - |
| Ara Mitama* | ? | 300 | 999 | Ice | - | - | Phys, Expel, Death, Gun | Elec, Force |
- Blob starts with 9 MP, and will try to drain more to use Teradyne
- Special encounter
Boss
| Demon | Level | HP | MP | Wk | Rpl | Drn | Nul | Str |
|---|---|---|---|---|---|---|---|---|
| Camazotz | ? | ~700 | - | Earth1 | - | - | Earth, Ailment, Death, Expel | - |
- Only while in guard stance
Maribel Base, second visit
Demons
| Demon | Level | HP | MP | Weak | Resist | Null | Repel | Drain | Drop |
|---|---|---|---|---|---|---|---|---|---|
| Nekomata | 15 | 122 | 120 | Elec | - | Charm | - | - | Revival Gem |
| Tarrasque | 16 | 210 | 136 | Fire, Earth | Physical | Elec | - | - | - |
| Succubus | 19 | 122 | 181 | Elec, Expel, Mute, Panic, Mute | Earth | Charm | - | - | Panacea / Active Cell |
| Onkot | 20 | 136 | 184 | Elec, Charm, Nerve | Physical | - | - | - | - |
| Valkyrie | 20 | 192 | 152 | Mute, Panic | Physical | Fire, Expel | - | - | Error Cell |
| Kelpie | 21 | 188 | 144 | Fire | Earth | Elec | - | - | Brave Ration / Thunder Rod |
| Nue | 23 | 212 | 168 | Force, Charm | - | Ice, Death | - | - | Dark Veil |
| Turdak | 23 | 171 | 180 | Expel, Panic | - | Fire, Death | - | - | Dis-Curse / Revival Gem |
| Ara Mitama* | ? | 300 | 999 | Ice | - | - | Phys, Expel, Death, Gun | Elec, Force |
Bosses / Compulsory Battles
| Demon | HP | MP | Weak | Resist | Null | Repel | Drain | Drop |
|---|---|---|---|---|---|---|---|---|
| Camazotz | ~700 | - | - | - | Earth, Ailment, Death, Expel | - | - | Great Chakra |
| Atavaka | 1500 | 10000 | Earth | Physical | Panic | Expel, Death | - | Revival Gem |
| Baihu | 6200 | - | - | Physical, Ice, Elec | Ailment, Death, Expel | - | Force | Soma Drop |
Items
Maribel Base
- Revival Gem
- Dis-Poison x 3
- Error Cell
- Active Cell x2
- Brave Ration
- Frigid Shot
- Chakra Drop x 2
- Dis-Ache x 3
- Devil Cell
- Revival Gem
- Odd Morsel
- Chakra Pot
- Wild Card (behind a Blue Wall)
- Quick Noise (behind a Blue Wall)
- Great Chakra (behind a Blue Wall)
- Dis-Poison x 3 (not accessible during the first visit)
- Code Cell (not accessible during the first visit)
- Dis-Stun x 2 (not accessible during the first visit)
- Quantum Cell (not accessible during the first visit)
- Dis-Curse x 3 (not accessible during the first visit)
- Power Noise (behind a Yellow Wall)
- Soma Drop (behind a Blue Wall and a Yellow Wall)
Trivia
- Manipura is named after the third primary chakra in Hindu tradition.
| Characters (Atma Avatars) | |
| Playable | Serph (Varna) - Heat (Agni) - Argilla (Prithivi) - Gale (Vayu) - Cielo (Dyaus) |
| Non-Playable | Sera - Angel (Harihara) - Harley (Hayagriva) - Jinana (Usas) - Bat (Camazotz) - Mick the Slug (Rahu) - Lupa (Cerberus) - Varin Omega (Ravana) - Twinklebell - Schrödinger - Demi-fiend |
| Locations | |
| Junkyard | Ground Zero - Muladhara - Svadhisthana - Manipura - Anahata - Coordinate 136 - Deserted Ship - Embryon Base 2 - Vishuddha - Ajna - Karma Temple - Samsara Tunnels |
| Music | |
| Albums | Original Soundtracks |
| Songs | "Pray" - "Danger" |
| Archives | |
| Terminology | Atma - Embryon - Field hunt - Nirvana - Press Turn - Magnetite |
| Lists | Demons - Bosses - Mantra - Skills (Combos) - Items |
| Other Media | |
| Games | A's TEST Server |
| Publications | Quantum Devil Saga: Avatar Tuner - That's Catch 22 - DOGDAYS - Shinen no Matou |