m (Correcting this little mess-up.) |
|||
| Line 1: | Line 1: | ||
| − | |||
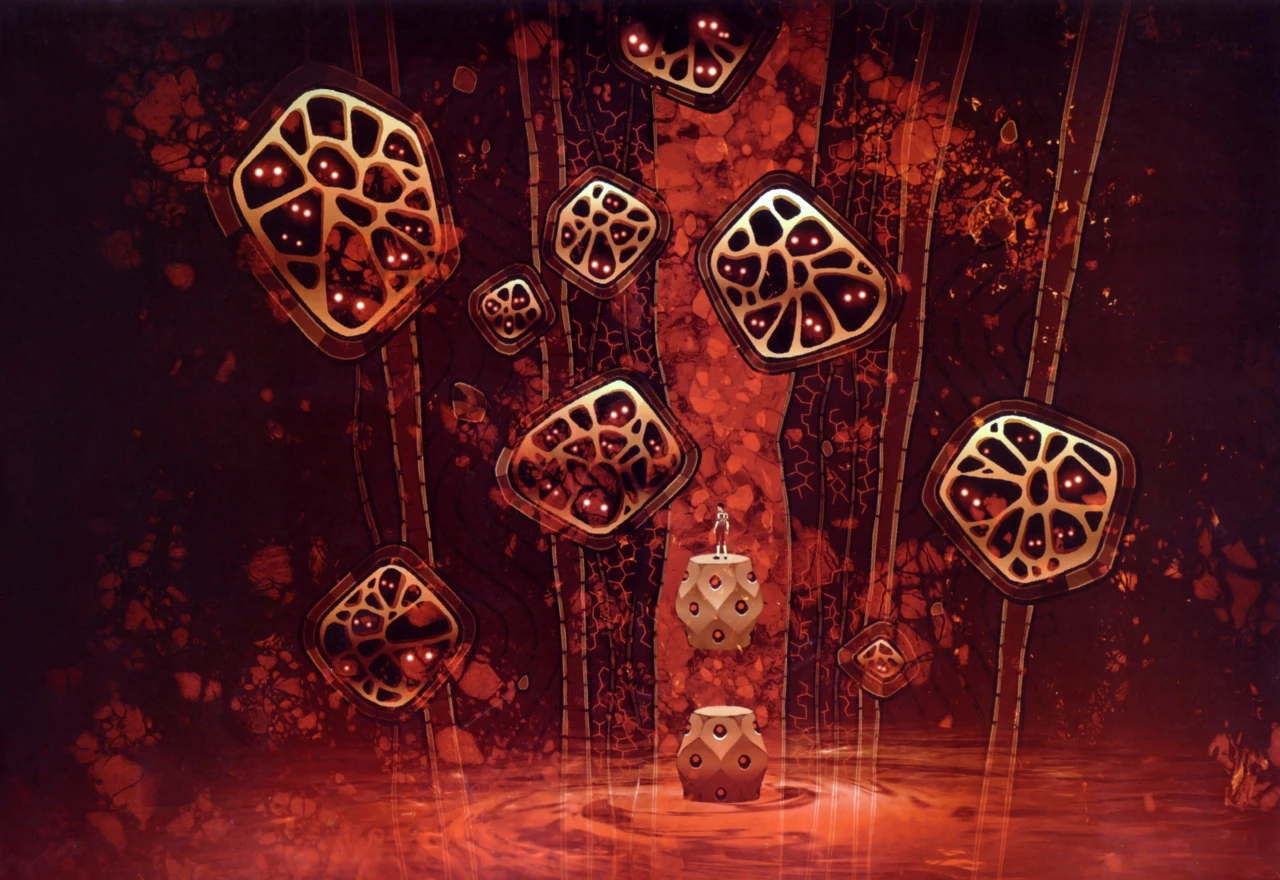
[[File:Tumblr_m1q72iwMCC1qjskumo1_1280.jpg|thumb|284px|The Labyrinth of Amala]] |
[[File:Tumblr_m1q72iwMCC1qjskumo1_1280.jpg|thumb|284px|The Labyrinth of Amala]] |
||
The '''Labyrinth of Amala''' is an optional dungeon available in the updated re-release of ''Shin Megami Tensei III: Nocturne''. |
The '''Labyrinth of Amala''' is an optional dungeon available in the updated re-release of ''Shin Megami Tensei III: Nocturne''. |
||
| Line 243: | Line 242: | ||
|[[Beast]] |
|[[Beast]] |
||
|[[Badb Catha]] |
|[[Badb Catha]] |
||
| − | |186 |
||
| − | |87 |
||
|186 |
|186 |
||
|87 |
|87 |
||
Revision as of 02:28, 19 July 2020
The Labyrinth of Amala
The Labyrinth of Amala is an optional dungeon available in the updated re-release of Shin Megami Tensei III: Nocturne.
Profile
The dungeon contains both valuable treasures and dangerous curses. It is based somewhat on the Japanese netherworld "Makai," but also has a few similarities to the Christian underworld, Hell.
It has five floors in descending order, and travel between the floors (Kalpas) can only be achieved by using Warp Zones. There are many demons that inhabit the Kalpas in the Labyrinth, and as the number of the Kalpa increase, so does the strength of the inhabiting demons. At the very bottom of each Kalpa is a peephole which serves as a communication device with the Old Man in the Wheelchair and the Lady in Black. The Lady in Black offers the Demi-fiend many valuable bits of information, which explains many previously unresolved plotlines in the original story.
Each floor is unique and has its own sub-basements and mazes within. Each Kalpa requires specific Candelabrum to enter, which may be obtained by defeating the Fiends in order. Any Kalpa beyond the first also requires the preceding Kalpa to be cleared before they can be accessed. No demons can be recruited here via negotiations, as each one has its own reason for venturing the labyrinth, and talking them out of it is impossible.
Healing is a precious commodity in the Labyrinth; the hidden Dark Doctors will heal the entire party for a set fee, which increases the further the Demi-fiend descends into the Labyrinth. A pair of ghost ladies will also offer the player a chance to drink some tea and rest. Taking them up on the offer will fully heal the party... but deposit them at the entrance to the Labyrinth afterward and remove a large sum of the Demi-fiend's Macca. This can be a quick shortcut to exit the labyrinth in a fresh state, but the price usually is not worth it; especially if the player has amassed a large sum of Macca from the trip.
First Kalpa
This is the first available Kalpa, explorable upon defeating the Fiend Matador. It is the most benign of the Kalpa in the Labyrinth; the walls and ceiling are colored white, the inhabiting demons are fairly weak and there are a few beings within who can offer valuable assistance. These include Kamala, who can provide hints to where any available Fiend battles may be; a Shady Broker who provides a Pisaca with many exploration skills and the first Dark Doctor. This level is more or less an imitation of Heaven.
In the first basement area, there are hidden pitfalls that will drop the Demi-fiend down onto a "damage" floor in the second basement. A ghost in the second basement he will give the Demi-fiend a hint, telling him to look at the ceiling, if bribed with 2,000 Macca. Areas where the ceiling isn't lit will be above the pitfalls. One can move diagonally through the square areas without falling through, though the space in which to do so is very thin.
Second Kalpa
This Kalpa is available after defeating the Fiends Daisoujou and Hell Biker. Before entering this Kalpa, a lofty voice calls out to the Demi-fiend. It requests him to leave the Labyrinth of Amala and asks him if he will continue. Regardless of his answer, the voice tells him to leave the Labyrinth and never return.
The actual Kalpa itself is similar to the previous Kalpa, but the condition of the walls and ceilings are greatly deteriorated. The demons in this Kalpa are somewhat stronger, but the most distinguishing feature of this Kalpa is the "Cursed Corridor." Walking through the corridor is the equivalent of walking over damage floors; however, the damage cannot be avoided with the use of Liftoma or Float Balls. To add to the danger of the corridor, it is filled with high-level demons that, when combined with the damage of the Corridor, can easily kill any weakened travelers. This is very discouraging, but if one can reach the end of the Cursed Corridor, an Efreet will award them 250,000 macca.
This Kalpa also houses the valuable Moon Key, which is needed to open various vaults, one of them in the First Kalpa, and the Black Visor, a device used to "communicate" with past battles, essentially replaying them with the current lineup, in the special Burial Chambers. This Kalpa has the first instances of one-way corridors. Another Shady Broker will sell the Demi-fiend a valuable Nue stacked with healing spells of all kinds and an MP recovery skill.
On an interesting side note, this floor contains souls of various Messians and Gaians, the two major forces in Shin Megami Tensei and Shin Megami Tensei II; these Messians and Gaians are the sacrifices provided by Hikawa to trigger the Conception and the birth of the Vortex World rather than inhabitants of a previous world.
Third Kalpa
When the Demi-fiend first arrives outside this Kalpa, he is encountered by the Four Horsemen of the Apocalypse (White Rider, Red Rider, Black Rider and Pale Rider). They ask if he will "travel the noble path", but warn that he will lose his humanity in doing so. If the Demi-fiend agrees, they are happy, and ask him to defeat them to prove his strength. If he refuses, they are angry, and say that they will lie in wait for the Demi-fiend in the Vortex World and kill him if they find him. Either way, the first three Horsemen must be defeated before the Third Kalpa can be explored.
The Kalpa itself resembles the last, but its condition has deteriorated more than the Second Kalpa. Its walls and ceiling are an orange color, and the air is somewhat hazy. The path that is traveled through the Kalpa varies greatly depending on the explorer's stats and demonic race (in the Demi-fiend's case, this means what type of Magatama he has mastered). When the Demi-fiend has traveled deep enough, he is confronted by Dante.
Dante understands the full picture more than the Demi-fiend and warns him not to continue. Regardless of the Demi-fiend's answer, he warns that he will kill the Demi-fiend should he try to progress. If the Demi-fiend continues, he will have to play a game of cat-and-mouse with Dante while progressing through the maze in the Kalpa. Eventually, Dante battles the Demi-fiend. After taking quite a bit of damage, Dante compliments the Demi-fiend on his style and hands him his Candelabrum, which is needed to explore the next Kalpa. He then leaves, saying he hopes they'll meet again.
After Dante is defeated, Black Frost can be found in the maze, in the first switch room. He says he has returned from death and wants to be stronger. Since the Demi-fiend is the one who defeated him, Black Frost believes that by joining up with him, he can gain more power, and joins the Demi-fiend's party without his consent.
There are three Shady Brokers in this level, each selling different wares. Their accessibility depends on the Demi-fiend's alignment; there are three doors, each of which will only open if playing with a certain alignment.
- Dark Alignment.- An extremely weak Preta which knows the entire Megido- line of attacks.
- Neutral Alignment.- Deathstones, items required to summon Fiends at the Cathedral of Shadows.
- Light Alignment.- An Arahabaki which knows a variety of defensive spells (Tetrakarn, Tetraja, Rakukaja, etc.).
Fourth Kalpa
This Kalpa is available after defeating the last of the Fiends: Dante, Pale Rider, The Harlot and Trumpeter. This Kalpa begins to reveal the true nature of the Labyrinth: numerous one-way passages, damage floors, cursed zones, pitfalls and dangerous demons. The physical appearance of the Fourth Kalpa is very surreal, with the cursed areas having a hazy atmosphere and dark corridors.
The Fourth Kalpa contains the unique "Twelve Meters Of Eternity", a warp area which leads to a different place depending on the phase of Kagutsuchi.
- During an odd-numbered phase, it will lead to the Road to Hell, which is a dead-end path containing only a few treasures and a hidden Burial Chamber.
- During a half or full Kagutsuchi, it will lead to the "Hell Treasury," an area resembling a vault that contains large amounts of macca, as well as a special warp zone that grants a lot of money but leads to a dead-end area with a teleport tile to return to the vault entrance.
- During an even numbered phase that is not new, half or full, "Hell's Maze" may be accessed; With the "Afterlife Bell" (found in Zoshigaya Cemetery after obtaining information from one of the spirits in the Maze), the souls of Futomimi and Sakahagi can be allowed to pass on if they are found, which unlocks them for fusion in the Cathedral of Shadows.
The final area that can be accessed via the "Twelve Meters Of Eternity" is Hell's Hall, which is only accessible during a New Kagutsuchi phase, considered the darkest hour. It is a very dangerous place; like all the other areas, it forbids the use of a map; the corridors are all cursed and high-level demons run rampant around. In the inner sanctum of Hell's Hall, Tyrant Beelzebub lies in wait. In order to proceed to the Fifth and final Kalpa, Beelzebub must be defeated. After doing so, all of the cursed areas (including the one in the Second Kalpa) will be cleared.
This Kalpa's Shady Broker sells a strong Mothman which knows the highest tier spells.
Fifth Kalpa
The last Kalpa in the Labyrinth of Amala. It can be accessed after Beelzebub's death by returning to the Second Kalpa and talking to the Efreet at the end of the Cursed Corridor, talking to Loki in Nyx's Lounge in Ginza and finally receiving the Star Key from the Collector Manikin in Asakusa. The key must be used to open the locked door in the Third Kalpa and using the alternate Warp Zone to activate the switch in the Fourth Kalpa. The Candelabrum required to open the Fifth Kalpa is none other than the one given directly to the Demi-fiend by the Lady In Black.
The Fifth Kalpa reveals the true nature of the Labyrinth; Magatsuhi flows throughout the corridors, attracting both weak and deadly demons. The corridors themselves can deceive travelers; sometimes what seems to be a wall is nothing more than an illusion. Some doors within the Kalpa require a being of certain ability and appearance; if that being does not meet the door's requirement, they are instantly killed.
The doors require:
- A demon with strong Strength, Magic, Vitality, Luck or Agility (must have said values at 25 or over to qualify)
- A demon with a black soul (Black Frost)
- A demon embodying chaos (Beelzebub (fly form))
- A demon brimming with light (Metatron)
- A door that demands to see one with a heart of a demon (True Demon Ending only; the door can still open, but it will lead to an empty room)
- The first demon recruited in the Vortex World (the game's starting Pixie or her "descendant" by fusion) If the demon is able to open the door, it is transformed into an upgraded Level 80 Pixie with potent abilities and enhanced stats.
The Demi-fiend encounters Dante (Raidou in Chronicle Edition) in the very first room of the Fifth Kalpa. Dante offers his services to the Demi-fiend and proposes a coin toss. If the Demi-fiend calls the toss correctly, Dante will only ask for 1 Macca to join; however, if the Demi-fiend calls the toss incorrectly, Dante will demand half of his total Macca. In a call back to Devil May Cry II, Dante uses a double-headed coin. Raidou uses a set of two dices instead, but the choice is basically the same as Dante. Whether or not the Demi-fiend decides to recruit Dante/Raidou, he can continue into the Kalpa. When rejected, Dante/Raidou will stay in this room. Demi-fiend can talk to recruit them again later simply by returning here.
If the Demi-fiend continues to explore the Kalpa, near the bottom he will encounter the physical form of the lofty voice from the Second Kalpa: the Seraph Metatron. He is angry that the Demi-fiend has disobeyed his command and has either unknowingly or willingly aided the "fallen angel." He says he cannot allow the Demi-fiend to continue and attacks him. He must be defeated to descend to the bottom of the labyrinth.
This Kalpa is, in fact, the location of the tutorial battle as witnessed by the Lady in Black and the Old Man.
As an added note, this Kalpa is sealed should the Demi-fiend enter the Tower of Kagutsuchi before completing the Fourth Kalpa, given that the peepholes communicating with the Old Gentleman and the Lady in Black cease to work and that only the Lady can open the door to this Kalpa. The True Demon Ending also becomes impossible to unlock should the player enter the Tower before meeting with the Old Man at the bottom of the Fifth Kalpa, given him and the Lady disappear afterward.
Entering the Fifth Kalpa before entering the Tower of Kagutsuchi will keep it open, but should the player didn't meet the Old Gentleman at the bottom before that, the Lift of the Abyss (which is required to meet him) will be non-operational and the True Demon ending cannot be obtained.
This Kalpa's Shady Broker will sell the Demi-fiend an extremely expensive Girimekhala which knows the Pierce ability - the only source of the skill for demons. Other than that, it knows a variety of highly-damaging Physical attacks, allowing it to be easily used as a fusion component for physical fighters.
Amala Grave Run
Once the Black Visor has been collected, the Demi-fiend will be able to interact with the gravestones at Burial Chambers. This will enable to relive past boss battles with the current level, moveset and demon lineup (battles yet to be fought against the boss which is eventually enshrined in the tombstone will be reflected as blank graves).
Finishing the battle with a limited number of Press Turns in all Burial Chambers (when rereading the gravestone, the number of turns spent will be marked in red if this has been achieved) will trigger an event in a New Game Plus, in which Cerberus meets with the Demi-fiend at the first Burial Chamber in the First Kalpa and lead him to the Tomb of Yomi in the Labyrinth's 666th level. There, the Demi-fiend will meet with Izanagi and Izanami, the creator gods of the old world, who in recognition of his power, reward him with an extra Press Turn.
The ten Burial Chambers in the Labyrinth, with the twenty-four gravestones are:
- First Kalpa:
- 1F: Forneus and Troll
- B1F: Yaksini and Orthrus
- Second Kalpa:
- B3F (West): Ose and Kaiwan
- B3F (North): Mizuchi and Moirae Sisters
- Third Kalpa:
- 1F (West): Kin-Ki, Fuu-Ki and Sui-Ki
- 1F (North): Ongyo-Ki, Mara and Black Frost
- Fourth Kalpa:
- 1F: Sakahagi and Spectre
- Road to Hell: Alciel, Albion (with Tharmus, Luvah, Urizen and Urthona) and Skadi
- Fifth Kalpa:
- B2F: Mithra and Thor
- B5F: Ahriman, Noah and Baal Avatar (Depending on the Demi-fiend's Reason, he may avoid one of these fights. In that case, a demon can be found close to the boss's location who will provide the memory of the missed battle, allowing him to fight the creature by using the Black Visor.)
Demons
- None of the demons that can be encountered in the Kalpas can be talked to.
First Kalpa
| Level | Race | Demon | HP | MP | Weak | Strong | Null | Drain | Repel | Skills |
|---|---|---|---|---|---|---|---|---|---|---|
| 5 | Jirae | Hua Po | 50 | 30 | Ice | Fire | - | - | - | Rakukaja, Agi, Maragi |
| 17 | Haunt | Yaka | 150 | 81 | Ice/Expel | - | Death | - | - | Mazio, Deathtouch, Tarunda, Dia, Diarama, Venom Claw |
| 18 | Beast | Nekomata | 156 | 90 | Elec | - | - | Force | - | Marin Karin, Feral Claw, Stun Needle |
| 19 | Yoma | Koppa | 156 | 87 | Curse | - | Force | - | - | Tarukaja, Wing Buffet, Shibaboo, Zanma, Gathering (Koppa), Kamikaze |
| 19 | Fairy | Pyro Jack | 162 | 87 | Ice | - | - | Fire | - | Agi, Maragi, Agilao |
| 20 | Haunt | Chatterskull | 156 | 96 | Expel/Curse | - | Death | Fire | - | Sukunda, Hell Thrust, Stun Gaze, Last Resort |
| 20 | Brute | Momunofu | 180 | 78 | Ailments | Phys | - | - | - | Focus, Lunge |
| 20 | Femme | Taraka | 180 | 78 | Ice | - | Nerve | - | - | Heat Wave, Rakukaja, Shibaboo |
| 20 | Element | Flaemis | 188 | 96 | Ice | - | Expel/Death | Fire | - | Media, Maragi, Makakaja |
| 20 | Fallen | Forneus | 220 | 81 | Elec | - | Death | Ice | - | Bufula, Mabufula, Stun Bite |
| 23 | Beast | Badb Catha | 186 | 87 | Elec | Phys | - | - | - | Needle Rush, Wing Buffet |
| 23 | Yoma | Dis | 198 | 111 | - | - | - | Fire | - | Makajam, Agilao, Stone Gaze |
| 25 | Night | Incubus | 198 | 117 | Force | - | Curse/Mind | - | - | Sexy Gaze, Evil Gaze, Life Drain |
| 25 | Wilder | Raiju | 204 | 120 | Force | - | Death | Elec | - | Feral Claw, Needle Rush, Shock |
| 25 | Brute | Oni | 264 | 96 | Nerve | Phys | - | - | - | Berserk, War Cry |
| 26 | Fairy | Kelpie | 210 | 117 | Force | Ice | - | - | - | Pulinpa, Stun Bite, Diarama, Marin Karin |
| 28 | Yoma | Karasu | 234 | 117 | Curse | - | - | - | Force | Agilao |
| 28 | Snake | Naga | 264 | 108 | Fire | - | - | Elec | - | Tarukaja, Zionga, Hell Thrust |
| 28 | Haunt | Pisaca | 270 | 114 | Fire | - | Death/Curse/Mind | - | - | Venom Bite, Stun Gaze, Sonic Wave, Life Drain, Gathering (Pisaca) |
| 29 | Fallen | Eligor | 288 | 114 | Elec | Phys | Death | - | - | Rakukaja, Berserk, Mudo, Dragon Eye, Beast Eye |
| 30 | Vile | Arahabaki | 294 | 120 | Fire/Elec/Force/Curse/Mind/Nerve | - | Phys/Expel/Death | - | Ice | Mabufula, Stone Gaze, Dragon Eye, Beast Eye |
| 31 | Wilder | Nue | 258 | 120 | Fire | - | Ice/Death | - | - | War Cry, Stun Claw, Ice Breath, Mamudo, Dark Howl (Nue) |
| 37 | Fallen | Berith | 360 | 141 | Ice | Phys | Death | Fire | - | Heat Wave, Hellfire |
| 48 | Megami | Sati | 549 | 204 | Ice | - | - | Fire | Expel | Agidyne, Maragidyne, Allure |
Second Kalpa
| Level | Race | Demon | HP | MP | Weak | Strong | Null | Drain | Repel | Skills |
|---|---|---|---|---|---|---|---|---|---|---|
| 1 | Foul | Will O' Wisp | 10 | 18 | Magic/Expel | Phys | Death | - | - | Deathtouch, Makakaja |
| 4 | Brute | Shikigami | 48 | 27 | Fire | - | - | - | Elec | Zio, Sukunda, Tarukaja, Tarunda |
| 6 | Foul | Slime | 54 | 33 | Fire/Expel | Phys | Death | - | - | Sonic Wave, Gathering (Slime), Last Resort |
| 6 | Wilder | Zhen | 65 | 50 | Fire | Ailments | Death | - | - | Wing Buffet, Toxic Sting, War Cry |
| 7 | Foul | Mou-Ryo | 66 | 42 | Expel | - | Death | - | - | Deathtouch, Pulinpa, Toxic Sting, Zan, Mazan |
| 15 | Wilder | Bicorn | 150 | 60 | Elec | Ailments | Death | - | - | Charm Bite, Pulinpa, Stun Gaze |
| 16 | Foul | Blob | 156 | 66 | Ice/Expel | Phys | Death | - | - | Zanma, Toxic Sting |
| 20 | Brute | Momunofu | 180 | 78 | Ailments | Phys | - | - | - | Focus, Lunge |
| 25 | Wilder | Raiju | 204 | 120 | Force | - | Death | Elec | - | Feral Claw, Needle Rush, Shock |
| 25 | Brute | Oni | 264 | 96 | Nerve | Phys | - | - | - | Berserk, War Cry |
| 28 | Foul | Black Ooze | 264 | 111 | Elec/Expel | Phys | Death | - | - | Deathtouch, Panic Voice, Mute Gaze, Gathering (Black Ooze) |
| 31 | Wilder | Nue | 258 | 120 | Fire | - | Ice/Death | - | - | War Cry, Stun Claw, Ice Breath, Mamudo, Dark Howl (Nue) |
| 42 | Foul | Phantom | 336 | 177 | Force/Expel | Phys | Death | - | - | Last Resort, Mana Drain, Kamikaze, Tarunda, Dekaja, Mazionga, Ziodyne |
| 43 | Wilder | Mothman | 416 | 183 | Elec | - | Death/Fire | - | - | Panic Voice, Evil Gaze |
| 44 | Brute | Ikusa | 364 | 177 | Force | - | Nerve | - | - | Mighty Gust, Arid Needle, Mudoon |
| 54 | Brute | Shiki-Ouji | 420 | 234 | Fire | - | Phys | - | Death/Expel | Mahamaon, Mamudoon, Stun Needle |
| 75 | Wilder | Hresvelgr | 600 | 285 | Fire | - | Death | - | Ice | Mabufudyne, Wing Buffet, Iron Claw, Anti-Phys |
| Level | Race | Demon | HP | MP | Weak | Strong | Null | Drain | Repel | Skills |
|---|---|---|---|---|---|---|---|---|---|---|
| 65 | Vile | Tao Tie | 567 | 258 | Curse | - | Death | - | - | Life Drain, Tetraja, Makajamon, Hell Gaze, Megido |
| 68 | Fallen | Flauros | 574 | 246 | Nerve | - | - | - | Death | Deathbound, Iron Claw, War Cry |
| 69 | Tyrant | Abaddon | 564 | 279 | - | Magic | Expel | - | Death | Mabufudyne, Panic Voice, Retaliate |
| 70 | Night | Nyx | 561 | 291 | - | Magic | - | - | - | Dormina, Glacial Blast, Mana Drain, Makarakarn, Debilitate, Eternal Rest |
Trivia
- Amara (Amala) refers to Amaravati. In Hinduism, Amaravati is the capital of Svarga, a temporary paradise where the dead and gods reside. It is ruled by Indra and located on Mt. Meru.
- Calpa (Kalpa) is a Hindu concept. Hinduism states that the universe is going through a constant cycle of reincarnation, and each "life" is called a "Calpa."