""Kaneshiro doesn't leave any tracks," huh? Figures it'd be floating."
Kaneshiro's Palace, also known as the Bank of Gluttony, is a location in Persona 5. It is the Palace of Junya Kaneshiro.
Appearances[]
Profile[]
Persona 5[]
Kaneshiro's Palace is a world within the Metaverse created by Junya Kaneshiro. The Phantom Thieves of Hearts plan a heist to steal Kaneshiro's heart in order to prove their justice to Makoto Niijima, but a further incentive appears, where the Thieves must prevent Kaneshiro from extorting them using a photo leak due to Makoto's brash actions.
Unlike the previous two Palaces, Kaneshiro's Palace encompasses nearly all of Shibuya drowned in a dark-green atmosphere. A massive bank floating in the air sucking banknotes from the ground acts as the main body of the Palace and a representative of Kaneshiro's elitism, confidence in not getting caught by the police and desire for wealth for the sake of wealth. The entire Palace area, both the ground and Bank, are filled with ATM Cognitive existences that embody Kaneshiro's disregard for other people, seeing only them as a source of income. Each ATM seems to embody a specific person he is extorting for his wealth. The physical conditions of each ATM seems to reflect that person's current financial state. Once a person has lost most of their money, the ATMs become more and more damaged until they fall over dead on the side of the road. Shadow Kaneshiro is also accompanied with cognitive copies of his henchmen. It is guarded by shadows that appear as security guards in riot gear and guard dogs that manifest as Orthrus.
The Palace is initially unreachable due to being high up in the air, but when somebody who is extorted by Kaneshiro enters its outskirts, it will open itself to them. Since Makoto Niijima is extorted by Kaneshiro, this transforms her into the key to the Palace, allowing the party to infiltrate it. However, as Makoto and the party enter from the front door, this instantly alerts Kaneshiro and his shadow guards and he sets up a trap to kill the party. The party is instantly overwhelmed by the number of shadows, then is cornered in the middle of their escape. Kaneshiro reveals to Makoto his intention to sell her sister as a sex slave and if she does not want it, she has to take customers to pay off her debt. This angers Makoto to the point that she breaks and awakens Johanna, who defeats the Shadow guards Sui-Ki and two Onis with help from the party. However, due to the increasing security, the party is forced to escape the Palace.
After the party finds out the location of Kaneshiro's treasure, they send a series of calling cards all over Shibuya, in which one of them were picked by Kaneshiro's henchmen and he delivered it to him, angering him and causing his treasure to take form. The party confronts Kaneshiro in the depths of the Palace and he transforms into Bael, first fighting them on foot then with his "Piggytron" robot. (In Royal, Kaneshiro instead fights the party with Piggytron first, then on foot with two other guards.) After the party defeats Kaneshiro and destroys his Piggytron, he again warns the party of a black mask assassin in the Metaverse before surrendering, destroying his Palace. A day later he willingly surrenders in front of the police and is arrested, causing Sae Niijima to worry that her sister is under the influence of the Phantom Thieves.
Walkthrough[]
- Lockpicks needed: 3
- Note: It isn't necessary to buy weapons for Makoto in this dungeon as the Heavy Pound weapon is comparable to what is available in Untouchable, and the Peacemaker HP, a customized variant of the Peacemaker, surpasses the rest of the firearms available to Makoto in the shop. Only the P Revolver II has slightly higher attack and accuracy than the Peacemaker HP, but it cannot afflict Fear.
Upon the first investigation of the Palace on June 19th, the Phantom Thieves cannot enter the Palace but instead end up in a distorted version of Shibuya. The Thieves must investigate the ATM Human Cognitions in the twisted shopping district until they investigate one that falls onto the floor shortly after being talked to, after which the Palace appears as a giant UFO sucking money from the air. Since it is high up, there is no way for the Thieves to enter it and they are forced to leave.
On June 20th, Kaneshiro successfully subdues Makoto and blackmails the Thieves into paying three million yen in three weeks or he will report the Thieves to the police using the picture he took in the nightclub and turn Makoto to prostitution, which turns Makoto into the "Special Customer" for the bank in the Metaverse. Since Makoto is considered a special customer, the UFO-like bank now opens a staircase for the Phantom Thieves to enter. Once they enter the Palace, Makoto enters the front door of the bank, which alerts the Shadows until Makoto states that she is a special customer and Shadow Kaneshiro allows them to enter.
Now the Thieves must head to the reception office; if they try to go anywhere else, the Shadow guards will prevent them from going there. Examining the mountain of cash in the reception office will instantly trigger an event that results in confronting two waves of Shadows, in groups of two and manifesting as Oni. They resist Physical and Gun attacks, so elemental skills will deal with them faster. Once those were taken down, Morgana will notice there are too many Shadows, forcing them to escape. More guards and Shadow Kaneshiro will corner the party once they approach the exit, resulting in a confrontation leading to Makoto awakening to her Persona, Johanna. The party will then face a party of three Shadows, two Oni and a Sui-Ki. Makoto's Nuclear skills can strike at Sui-Ki's weakness for extra turns. Due to Sui-Ki's Ice attacks, the player should avoid having Ann in their party prior to this confrontation while also being vary of having the protagonist equip Personas weak against Ice. Following the Shadows' defeat, the party will proceed to force their way out of the Palace for the day.
Bank Entrance[]
Starting from June 21st, the party will be able to start exploring Kaneshiro's Palace. The front entrance to Kaneshiro's Palace will be shuttered and taped up with a notice. The Phantom Thieves must find an alternate entrance to the bank. Investigating the golden pig statue to the far right will reveal a hidden passage leading to a room with a staircase to the east of the area the party visited last time. The stairs will lead to a dead end, so the party must proceed into the entrance hall.
Front Hall[]
The party can use the benches to ambush the two patrolling Shadows here. Heading north into the teller area will reveal a Treasure Chest containing an Elysian Robe in the southwest corner of the room. The doors heading towards the reception office are barred, so head towards the west end of the entrance hall.
Heading forward, the party will notice a Shadow boarding an elevator with no control panel. The objectives update to finding a route to the basement. The party can use the walls along the northern side to ambush two more Shadows blocking access to a Treasure Chest containing a Balm of Life. To the southwest is a sealed door. The party can now proceed up the stairs; the right side will provide easier access to the next hiding spot.
Approaching the top, the party will take note of the canine Shadow further back. These will take the form of Orthrus at first with additional partners appearing later on. Take cover beside a pillar and ambush it. Afterward, there will be another guard and canine Shadow patrolling the area nearby that can also be ambushed. Another guard will be patrolling the southern balcony after dealing with the second canine Shadow. Heading further east will lead the party to the other side of the dead end at the top of the stairs from earlier. Pressing the red button will open the partition.
The door to the immediate west of the red button is locked. Following the wall will lead to climbable equipment leading into a shaft. At the end of the shaft, the protagonist will be prompted to ambush the guard, leading to a battle with four Orobas Shadows. Defeating this group will net the party the Bank Keycard and the Bank Blueprint. However, the Shadows in the immediate area outside of the room will have also respawned.
The Bank Keycard will unlock the exit to the room once used with the keycard reader to the right of the door. Heading back west towards the stairs, turn south into the hallway to find a locked door on the west wall. The Bank Keycard will also unlock this door. The party can ride the top of the elevator from earlier down to the basement.
Banker Passageway[]
After a short venture through some air vents, the party will emerge in the rafters of a room in the Banker Passageway. After the cutscene, there will be a Safe Room immediately to the northeast. The way further north on the eastern side is blocked, so proceed north via the western hallway. Morgana will take note of the cameras in this hallway. Use the protagonist's Third Eye to see the camera beams and avoid being spotted. At the north end of the hallway, the party will take note of the electrical box on the wall. This will prompt the protagonist to destroy it with a kick, disabling the cameras behind the party.
In the next room, duck behind a pillar and ambush the patrolling Shadow. The western stairs are blocked by cameras, so head south. There are four Shadows patrolling this hallway, including a glowing red Shadow on the western side. The room the red Shadow is guarding contains an electrical box that can be smashed to disable one of the cameras covering the western stairs. Following the hallway south leads to another room containing a second electrical box and a Treasure Chest containing a Snuff Soul. Smashing the electrical box disables the second camera blocking the stairs, allowing access upwards.
Following the western stairs, they will ascend and then descend into the eastern portion of the area. There will be another canine Shadow patrolling this hallway. The room nearby contains three breakable treasures illuminated by two security cameras, exit the room and continue down the hallway to find an electrical box that disables the cameras on the northern wall. The card reader will open the gate, allowing the party to access the Safe Room again.
After saving, enter the room immediately north of the Safe Room and head through to the next room. To the south, the stairs upward lead to a card reader which unlocks the door in the southwest corner of the front hall, opening a shortcut downward. After unlocking the door, head back downstairs and head east this time.
The group will be in a room with multiple stair levels and several cameras. Head into the eastern hallway and deal with the patrolling Shadow. The climbable equipment and air shaft will lead to a breakable object. The drop down from the southeast corner will lead to another small hallway with another patrolling shadow and a treasure chest. After defeating the Shadow, open the Treasure Chest to receive a Balm of Life.
Heading west will lead back towards the area with the cameras on the other end and a large vault door. Heading further west and up the stairs will lead to a door locked by a card reader which can be unlocked, but there's nothing to do past the door just yet. The Treasure Chest to the south of the door yields Tarnished Gear when opened.
Enter the only available door on the northwest side of the hallway and enter the air vent above. The Treasure Chest on the other side will yield a Black Kogatana that will be useful later on. There are two electrical boxes on the west wall that need smashing. These will disable all of the cameras in the large room that was passed through earlier. Unlock the door out using the Bank Keycard and take the northeast door into the room.
Move toward the northern room where two Shadows are to eavesdrop on a conversation, resulting in the party realizing they possess two keys to move forward and forming a plan to split them up. This will prompt the party to head to the monitoring room on the second floor of the front hall. They can move there through a dialogue prompt or manually afterward.
Using the communicator in the monitoring room will summon one of the large shadows with one of the keys to the monitoring room. The party must defeat Fuu-Ki in order to obtain the Right Key. Using Electricity attacks will make short work of him. The party can then either head straight there to engage the remaining Shadow for the Left Key or explore some more. When confronted, the remaining guard will transform and lead into another encounter with Sui-Ki. Defeating Sui-Ki will net the party the Left Key and the Basement Blueprint.
Head down to the Giant Partition to unlock the way forward into the Laundering Office. Stronger types of Shadows will begin to be introduced from here onward.
Laundering Office[]
After the long walkway north, the party must go west and into the hall leading south. Here they will be introduced to cameras that periodically switch off and on in addition to Shadows patrolling the hallway. Ambushing these Shadows while they're standing in the camera radius can potentially lead to the protagonist being spotted once the battle is over. Head south along the hallway, using cover to avoid the cameras and two patrolling Shadows. The protagonist cannot jump to another hiding spot if the path takes them through an active camera's viewpoint. After reaching the southern room, follow the air vent and jump down.
Head south along the ledge from here and enter another vent. The party will emerge near a large elevator. Ignore it for the moment and traverse the hallway with more intermittent cameras and two patrolling Shadows. At the east end of the next hallway will be a Treasure Chest containing an Ignis Ring. The protagonist must run past three sets of double blinking cameras, stopping in the gaps between blinks to reach the end. The door at the east end of the hallway leads nowhere. Head back to the west end of the hallway and take the north door. Head up the stairs to unlock a shortcut to the first area of the Laundering Office. Now head back to the large elevator and take it downwards.
There will be a canine Shadow guarding a Treasure Chest at the end of the hallway which contains a Revival Bead. Entering the door to the south will allow the party to spot Shadow Kaneshiro conversing with another Shadow.
There isn't anywhere to hide on the stairs downwards for the initial flights, so the protagonist must carefully ambush the Shadows present on the way down. The west side down leads to a Treasure Chest containing a Bead. There is also a Locked Chest near a strong red Shadow patrolling the stairs. After defeating the red Shadow, unlock the chest to obtain the weapon Heavy Pound for Makoto along with the treasure items Safe Dial and Old Coin. The eastern stairs yield only one breakable container. At the bottom of the stairs, the party will have a brief confrontation with Shadow Kaneshiro and a large Shadow.
Shadow Kaneshiro will order the guards to finish the Phantom Thieves off in order to keep them away from the elevator, initiating a battle with Fuu-Ki, Sui-Ki and Kin-Ki. Fuu-Ki and Sui-Ki can be handled as before, while Kin-Ki is weak to Psy skills.
After the battle, Shadow Kaneshiro will have vanished, leaving only a journal behind. The journal reads "R=C=0, I=1, H=2" and can be read under the protagonist's key items as needed. After regaining control, ignore the elevator. Head north along the bottom floor to reach the next Safe Room. Beware of the Shadows that have respawned and resumed their patrol of the stairs.
After saving and healing as needed, head back south to the elevator.
Underground Vault[]
At the bottom of the elevator immediately to the west, is another safe room that will serve as a shortcut. Investigate the PIN Entry Panel to be prompted for a password. The password hint is RICH, translating to 0102. With the way forward unlocked, head west and down into the vault door to reach Vault: 1F.
Vault: 1F[]
Head down the stairs, being mindful of the canine Shadow near the bottom of the stairs. There are four Shadows in total patrolling the western area. After clearing away the Shadows, enter the room on the west side of the area. There will be a Treasure Chest that contains a pair of Wild Clogs. Examining the large pig statue will yield Torn Page 1, which reads "P=1." Now head for the southern hallway.
At the bottom of the stairs, there will be three Shadows patrolling the lower level, one of which will be a strong red Shadow. Follow the corridor south and to the first turn east and deal with the red Shadow, then investigate the pig statue. The party will receive Torn Page 2, which reads "E=9 A=3."
Now follow the hallway back north and climb the vaults to reach a doorway to a Treasure Chest containing a Bead. From here, jump down and follow the hall south and up the stairs heading north. There will be another PIN Entry Panel at the end of this path. The password will be REAP, or 0931. Head back to the Underground Vault and hit up the Safe Room or move into the next vault.
Vault: 2F[]
The party will wind up in Vault: 2F. There will be an active camera and a cycling camera at the bottom of the stairs. Run past the cycling camera and smash the electrical box on the wall at the end of the hallway to disable them both.
Ignore the door at the end of the corridor and jump up onto the ledge and follow it to an air vent. On the other side, the party will be standing on high shelves looking over an electrified lower floor. Jumping over to the Locked Chest and picking it yields the Peacemaker HP revolver for Makoto and an Aquamarine.
Continue along the shelves to another vent to continue onward. Jump down from the ledge and take the east door north into the electrified room. There will be another pig statue next to the east wall. Open it to get Torn Page 3, which reads "U=A."
Return to the hallway and follow it as it winds to the west, being mindful of the patrolling Shadow and the cameras. Smash the electrical box to disable them and continue onward. Head up the stairs and cross the area heading south to reach another pig statue. Inside is Torn Page 4, which reads "G=P."
Two canine Shadows will burst into existence in the room after retrieving the note. The protagonist can hide behind the pig statue to avoid detection by the nearest, and then the raised platforms to avoid the second. With those two out of the way, head east and destroy the electrical box to disable the room filled with the electric fields. The PIN Entry Panel nearby has a password of HUGE, or 2319.
Entering the formerly electrified room instead of heading right back to the Underground Vault will lead to a Treasure Chest in the northwest corner of the lower area containing a Midnight Ring.
Underground Vault[]
There will be a large guard between the Phantom Thieves and a control panel. Engaging it leads to a battle with two Oni and Take-Minakata. Do not equip a Persona weak to Electricity. Take-Minakata will frequently follow up with a strong Physical attack to anyone that is stunned. Minakata is weak to Psy skills.
Afterward, manipulate the control panel to shift the next vault wall to allow access to the left, which allows access to another panel. Press the button here to align the opening in the next vault wall with the other vaults, then move to the previous panel and position the vault wall the other way (to the right). Move forward into the next area.
Vault: 3F[]
The party will now be in Vault: 3F. There will be a canine Shadow and humanoid Shadow patrolling near the bottom of the stairs. There will be a Locked Chest in the second room to the west containing a Revenge Mirror accessory, Chewing Soul and Amethyst. Follow the only available path past the cameras and the patrolling Shadow on the lower level. The electrical box to disable the cameras is on the west wall of the hallway. The hallway exits to a room full of shelves stacked with money and four patrolling shadows.
Climbing the lower shelves on the east side of this room and circling around leads to a Treasure Chest containing Gold-tainted Armor. Following the shelves to the west leads to an air vent which opens into a room containing a PIN Entry Panel and card reader. Use the Bank Keycard to unlock the gate and head north into the next area.
There will be a canine Shadow patrolling the hall leading north and a strong red Shadow to the east along with security cameras. Follow the hall to the north wall to find an electrical box that disables three cameras blocking the way forward. Ducking into the northern branch from here leads past a cycling camera with its electrical box nearby and to another pig statue containing Torn Page 6, which reads "L= U + G, D = G."
Following the hallway east and south only leads to a barred door and the room with the shelves, so head back west to where the red Shadow is patrolling. The protagonist will have to run past the camera while it's cycled off and while the shadow's back is turned in order to ambush it. Head into the north alcove to break the electrical box for the nearby cameras and to open the pig statue to get Torn Page 5, which reads "O+H=10." Unlock the door to the east using the Bank Keycard and head back to the PIN Entry Panel. The password for this panel is GOLD, or 1841.
With this, the way to the center of the Underground Vault is unlocked. After confirming the Treasure's location, the Phantom Thieves will be ready to send the calling card.
Treasure[]

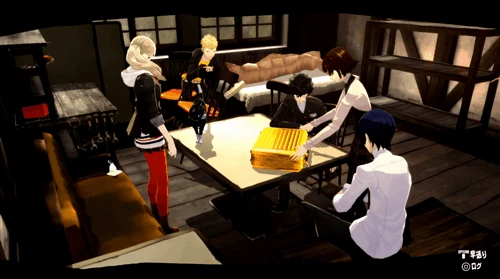
Makoto opening Kaneshiro's Treasure
Kaneshiro's Treasure is his golden briefcase which takes the shape of giant gold bars stored inside Piggytron, the mechanical piggy bank that assisted Shadow Kaneshiro during the battle against the Phantom Thieves. The Phantom Thieves take the briefcase into Café Leblanc where Makoto Niijima opens the lock by remembering its number combination when she saw it opened in Kaneshiro's club. They find it full of notes from "Children's Bank," after Yusuke noted how something looked off while Ryuji and Ann got lost in money lust, which have Shadow Kaneshiro's portrait, symbolizing how Kaneshiro only tried to look like a powerful person. While the bank notes were worthless, the briefcase itself is made of gold, allowing them to sell the briefcase and use that money to celebrate at an expensive sushi restaurant located in Ginza.
Equipment[]
Updated gear that becomes available once Kaneshiro's Palace becomes accessible.
Persona 5[]
| Weapon | User | Attack | Accuracy | Effect | Location |
|---|---|---|---|---|---|
| Skinning Knife | Protagonist | 102 | 96 | - | Untouchable (¥11,800) |
| Kopis | 122 | 98 | Untouchable (¥15,000) | ||
| Talwar | Morgana | 98 | 94 | +Confuse (low) | Chest - Mementos, Chemdah Untouchable (¥12,200) |
| Sleeper Blade | 118 | 96 | +Sleep (low) | Untouchable (¥15,600) | |
| Iron Pipe | Ryuji | 104 | 92 | - | Untouchable (¥12,200) |
| Heavy Mace | 124 | 94 | Untouchable (¥15,400) | ||
| Warrior Whip | Ann | 96 | 94 | Untouchable (¥11,200) | |
| Burn Whip | 110 | 90 | +Burn (low) | Untouchable (¥14,400) | |
| Imitation Katana | Yusuke | 108 | 94 | - | Chest - Mementos, Chemdah Untouchable (¥12,400) |
| Antique Gunto | 128 | 96 | Untouchable (¥15,800) | ||
| Brass Knuckles | Makoto | 102 | 94 | Default | |
| Delta Knuckle | 112 | 94 | Untouchable (¥12,600) | ||
| Heavy Grip | 122 | 96 | Untouchable (¥14,200) | ||
| Heavy Pound | 130 | 88 | +Dizzy (low) | Locked Chest - Kaneshiro's Palace, Laundering Office |
| Weapon | User | Attack | Accuracy | Rounds | Effect | Location |
|---|---|---|---|---|---|---|
| Compact | Protagonist | 140 | 92 | 8 | - | Untouchable (¥16,000) |
| Sand Hawk | 148 | 96 | Untouchable (¥19,200) | |||
| Upsilon | Morgana | 128 | 90 | 3 | Untouchable (¥11,600) | |
| Comet 3 | 142 | 94 | 5 | Untouchable (¥13,400) | ||
| Mad Maximum | Ryuji | 130 | 86 | 4 | Untouchable (¥14,000) | |
| Fireworks | 138 | 94 | Untouchable (¥15,600) | |||
| Nock Valley | 152 | 94 | Untouchable (¥19,200) | |||
| Flare SMG | Ann | 124 | 78 | 12 | Untouchable (¥13,200) | |
| Blitz MG | 132 | 86 | Untouchable (¥14,600) | |||
| Heavy Assault | Yusuke | 128 | 82 | Untouchable (¥15,600) | ||
| G1 Type | 136 | 90 | Untouchable (¥17,200) | |||
| Replica Revolver | Makoto | 126 | 86 | 6 | Default | |
| Peacemaker | 134 | 94 | Untouchable (¥14,600) | |||
| P Revolver | 140 | 90 | Untouchable (¥15,200) | |||
| Peacemaker HP | 168 | 88 | Locked Chest - Kaneshiro's Palace, Vault: 2F |
| Armor | User | Defense | Evasion | Effect | Location |
|---|---|---|---|---|---|
| Acrylic-coated Gear | Unisex | 10 | 1 | - | Chest - Mementos, Chemdah |
| Paint-flecked Armor | |||||
| Tarnished Gear | Chest - Kaneshiro's Palace, Banker Passageway | ||||
| Gold-tainted Armor | Chest - Kaneshiro's Palace, Vault: 3F | ||||
| Elegant Shirt | 72 | 9 | Wash Acrylic-coated Gear | ||
| Flowing Scarf | Cats | 74 | 20 | Ag+3 | |
| Courbet Apron | Females | 75 | 14 | - | |
| Army Vest | Unisex | 77 | 6 | St+1 | Locked Chest - Mementos, Aiyatsbus Chest - Mementos, Chemdah Untouchable (¥12,400) |
| Camo Collar | Cats | 80 | 16 | +Evade Physical (low) | Locked Chest - Mementos, Aiyatsbus Untouchable (¥12,000) |
| Power Camisole | Females | 81 | 10 | St+1 | Chest - Mementos, Chemdah Untouchable (¥12,800) |
| Pollock Vest | Unisex | 81 | 10 | +Resist Fear | Wash Paint-flecked Armor |
| Okamoto Vest | Males | 82 | 12 | En+2 | Wash Acrylic-coated Gear |
| Scream Dress | Females | 85 | 15 | +Resist Confuse | Wash Paint-flecked Armor |
| Renoir Scarf | Cats | 85 | 21 | Ma+5 | |
| Athletic Shirt | Males | 88 | 8 | Ag+1 | Chest - Mementos, Chemdah Untouchable (¥13,000) |
| Turtleneck | Females | 88 | 12 | - | Makoto default |
| Reckless Vest | Unisex | 89 | 7 | +Resist Fear | Untouchable (¥17,000) |
| Glaring Cape | Females | 93 | 11 | +Resist Dizzy | Untouchable (¥17,200) |
| Gaudy Undies | Males | 93 | 13 | +Resist Confuse | Wash Paint-flecked Armor |
| Water Crown | Cats | 93 | 17 | +Resist Burn | Untouchable (¥16,200) |
| Gilded Vest | Unisex | 94 | 10 | St+2 | Wash Tarnished Gear |
| Sponge Camisole | Females | 99 | 15 | St+5 | |
| Fancy Collar | Cats | 99 | 21 | - | |
| Papal Robes | Unisex | 100 | 7 | +Evade Bless (low) | Locked Chest - Mementos, Chemdah |
| Saint's Tunic | Males | 102 | 9 | +Resist Rage | Locked Chest - Madarame's Palace, Main Treasure Hall Untouchable (¥17,600) |
| Elysian Robe | Females | 104 | 11 | +Reduce Curse dmg (low) | Locked Chest - Mementos, Chemdah Chest - Kaneshiro's Palace, Front Hall 1F |
| Bookkeeper Wrap | Unisex | 108 | 11 | Ag+3 | Wash Gold-tainted Armor |
| Nouveau Riche Shirt | Males | 108 | 13 | Ag+3 | Wash Tarnished Gear |
| Accountant Cape | Females | 113 | 17 | +Resist Dizzy | Wash Gold-tainted Armor |
| Flexible Collar | Cats | 115 | 22 | Ag+3 | |
| Patron Undies | Males | 124 | 14 | Lu+5 |
| Accessory | Effect | Location |
|---|---|---|
| Power Anklet | St+1 | Untouchable (¥3,000) |
| Magic Amulet | Ma+1 | |
| Strength Belt | En+1 | |
| Army Socks | Ag+1 | |
| Lucky Charm | Lu+1 | |
| Ignis Ring | +Reduce Fire dmg (med) | Chest - Kaneshiro's Palace, Laundering Office |
| Midnight Ring | +Reduce Curse dmg (low) | Chest - Kaneshiro's Palace, Vault: 2F |
| Revenge Mirror | +Repel Physical (low) | Locked Chest - Kaneshiro's Palace, Vault: 3F |
Persona 5 Royal[]
Some gear is only available once the fusion alarm is unlocked, but only when Kaneshiro's treasure route has been secured.
| Weapon | User | Attack | Accuracy | Effect | Location |
|---|---|---|---|---|---|
| Stun Dagger | Protagonist | 102 | 96 | Low Shock | Untouchable (¥12,900) |
| Skinning Knife | 122 | 98 | - | Untouchable (¥14,900) | |
| The Great Thief Stick | 150 | 92 | Med Random Ailment | Electric Chair Execution – Arsène (fusion alarm) | |
| Talwar | Morgana | 96 | 97 | Low Confuse | Untouchable (¥13,200) |
| Sleeper Blade | 116 | 99 | Low Sleep | Untouchable (¥16,300) | |
| Wicked Iron Pipe | Ryuji | 106 | 91 | St+3 | Untouchable (¥13,200) |
| Heavy Mace | 126 | 93 | - | Untouchable (¥15,200) | |
| Gang Star | 130 | 93 | Low Fear | Locked chest - Banker Passageway | |
| Sleep Stick | 144 | 88 | Med Sleep | Complete the request "Ending the Boyfriend's Abuse." | |
| Burn Whip | Ann | 98 | 97 | Low Burn | Untouchable (¥12,100) |
| Warrior Whip | 118 | 99 | - | Untouchable (¥14,000) | |
| Decorative Whip | 122 | 99 | Lu+5 | Trade Imported Protein to Trader Sakai in Kichijoji (6/12 - 6/17) | |
| Whip Sword | 136 | 99 | - | Complete the request "Sadism is Just a Sign of Love" | |
| Antique Gunto | Yusuke | 108 | 94 | St+3 | Untouchable (¥13,400) |
| Zandouto | 128 | 96 | - | Untouchable (¥15,500) | |
| Senryou Yakusha R | 140 | 90 | St+6 | Electric Chair Execution - Ame-no-Uzume (fusion alarm) | |
| Brass Knuckles | Makoto | 102 | 94 | - | Default |
| Delta Knuckle | 102 | 94 | +Critical rate up (low) | Untouchable (¥12,100) | |
| Heavy Grip | 122 | 96 | - | Untouchable (¥14,000) | |
| Knuckle Duster | 126 | 96 | - | Locked chest - Laundering Office |
| Weapon | User | Attack | Accuracy | Rounds | Effect | Location |
|---|---|---|---|---|---|---|
| Sand Hawk | Protagonist | 120 | 85 | 8 | - | Untouchable (¥15,000) |
| Comet 3 | Morgana | 110 | 90 | 5 | - | Untouchable (¥15,400) |
| Fireworks | Ryuji | 130 | 85 | 3 | - | Untouchable (¥15,400) |
| Pumpkin Buster | 160 | 85 | 3 | High Burn | Electric Chair Execution - Jack-o'-Lantern (fusion alarm) | |
| Blitz MG | Ann | 115 | 90 | 12 | - | Untouchable (¥14,200) |
| Pink Buster | 135 | 90 | 12 | Med Brainwash | Electric Chair Execution - Succubus (fusion alarm) | |
| Heavy Assault | Yusuke | 125 | 75 | 10 | - | Untouchable (¥15,800) |
| Replica Revolver | Makoto | 115 | 75 | 6 | - | Default |
| Peacemaker | 135 | 75 | 6 | - | Untouchable (¥14,200) |
| Armor | User | Defense | Evasion | Effect | Location |
|---|---|---|---|---|---|
| Moonlight Robe R | Females | 70 | 30 | +Repel Physical dmg (high) | Electric Chair Execution - Kaguya (fusion alarm) |
| Turtleneck | Females | 88 | 12 | - | Makoto default |
| Golden Vest | Unisex | 114 | 7 | En+3 | Locked chest - Vault: 2F |
| Army Vest | Unisex | 77 | 6 | St+1 | Untouchable (¥12,400) |
| Camo Collar | Cats | 80 | 16 | +Evade Physical (low) | Untouchable (¥12,000) |
| Power Camisole | Females | 81 | 10 | St+2 | Untouchable (¥12,800) |
| Athletic Shirt | Males | 88 | 8 | Ag+1 | Untouchable (¥13,000) |
| Reckless Vest | Unisex | 89 | 7 | +Resist Fear | Untouchable (¥17,000) |
| Glaring Cape | Females | 93 | 11 | +Resist Dizzy | Untouchable (¥17,200) |
| Water Crown | Cats | 93 | 17 | +Resist Burn | Untouchable (¥16,200) |
| Fine Silk Dress | Females | 100 | 14 | +Evade Magic (med) | Electric Chair Execution - Silky (fusion alarm) |
| Saint's Tunic | Males | 102 | 9 | +Resist Rage | Untouchable (¥17,600) |
| Heavensent Dress | Females | 105 | 14 | Ma+4 | Electric Chair Execution - Phoenix |
| Old Coat | Cats | 109 | 16 | +Evade Psy (med) | Wash Sooty Cat's Armor Clothing Grab Bag (Random, Kaneshiro's Palace) |
| Heavensent Dress | Females | 110 | 14 | Ma+6 | Electric Chair Execution - Phoenix (fusion alarm) |
| Old Fiery Apron | Females | 111 | 13 | +10 HP | Wash Sooty Ogress' Gear Clothing Grab Bag (Random, Kaneshiro's Palace) |
| Old Haori | Males | 118 | 8 | En+1 | Wash Sooty Man's Armor Clothing Grab Bag (Random, Kaneshiro's Palace) |
| Frost Ace Hood | Cats | 120 | 20 | +40 SP | Electric Chair Execution - Jack Frost fusion alarm) |
| Nekomata Coat | Cats | 129 | 16 | +Evade Psy (high) | Wash Sooty Cat's Armor |
| Bloodied Capote | Males | 130 | 20 | Ag+6 | Electric Chair Execution - Matador fusion alarm) |
| Fiery Apron | Females | 132 | 13 | +30 HP | Wash Sooty Ogress' Gear |
| Dishonored Haori | Males | 140 | 8 | En+5 | Wash Sooty Man's Armor |
Search Objects[]
Treasure Chests[]
| Item | Type | Locked | Location |
|---|---|---|---|
| Elysian Robe | No | Front Hall | |
| Balm of Life | No | ||
| Snuff Soul | No | Banker Passageway | |
| Balm of Life | No | ||
| Black Kogatana | No | ||
| Tarnished Gear | No | ||
| Ignis Ring | No | Laundering Office | |
| Revival Bead | No | ||
| Bead | No | ||
| Heavy Pound | Yes | ||
| Safe Dial | |||
| Old Coin | |||
| Wild Clogs | No | Vault: 1F | |
| Bead | No | ||
| Peacemaker HP | Yes | Vault: 2F | |
| Aquamarine | |||
| Midnight Ring | No | ||
| Revenge Mirror | Yes | Vault: 3F | |
| Chewing Soul | |||
| Amethyst | |||
| Gold-tainted Armor | No |
| Item | Type | Locked | Location |
|---|---|---|---|
| Portable Battery | No | Front Hall | |
| Brainwash Vial S x3 | No | ||
| Black Rock | No | Banker Passageway | |
| Gang Star | Yes | ||
| Psy Magatama x3 | No | ||
| Snuff Soul | No | ||
| Black Kogatana | No | Laundering Office | |
| Relax Gel | No | ||
| Revival Bead | No | ||
| Knuckle Duster | Yes | ||
| Bead | No | Vault: 1F | |
| Model Gun | No | ||
| Golden Vest | Yes | Vault: 2F | |
| Alert Capsule | No | ||
| Bead Chain | Yes | Vault: 3F | |
| Snuff Soul | No | ||
| Incense LU | No |
Enemies[]
- A Shadow taking the form of a guard dog always transforms into an Orthrus.
| Shadow | Lv | Arcana | Personality | Affinity | ||||||||||
|---|---|---|---|---|---|---|---|---|---|---|---|---|---|---|
| Sui-Ki | 24 | Moon | Gloomy | - | - | - | Dr | St | - | - | Wk | - | - | 20 |
| Oni | 19 | Strength | Upbeat | St | St | - | - | - | - | - | - | - | - | 20 |
| Angel | 12 | Justice | Irritable | - | - | - | - | St | - | - | - | Nu | Wk | 20 |
| Yaksini | 20 | Empress | Irritable | - | - | - | St | - | - | - | Wk | - | - | 20 |
| High Pixie | 16 | Fool | Irritable | - | Wk | - | - | St | St | - | Wk | - | - | 20 |
| Rakshasa | 24 | Strength | Irritable | St | - | St | - | - | Wk | - | - | Wk | St | 20 |
| Nekomata | 17 | Magician | Upbeat | - | - | - | - | Wk | - | St | - | - | - | 80 |
| Leanan Sidhe | 19 | Lovers | Irritable | - | - | Wk | - | - | St | St | - | - | - | 20 |
| Take-Minakata | 29 | Hanged Man | Gloomy | - | - | - | - | Rp | - | Wk | - | - | St | 20 |
| Orobas | 17 | Hierophant | Timid | - | - | - | - | - | St | - | - | Wk | St | 20 |
| Orthrus | 21 | Hanged Man | Irritable | - | - | Dr | Wk | - | - | - | St | - | - | 20 |
| Queen's Necklace | 15 | Empress | Upbeat | St | Wk | St | St | St | St | St | St | St | St | 20 |
- A Shadow taking the form of a guard dog always transforms into an Orthrus.
- Red Shadows always transform into Take-Minakata.
- High Pixie, Nekomata, Yaksini and Rakshasa might manifest as Disaster Shadows.
| Shadow | Lv | Arcana | Personality | Affinity | ||||||||||
|---|---|---|---|---|---|---|---|---|---|---|---|---|---|---|
| Sui-Ki | 24 | Moon | Gloomy | - | - | - | Dr | St | - | - | Wk | - | - | 20 |
| Oni | 19 | Strength | Upbeat | St | St | - | - | - | - | - | - | - | - | 20 |
| Black Ooze | 18 | Moon | Timid | St | St | - | St | Wk | - | Wk | - | Wk | Nu | 20 |
| Yaksini | 20 | Empress | Irritable | - | - | - | St | - | - | - | Wk | - | - | 20 |
| High Pixie | 16 | Fool | Irritable | - | Wk | - | - | St | St | - | Wk | - | - | 20 |
| Rakshasa | 24 | Strength | Irritable | St | - | St | - | - | Wk | - | - | Wk | St | 20 |
| Nekomata | 17 | Magician | Upbeat | - | - | - | - | Wk | - | St | - | - | - | 80 |
| Leanan Sidhe | 19 | Lovers | Irritable | - | - | Wk | - | - | St | St | - | - | - | 20 |
| Take-Minakata | 26 | Hanged Man | Irritable | - | - | - | - | Rp | - | Wk | - | - | St | 20 |
| Orobas | 17 | Hierophant | Timid | - | - | - | Wk | - | St | - | - | - | St | 20 |
| Orthrus | 21 | Hanged Man | Irritable | - | - | Dr | Wk | - | - | - | St | - | - | 20 |
| Queen's Necklace | 15 | Empress | Upbeat | St | St | - | - | - | - | Wk | - | - | - | 20 |
Bosses[]
| Shadow | Lv | Arcana | Affinity | |||||||||
|---|---|---|---|---|---|---|---|---|---|---|---|---|
| Sui-Ki | 21 | Magician | - | - | - | Dr | St | - | - | Wk | - | - |
| Oni | 19 | Strength | St | St | - | - | - | - | - | - | - | - |
| Kin-Ki | 27 | Chariot | St | St | - | - | - | - | Wk | - | - | - |
| Fuu-Ki | 26 | Star | - | - | - | - | Wk | Dr | - | - | St | - |
| Take-Minakata | 29 | Hanged Man | - | - | - | - | Rp | - | Wk | - | - | St |
| Bael (Junya Kaneshiro) - Gluttony | 25 | - | - | - | - | - | - | - | - | - | - | - |
| Piggytron | 26 | - | - | - | - | - | - | - | - | - | - | - |
- Notes:
- Junya Bael Kaneshiro is affected by most status conditions. However, he is still immune to Fear, Brainwash and Despair and cannot be Frozen.
- Hitman-for-Hire and Bodyguard-for-Hire are affected by all status bar Fear, Brainwash and Despair and thus can be affected by technical damage.
- If Junya Bael Kaneshiro is affected by Mute, he cannot attack at all.
| Shadow | Lv | Arcana | Affinity | |||||||||
|---|---|---|---|---|---|---|---|---|---|---|---|---|
| Sui-Ki | 21 | Magician | - | - | - | Dr | St | - | - | Wk | - | - |
| Oni | 19 | Strength | St | St | - | - | - | - | - | - | - | - |
| Kin-Ki | 27 | Chariot | St | Rp | - | - | - | - | - | - | - | - |
| Fuu-Ki | 26 | Star | - | St | - | - | Wk | Dr | - | - | - | - |
| Kumbhanda | 26 | Death | - | St | Nu | - | - | - | - | - | Wk | St |
| Cerberus | ??? | Chariot | - | - | Dr | Wk | - | - | - | St | - | - |
| Piggytron | 26 | - | - | - | - | - | - | - | - | - | - | - |
| Hitman-for-Hire | ??? | - | St | St | St | St | St | St | St | St | Dr | St |
| Bodyguard-for-Hire | ??? | - | St | St | St | St | St | St | St | St | St | Dr |
| Bael (Junya Kaneshiro) - Gluttony | 25 | - | St | Nu | - | - | - | - | - | - | - | - |
Gallery[]
")
")
")
Trivia[]
- The PIN codes are:
- PIN #1: RICH = 0102
- PIN #2: REAP = 0931
- PIN #3: HUGE = 2319
- PIN #4: GOLD = 1841
- The trees outside have dollar-like leaves, alluding to the saying "money does not grow on trees."
- When translated, the sign at the bank's exterior means "Kaneshiro Credit Bank." This alludes to how Kaneshiro believes that his scam industry makes him a banker.
- The ground level of Kaneshiro's Palace lacks a cognition of Untouchable, instead being replaced by a black space. The party is also barricaded from entering the alleyway where Untouchable is supposed to be. This implies that Kaneshiro might have feared Iwai, or did not regard him as important.
| Characters | |
| Playable | Ren Amamiya - Ryuji Sakamoto - Morgana - Ann Takamaki - Yusuke Kitagawa - Makoto Niijima - Futaba Sakura - Haru Okumura - Caroline & Justine |
| DLC | Shinjiro Aragaki - Goro Akechi - Theodore - Lavenza - Sho Minazuki - Labrys |
| Locations | |
| Tokyo | Café Leblanc - Shibuya - Shujin Academy |
| Palace | Kamoshida's Palace - Madarame's Palace - Kaneshiro's Palace - Futaba's Palace - Okumura's Palace - Niijima's Palace - Shido's Palace - Mementos |
| Other | Velvet Room - Hawaii |
| Music | |
| Songs | GROOVY - One Nightbreak |
| Albums | Persona Dancing P3D & P5D Soundtrack Advanced CD |
| Archive | |
| Lists | Social - Trophies - Patches and Updates |
| Development | |
| Corporate | Atlus Co., Ltd. |
| Personnel | Kazuhisa Wada - Shigenori Soejima - Ryota Kozuka - Shoji Meguro Toshiki Konishi - Atsushi Kitajoh - Jazztronik - tofubeats - Mito - Yukihiro Fukutomi - KAIEN - Shacho - Taku Takahashi |