No edit summary |
No edit summary |
||
| (One intermediate revision by one other user not shown) | |||
| Line 3: | Line 3: | ||
|image = File:Persona 5 Kamishida palace entrance.png |
|image = File:Persona 5 Kamishida palace entrance.png |
||
|aka = Castle of Lust |
|aka = Castle of Lust |
||
| − | |japan = カモシダ・パレス |
+ | |japan = カモシダ・パレス<br>色欲の城 |
|romaji = Kamoshida Paresu |
|romaji = Kamoshida Paresu |
||
|appearance = ''[[Persona 5]]'' / ''[[Persona 5 Royal|Royal]]'' |
|appearance = ''[[Persona 5]]'' / ''[[Persona 5 Royal|Royal]]'' |
||
| Line 24: | Line 24: | ||
|next = [[Madarame's Palace]] |
|next = [[Madarame's Palace]] |
||
}} |
}} |
||
| − | |||
{{Quote|So the school's a castle, and the students are slaves... It's so on point that it makes me laugh. This really is the inside of that asshole's head...!|Ryuji Sakamoto, ''Persona 5''}} |
{{Quote|So the school's a castle, and the students are slaves... It's so on point that it makes me laugh. This really is the inside of that asshole's head...!|Ryuji Sakamoto, ''Persona 5''}} |
||
'''Kamoshida's Palace''', also known as the '''Castle of Lust''', is a location in ''[[Persona 5]]''. It is the [[Palace]] of [[Suguru Kamoshida]]. |
'''Kamoshida's Palace''', also known as the '''Castle of Lust''', is a location in ''[[Persona 5]]''. It is the [[Palace]] of [[Suguru Kamoshida]]. |
||
| Line 152: | Line 151: | ||
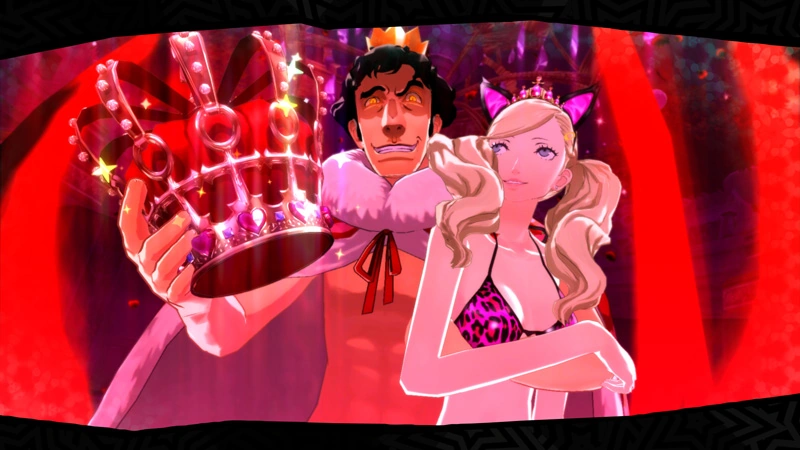
[[File:Suguru Anne.png|thumb|250px|Kamoshida holding his treasure.]] |
[[File:Suguru Anne.png|thumb|250px|Kamoshida holding his treasure.]] |
||
| − | Kamoshida's [[Treasure]] in reality is his Olympic gold medal, which takes the shape of a royal crown in the Metaverse. The Phantom Thieves sell the medal to [[Munehisa Iwai]] for 30,000 yen and use that money to celebrate with a buffet at the Wilton Hotel in [[Shibuya]]. The player receives 6,000 of the remaining yen for their own personal use. |
+ | Kamoshida's [[Treasure]], in reality, is his Olympic gold medal, which takes the shape of a royal crown, adorned with female symbol jewels, in the Metaverse. The Phantom Thieves sell the medal to [[Munehisa Iwai]] for 30,000 yen and use that money to celebrate with a buffet at the Wilton Hotel in [[Shibuya]]. The player receives 6,000 of the remaining yen for their own personal use. |
==Gear== |
==Gear== |
||
| Line 879: | Line 878: | ||
* The way all male student prisoners are tortured with cruel physical training machines alludes to [[Michiko Matsudaira]]'s abuse to two physically incapable male schoolmates ([[Kenta Yokouchi]] and [[Tsutomu Kurouri]]) in the [[Snow Queen Quest]] of ''[[Megami Ibunroku Persona]]''. |
* The way all male student prisoners are tortured with cruel physical training machines alludes to [[Michiko Matsudaira]]'s abuse to two physically incapable male schoolmates ([[Kenta Yokouchi]] and [[Tsutomu Kurouri]]) in the [[Snow Queen Quest]] of ''[[Megami Ibunroku Persona]]''. |
||
* Hidden files in the game indicate that Kamoshida's Palace is intended to be much larger than it is in the final game, which contains a sewer, a bed containing female volleyball student cognitions, a rat puzzle like those seen on [[Shido's Palace]] and a much larger torture gym. |
* Hidden files in the game indicate that Kamoshida's Palace is intended to be much larger than it is in the final game, which contains a sewer, a bed containing female volleyball student cognitions, a rat puzzle like those seen on [[Shido's Palace]] and a much larger torture gym. |
||
| − | ** The Sewer room is later redesigned without being submerged in water, and the [[Mara]] mid-boss is moved there and defending |
+ | ** The Sewer room is later redesigned without being submerged in water, and the [[Mara]] mid-boss is moved there and defending a Will Seed. |
* A hidden image in the game indicates that there is a provocative poster of a female volleyball team student that is supposed to be hung on the Library's hidden room, but was removed in the final game. However, there are still four golden pins in the room which matches the width of the poster. |
* A hidden image in the game indicates that there is a provocative poster of a female volleyball team student that is supposed to be hung on the Library's hidden room, but was removed in the final game. However, there are still four golden pins in the room which matches the width of the poster. |
||
Revision as of 20:46, 18 February 2020
"So the school's a castle, and the students are slaves... It's so on point that it makes me laugh. This really is the inside of that asshole's head...!"
Kamoshida's Palace, also known as the Castle of Lust, is a location in Persona 5. It is the Palace of Suguru Kamoshida.
Appearances
Profile
Persona 5
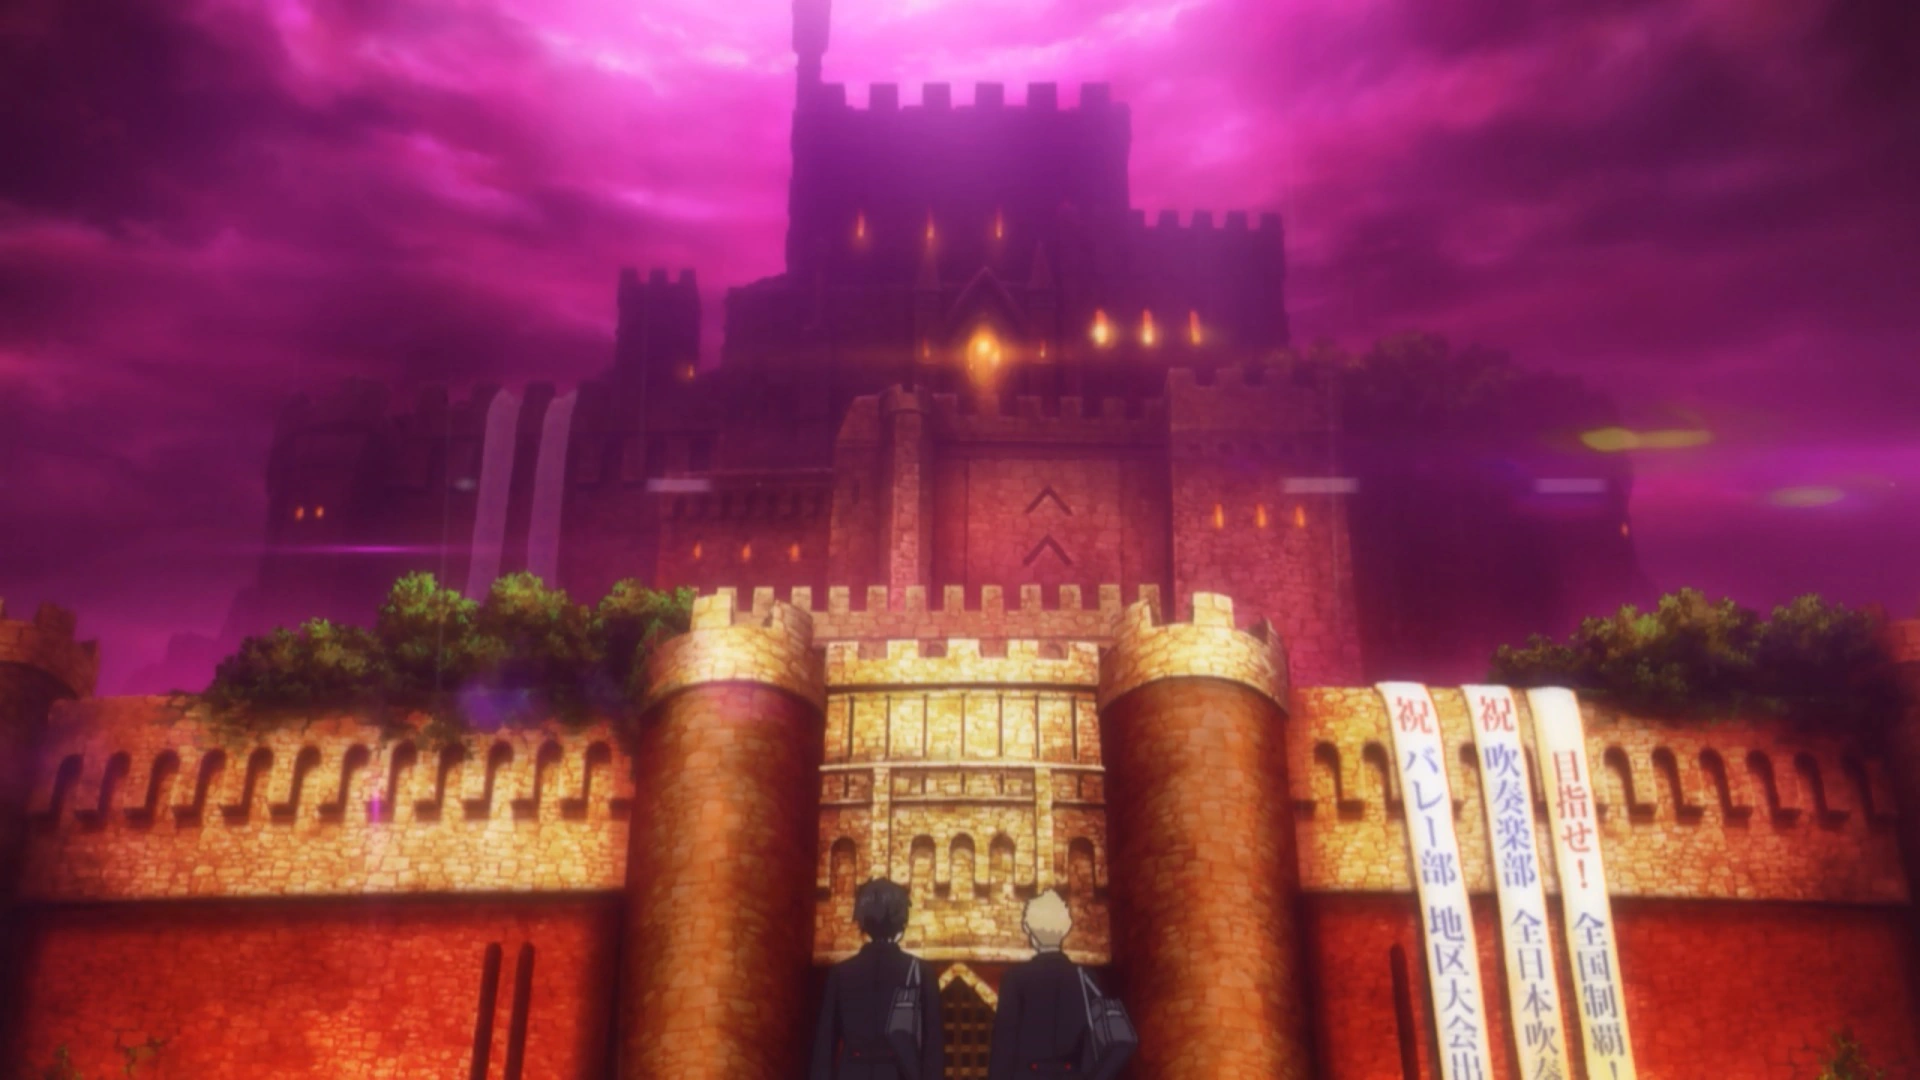
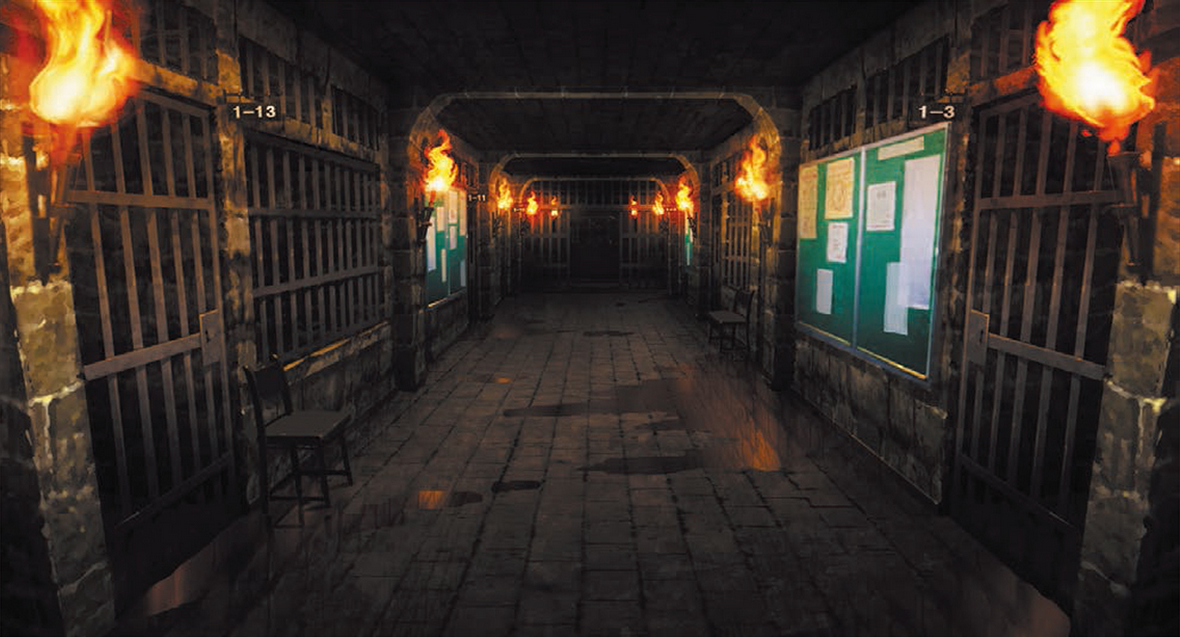
The protagonist and Ryuji discover the castle.
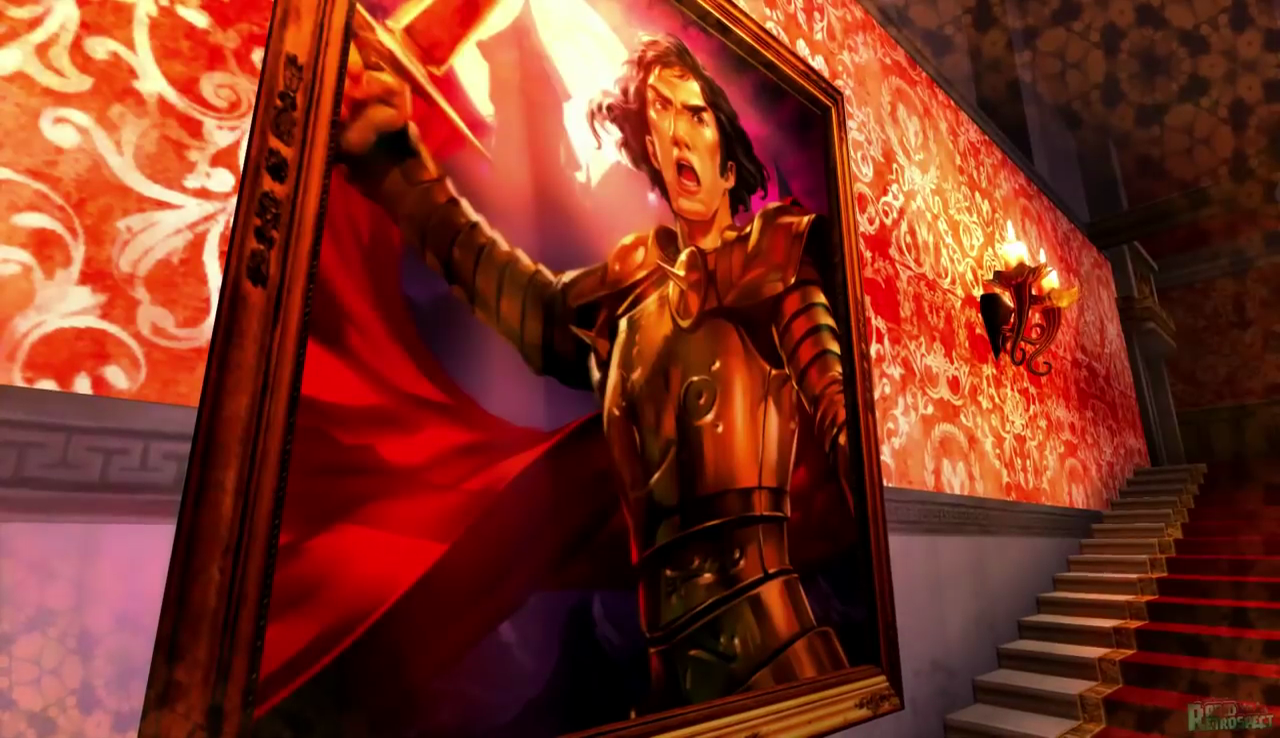
A world within the Metaverse created by Suguru Kamoshida. The Palace transforms Shujin Academy into a castle, reflecting Kamoshida's belief that he is the king of Shujin Academy. Its interior represents Kamoshida's twisted sexual desires and desire to control the school completely, as paintings and books that glorify himself and belittle the students in the school alongside pillars resembling buxom athlete bodies and even photos implied to be Shiho naked appear throughout the castle. The Palace is guarded by knight shaped shadows. It is also the area where most of the game's basics are taught.
The protagonist and Ryuji mistakenly activate the Metaverse Navigator and enter here on the way to Shujin Academy, where they were imprisoned by Shadow Kamoshida and were almost executed before the protagonist awakens Arsene, allowing him to protect Ryuji and escape. On the way, they also free Morgana who helps them escape the castle. After they arrive to the real Shujin late, they instantly meet Kamoshida in front of the school gates, who is completely oblivious to the Palace's existence.
They enter the Palace the second time with Morgana's instructions and encounters the cognitive existences of the volleyball students being abused in extraordinary ways. Ryuji initially does not recognize them as fakes before Morgana tells him that they are fake. Upon exiting the Palace, they were surrounded by Shadows and Shadow Kamoshida's guards easily corner the protagonist and Morgana, before Ryuji awakens Captain Kidd when Shadow Kamoshida angers him by revealing the truth. They successfully defeat the Shadows and escape, but not before encountering "Princess Ann," an obedient sex slave created from what Kamoshida views Ann as; An obedient sex slave to be toyed with under his mercy.
After Shiho Suzui's attempted suicide due to being sexually abused by Kamoshida as revenge for Ann Takamaki rejecting his offer to go to bed with him, the party plans another heist against the Palace, but was unknowingly joined with Ann, who was caught in the Metaverse Navigator and entered the Palace herself as she remembered the instructions to enter it. On the way to exploring the Palace, a Shadow manifesting as a Pixie is negotiated with and turned into the protagonist's second persona.
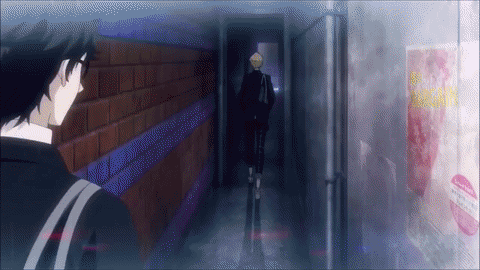
Shadow Kamoshida kidnaps Ann and attempts to execute her, while telling the truth about Shiho to her. This angers her and she awakens Carmen to fight alongside the party, defeating the shadow guard captain Belphegor. Now with Ann being bewildered and exhausted by the sudden turn of events, the party escapes the Palace. In Royal, a man wearing a leather jacket can also be seen briefly right after they escape it. A further incentive appears when Ryuji, the protagonist and Yuuki Mishima confront Kamoshida after Shiho's attempted suicide, where Kamoshida threatens to expel the three using the school board, forcing them to fight on a deadline.
The newly founded Phantom Thieves of Hearts successfully locate the Treasure and send a bunch of calling cards all over Shujin Academy, which alerts Kamoshida and forces his Treasure to take form. They defeat Shadow Kamoshida and Ann wants to kill his Shadow, but stops as she believes that a life of endless suffering and regret was a more appropriate decision for him. The Shadow vanishes and the Palace collapses, with the real world Kamoshida receiving a change of heart and thoroughly apologizing to the school, putting his life in a legacy of shame and regret.
Walkthrough
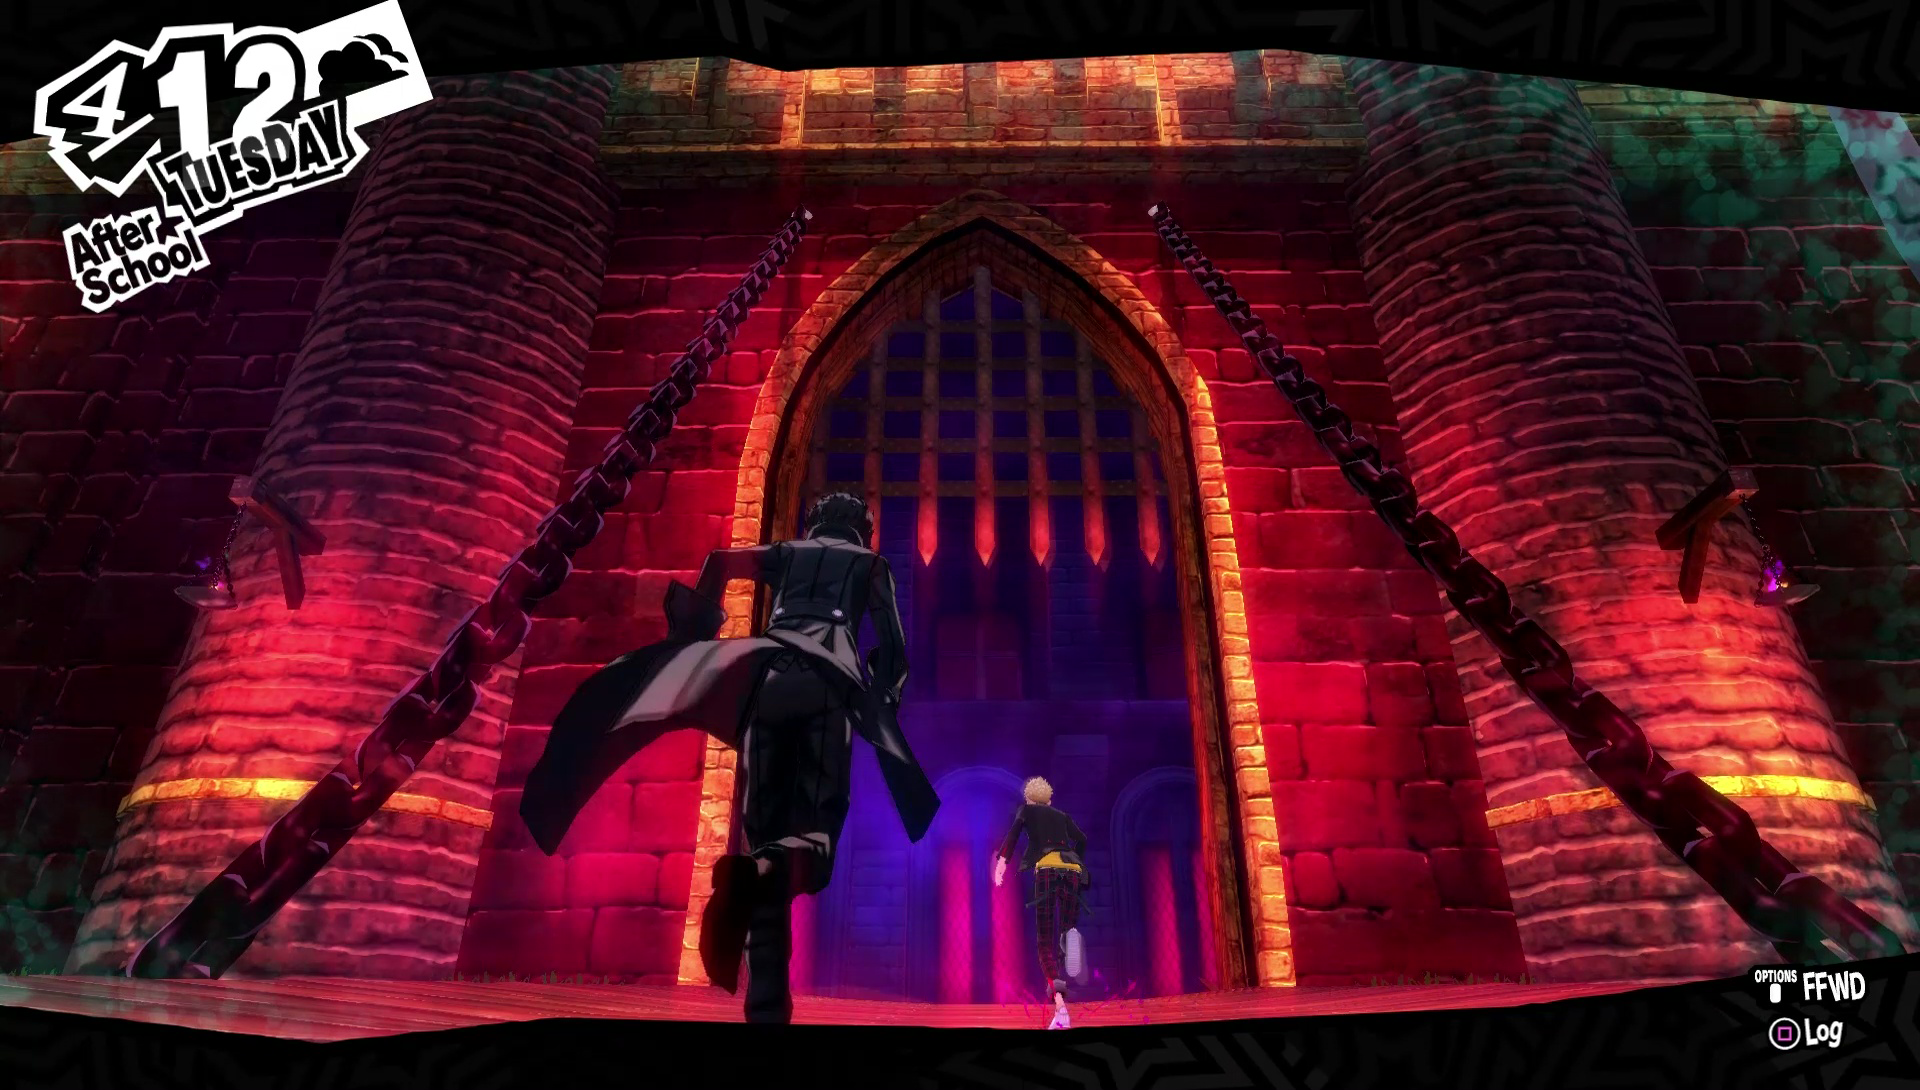
Keys needed: 4 Kamoshida's Palace is initially accessed on 4/11. After some cutscenes, the protagonist will face off against two Crypt-dwelling Pyromaniacs. After they are defeated, the protagonist and Ryuji must follow a straight-forward path through the dungeon.
After climbing the staircase and reaching a dead end, the two will meet a Strange Creature, who introduces themself as Morgana upon being released from their cell. Follow Morgana to the Kamoshida Statue and use the prompt to pull its jaw in order to lower the drawbridge to the next area.
After a short scene, the protagonist and Morgana will face a Bedside Brute and another Crypt-dwelling Pyromaniac. Morgana will explain the Weakness and 1 More system during this battle. After the battle, Morgana will give the protagonist 3 Medicine items, and the game tutorial will go over the auto-recover feature and how to check tutorials.
Continue west to reach another drawbridge and Kamoshida Statue. After a short scene, the party will face two Beguiling Girls. The party will automatically continue to the exit afterward.
The protagonist and Ryuji will return to the Palace on 4/12, and after meeting Morgana again in some dialogue scenes, they will be left in a room in the Palace's interior. Follow Morgana as he directs the two back to the dungeon area. Afterward, head down the spiral staircase.
Morgana will introduce the ambush tutorial at the gate. The protagonist can run up to the Shadow while its back is turned or jump into a hanging cage to the east to avoid detection if needed. Afterward, continue south and east past the bridge.
After a short scene, the party will end up in the first Safe Room of the Palace. Ryuji will give the protagonist a Tkachev pistol and Medicine during the dialogue sequence. Save the game and continue as needed.
After exiting the Safe Room, continue east down the stairs. Morgana will introduce the Security Level tutorial. After defeating the Shadow, investigate the door with the red exclamation point on the map to enter the next area.
Continue forward to enter a battle where Morgana explains the mechanics for using the party's equipped guns. Following their defeat, Morgana will talk more about the cognitive world mechanics and several battle related tutorials will be introduced. Continue onward.
After reaching a Shadow guarding a door, Morgana will explain the All-Out Attack system. Afterward, the group can proceed into the Training Hall of Love. After some scenes, move west down the hallway and investigate the training areas, then move back towards the entrance.
The party will be thrust into a battle in the main hall. Ryuji's Zio skill will score extra turns to attack Eligor if needed. After the battle, the party will exit the Palace again for the day.
The party will return to Kamoshida's Palace again on 4/15, and start at the entrance courtyard, head over to the air vent and go inside to wind up inside the Central Hall area. Head north and interacting with the nearby door leads to a dialogue sequence. Afterward, head north through the door.
There will be another Shadow on the other side of the door, and Morgana will use this opportunity to introduce negotiation through the Hold Up system to earn money and items, but also has the unexpected effect of recruiting Pixie into the protagonist's Persona stock. Afterward, the party will immediately be thrust into a battle with two Bicorns to show the protagonist's Persona change ability. Taking the door to the west afterward leads to West Building 1F.
West Building 1F
The door to the west is blocked by iron bars, so head north through the door. Be prepared to immediately take shelter behind the stone columns, as three Shadows patrol the room. After the Shadows are gone, opening the Treasure Chest in the room yields a Silver Dagger for the protagonist. Head north through the next door.
The party will end up in a new Safe Room when they approach the door to the north, but also discover that Ann Takamaki has re-entered the Palace after being sent home earlier and has been captured by Shadows. Head back south to the hallway that was blocked by iron bars, taking out the patrolling Shadows that have respawned if needed.
The party will be prompted to confirm that they want to enter the door at the end of the hall. Entering will result in Ann's awakening and a short boss fight with the guard captain, Belphegor. Her Agi skill will make short work of him, and should the protagonist have contracted Jack-o'-Lantern by this point, he can join in to initiate additional All-Out Attacks. The party will be forced to leave for the day after some more scenes.
Free Exploration
The party will return and be able to explore the Palace freely beginning on 4/18. Upon returning to the Metaverse, the protagonist will be drawn into the Velvet Room for an explanation of the fusion system. The protagonist must fuse two of their Personas together to proceed. When the party is ready, they can quick travel to the West Building 1F Safe Room or enter from the air vent again. Entering through the main entryway will let the protagonist score some valuables from the breakable items highlighted when using Third Eye.
The kitchen area to the east of the Safe Room has two patrolling Shadows and three breakable items. The protagonist can climb on the shelves to help ambush the Shadows if needed. The new hallway to the west has one patrolling Shadow, however, as the protagonist cannot hide yet, it will have to be ambushed carefully. The door to the north leads into Old West Castle 2F.
Old West Castle 2F
Climbing the spiral stairs and entering the hallway at the top starts the tutorial on using cover to hide in order to ambush enemies. Using it to defeat the next Shadow is required to proceed. The door in this hallway doesn't open, so proceed further down the hallway.
The party will come to a room with a table surrounded by a perimeter of metal bars. Use the protagonist's Third Eye ability to follow the footsteps and select the correct levers to pull. Pulling the wrong levers will summon Shadows into the room to ambush the party. After the correct levers have been pulled and the bars have been raised, collect the Old Castle Map from the table in the center of the room. Wait until the Shadow in the hallway to the south is heading away from the door to proceed through the next hallway.
In the upper area of the Central Hall, there will be bars blocking the way forward, so climb the ledges to the south and move along the chandeliers. A Shadow will appear to try and ambush the party on the central chandelier on their first time crossing this area. On the southeast side of the upper walkway, there will be a window leading back to the Castle Gate, and taking it will unlock a shortcut to the upper area. Drop down to the lower walkway when ready to move forward.
An open door to the east leads to the next Safe Room and a Locked Chest containing a Gold Breastplate male armor and Onyx. Entering the door to the east leads to the East Building 2F.
Follow the long winding hallway to real a large dining hall with four patrolling Shadows. The room to the north holds a Treasure Chest near the inaccessible door which holds a Snuff Soul item. To the east is a kitchen with a patrolling Shadow, with a door on the north side leading forward. Wait until the Shadow on the other side of the door is moving away before opening it.
The shelves in this next room can be used to ambush the patrolling Shadow. Afterward, the door to the north is locked, so the party must take a vent in the southwest corner of this room. Ambushing the Shadow leads to a battle where the Shadows begging tutorial is explained. This can be used to easily gain a new Persona, items or money. Shadows are more likely to beg while left at low health while the other Shadows on the field are defeated. Timid Shadows are highly likely to beg, while Irritable Shadows almost never beg. Opening the Treasure Chest afterward grants the party a Muscle Anklet accessory. Heading east and through the next door leads to the East Building 3F.
East Building 3F
Climb the stairs to the next hallway, there will be a new Safe Room at the top with a Shadow patrolling nearby. After healing and saving, head west down the hallway, and keep heading east at the hall split towards a room just south of the Safe Room on the map. Examine the bookshelf to receive The Slave Book as a key item. Carefully head back to the hall split, as a new Shadow is patrolling the hallway the party has gone down.
Continue down the unexplored hallway to reach a horseshoe-shaped hallway to the south. Examine the goat decoration on the door to the south to learn that a key is needed to progress. In the same hallway to the west, there are two rooms that can be entered. Take the door to the room on the north side. A Shadow will teleport in shortly after the party enters the room, so be prepared to ambush it. Examine the bookshelf to take The Queen Book.
Now enter the room to the south and examine the bookshelf to receive The King Book. Exit the room and follow the hallway south to deal with another Shadow and find a Locked Chest containing a Bead and Chewing Soul.
Enter the room to the north to find a library and use Third Eye to reveal three locations on the bookshelves to set books. The slot on the north wall has books related to Kamoshida, place the King Book here. The slot on the west wall has books relating to the volleyball team members. Place the Slave Book here. The spot on the east wall has books relating to female students, place the Queen Book here.
A shelf on the south wall will open up and the party will move to examine the new room. Examining a shelf on the east wall with a glittering object nets the Kamoshida's Medal key and Tower Map key items. Backtrack to the special door and use Kamoshida's Medal to proceed through. Taking the door leads to the East Building Annex.
East Building Annex
Heal and save in the Safe Room at the south end of the hallway. Proceed east. Morgana will prompt the protagonist to consider if he wants to continue onward, as there is a midboss fight coming up. The party will enter a battle with the Heavenly Punisher. He will use Charge to prepare a strong attack, and Morgana will prompt the party to guard and introduce the guarding tutorial.
After the midboss is defeated, more Shadows will teleport into the room. Immediately hide against the pews or be prepared to strike at any charging Shadows after the fight ends. The party should make their way over to the east end of the area and climb some wooden boxes upward when possible.
There is a Treasure Chest at the southeast end of the area containing Grimy Gear, which can be washed at the Yongen-Jaya laundromat to potentially produce one of the best armors available for Kamoshida's Palace for the party through random chance.
Jumping down on the southwest end causes a Shadow to teleport in, so be ready to ambush or attack it first. Opening the Treasure Chest here get the party the Wood Clappers accessory.
A door to the northwest leads to a long hallway, with the first door to the north being impassible. The next door on the south side of the hall leads to a Treasure Chest containing a Breath Sash accessory. The next room to the north contains a Shadow that must be ambushed as soon as the door is opened, as it is facing the door. There is one breakable object in this room. Following the hallway to the south leads to a lever that unlocks a door with some iron bars leading back into the upper northeast area of the chapel.
Follow the hallway north to the next spiral staircase. Following the staircase downward leads to a Shadow patrolling near a Locked Chest containing a Ryozanpaku Sword for Morgana and a Pearl. Taking the stairs up leads to the Old Castle Roof.
Old Castle Roof
Before entering the courtyard, four strong glowing Shadows will teleport in. They can be defeated at this point, but it will take some effort. Sneak past them by hiding if possible and head up the boxes and follow the path up the roof to the next area. Going through the door at the end of the path leads into the Central Tower.
Central Tower
The door to the west is barred, so head south. Opening the door on the north side of the southeast partition of the floor leads to an elevator that will take the party down to a hidden stairway. Examining the elevator shaft at the very bottom will lead to a fight with two Twilight Prostitutes, which must be ambushed once the elevator opens. Opening the Treasure Chest on the elevator gets the party a Bead.
Central Hall
Following the hallway to the south unlocks a hidden portrait door back to the Central Hall. Here, the protagonist can pull some levers on the upper walkways to raise some iron bars, one of which leads to a Safe Room from earlier, and the door on the lower level leading back to the infiltration entrance. There is a Treasure Chest in the northwest corner of the lower floor containing a Revival Bead and a Treasure Chest in the northeast corner containing a Bead. Take the Giant Portrait elevator back to the Central Tower.
Central Tower
Head west into the next partition of the floor. There will be a Locked Chest containing a Balm of Life and a Pearl. Pull the lever in the northwest partitioned area to unlock the door from earlier, then enter the door to the north to unlock the next Safe Room. Afterward, exit and take the staircase up to the next area.
In the next room, behind some bars, there's a Treasure Chest containing a Relax Gel item. There is another Treasure Chest containing a Baptismal Water on the west side of the floor, beside the stairs. Continue upwards to the next area.
A large wall will rise to block the large semicircular hallway when approached, so the party must take the suspended metal walkway. When the blades start swinging, examine the Kamoshida Statue. The party must then look for keys held by high-ranking Shadows on the lower floors of the Central Tower. Shadows wearing gold armor have spawned to fulfill this role. Defeating the one patrolling the previous floor will gain the party the Randy Right Eye key item. There will be multiple golden armored Shadows on the next floor down. Use Third Eye to pick out the one with the highest level. That will be the one holding the next key. Defeating the correct Shadow will reward the party with the Lustful Left Eye.
Save at the Safe Room if needed and head back up to the Kamoshida Statue. Using the eyes will stop the swinging blades. Midway down the walkway, there is a ledge with a Treasure Chest holding a Soul Drop. After crossing the bridge, there is another Treasure Chest to the east holding a Revival Bead item. Proceed up the stairs to the west.
Heal up in the next room, as there is a midboss fight coming. Attempting to use the stairs at the south end of the room will trigger the Shadow to appear for the fight. The stairs will not rise until it is defeated. Continue on the path upwards.
In the next area, keep heading east to find a new Safe Room, along with a Treasure Chest containing a Relax Gel item. Save at the room and continue when ready. Head west and climb the western statue up to a ledge, then jump down into the next hallway. Head north to find the Treasure Room. The route to the treasure will now be secured, all that is left is to send the calling card. The party can choose to automatically leave or level up in the Palace and leave via an exit or Safe Room.
Treasure
Kamoshida holding his treasure.
Kamoshida's Treasure, in reality, is his Olympic gold medal, which takes the shape of a royal crown, adorned with female symbol jewels, in the Metaverse. The Phantom Thieves sell the medal to Munehisa Iwai for 30,000 yen and use that money to celebrate with a buffet at the Wilton Hotel in Shibuya. The player receives 6,000 of the remaining yen for their own personal use.
Gear
Gear available for the party's use while in Kamoshida's Palace.
| Weapon | User | Attack | Accuracy | Effect | Location |
|---|---|---|---|---|---|
| Rebel Knife | Protagonist | 42 | 96 | - | Default |
| Blizz Dagger | Protagonist | 56 | 90 | +Freeze (low) | Airsoft Shop (¥2,800) |
| Silver Dagger | Protagonist | 58 | 96 | - | Chest - Kamoshida's Palace, West Building 1F |
| Kukri | Protagonist | 68 | 96 | - | Airshoft Shop (¥3,600) |
| Bandit Sword | Morgana | 38 | 94 | - | Default Airsoft Shop (¥2,000) |
| Falchion | Morgana | 48 | 94 | - | Airsoft Shop (¥2,800) |
| Normal Rod | Ryuji | 44 | 92 | - | Default |
| Mace | Ryuji | 54 | 92 | - | Airsoft Shop (¥2,800) |
| Hell Slugger | Ryuji | 64 | 94 | - | Airsoft Shop (¥4,000) |
| Leather Whip | Ann | 36 | 94 | - | Default |
| Heat Whip | Ann | 50 | 90 | +Burn (low) | Airsoft Shop (¥3,800) |
| Fundo-Kusari | Ann | 62 | 96 | - | Airsoft Shop (¥5,600) |
| Ryozanpaku Sword | Morgana | 68 | 94 | - | Locked Chest - Kamoshida's Palace, East Building Annex |
| Weapon | User | Attack | Accuracy | Rounds | Effect | Location |
|---|---|---|---|---|---|---|
| Tkachev | Protagonist | 66 | 88 | 8 | - | Default Airsoft Shop (¥1,400) |
| Governance | Protagonist | 76 | 96 | 8 | - | Airsoft Shop (¥3,000) |
| Slingshot | Morgana | 62 | 90 | 5 | - | Default Airsoft Shop (¥1,200) |
| Slingbow | Morgana | 74 | 98 | 5 | - | Airsoft Shop (¥2,600) |
| Levinson M31 | Ryuji | 64 | 86 | 4 | - | Default Airsoft Shop (¥1,400) |
| Granelli M3 | Ryuji | 88 | 90 | 2 | - | Airsoft Shop (¥4,400) |
| Replica SMG | Ann | 58 | 78 | 12 | - | Default |
| Sterlidge | Ann | 70 | 86 | 12 | - | Airsoft Shop (¥3,000) |
| Tommy Gun | Ann | 82 | 82 | 12 | - | Airsoft Shop (¥4,200) |
| Armor | User | Defense | Evasion | Effect | Location |
|---|---|---|---|---|---|
| Grimy Gear | - | 10 | 1 | - | Chest - Kamoshida's Palace, East Building Annex |
| Print T-shirt | Male | 21 | 8 | - | Ryuji default |
| Dark Undershirt | Male | 22 | 6 | - | Protagonist default |
| Neckerchief | Cat | 22 | 10 | - | Morgana default |
| Baseball Jacket | Female | 23 | 6 | - | Ann default |
| Silk Scarf | Cat | 24 | 14 | Ma+2 | Airsoft Shop (¥2,200) |
| Gold Breastplate | Male | 26 | 4 | - | Locked Chest - Kamoshida's Palace, Central Hall 2F |
| Padded Shirt | Unisex | 27 | 4 | En+2 | Airsoft Shop (¥2,400) |
| Battle Camisole | Female | 29 | 7 | +10 HP | Airsoft Shop (¥2,400) |
| Shoulder Pads | Male | 30 | 6 | Ag+2 | Airsoft Shop (¥2,400) |
| Cat Sweater | Cat | 34 | 15 | +Resist Freeze | Airsoft Shop (¥4,200) |
| Lynx Camo Vest | Unisex | 36 | 5 | +Resist Sleep | Airsoft Shop (¥4,400) |
| Magic Camisole | Female | 38 | 9 | Ma+2 | Airsoft Shop (¥4,600) |
| Burntech | Male | 40 | 7 | +Resist Freeze | Airsoft Shop (¥4,600) |
| Well-worn Scarf | Cat | 42 | 19 | Ma+3 | Wash Grimy Gear |
| Ancient Shirt | Unisex | 43 | 8 | En+3 | Wash Grimy Gear |
| Old Camisole | Female | 45 | 13 | - | Wash Grimy Gear |
| Pauldrons | Male | 48 | 11 | Ag+3 | Wash Grimy Gear |
| Accessory | Effect | Location |
|---|---|---|
| Breath Sash | +10 HP | Airsoft Shop (¥3,000) Chest - Kamoshida's Palace, East Building Annex |
| Chakra Choker | +10 SP | Airsoft Shop (¥5,000) |
| Muscle Anklet | St+2 | Chest - Kamoshida's Palace, Old West Castle 2F |
| Wood Clappers | +Resist Burn | Chest - Kamoshida's Palace, East Building Annex |
Enemies
| Shadow | Lv | Arcana | Personality | Affinity | ||||||||||
|---|---|---|---|---|---|---|---|---|---|---|---|---|---|---|
| Jack-o'-Lantern | 2 | Magician | Gloomy | - | Wk | Dr | Wk | - | Wk | - | - | - | - | 20 |
| Pixie | 2 | Lovers | Timid | - | Wk | - | Wk | St | - | - | - | St | Wk | 20 |
| Agathion | 3 | Chariot | Timid | - | St | - | - | St | Wk | - | - | - | - | 20 |
| Mandrake | 3 | Death | Upbeat | - | - | Wk | - | St | - | - | - | - | - | 20 |
| Bicorn | 4 | Hermit | Irritable | - | - | - | - | Wk | - | - | - | - | St | 20 |
| Incubus | 5 | Devil | Timid | - | Wk | - | - | St | - | - | - | Wk | - | 20 |
| Silky | 6 | Priestess | Gloomy | - | - | Wk | St | Wk | - | - | - | - | - | 20 |
| Kelpie | 6 | Strength | Upbeat | - | - | - | St | Wk | - | - | - | - | - | 80 |
| Succubus | 7 | Moon | Irritable | - | Wk | St | - | - | - | - | - | Wk | Nu | 20 |
| Berith | 9 | Hierophant | Irritable | - | Nu | St | Wk | - | - | - | - | - | - | 20 |
| Andras | 10 | Devil | Timid | - | Wk | Wk | St | - | - | - | - | - | - | 20 |
| Eligor | 16 | Emperor | Irritable | - | Str | Str | - | Wk | - | - | - | - | Str | 20 |
| Archangel | 16 | Justice | Irritable | - | - | - | - | Wk | - | - | - | Nu | Wk | 20 |
Bosses
| Shadow | Lv | Arcana | Affinity | ||||||||||
|---|---|---|---|---|---|---|---|---|---|---|---|---|---|
| Bicorn | 2 | Hermit | - | - | - | - | Wk | - | - | - | - | St | |
| Eligor | 3 | Hierophant | - | St | St | - | - | - | - | - | - | - | |
| Belphegor | 5 | Devil | St | - | Wk | - | St | St | - | - | - | - | |
| Archangel | 9 | Devil | - | - | St | St | St | - | - | - | St | - | |
| Mara | 12 | Tower | - | - | St | St | St | St | St | St | St | St | |
| Eligor | 16 | Emperor | - | St | St | - | - | - | - | - | - | St | |
| Trophy of Obsession | 10 | - | - | - | - | - | - | - | - | - | - | - | |
| Suguru "Asmodeus" Kamoshida | 11 | - | - | - | - | - | - | - | - | - | - | - | |
Gallery
 |
 |
 |
 |
 |
 |
 |
 |
Trivia
- Kamoshida's Palace is likely a reference to Yukiko's Castle. It has black-and-white checkered floors and a red carpet with gold edges. However, instead of a princess searching for her "prince," it is now a king searching for his queen.
- The design of Kamoshida's Palace is likely based of Romantic Castle from Persona 4: Dancing All Night.
- The way all male student prisoners are tortured with cruel physical training machines alludes to Michiko Matsudaira's abuse to two physically incapable male schoolmates (Kenta Yokouchi and Tsutomu Kurouri) in the Snow Queen Quest of Megami Ibunroku Persona.
- Hidden files in the game indicate that Kamoshida's Palace is intended to be much larger than it is in the final game, which contains a sewer, a bed containing female volleyball student cognitions, a rat puzzle like those seen on Shido's Palace and a much larger torture gym.
- The Sewer room is later redesigned without being submerged in water, and the Mara mid-boss is moved there and defending a Will Seed.
- A hidden image in the game indicates that there is a provocative poster of a female volleyball team student that is supposed to be hung on the Library's hidden room, but was removed in the final game. However, there are still four golden pins in the room which matches the width of the poster.
| Characters | |
| Playable | Ren Amamiya - Ryuji Sakamoto - Morgana - Ann Takamaki - Yusuke Kitagawa - Makoto Niijima - Futaba Sakura - Haru Okumura - Caroline & Justine |
| DLC | Shinjiro Aragaki - Goro Akechi - Theodore - Lavenza - Sho Minazuki - Labrys |
| Locations | |
| Tokyo | Café Leblanc - Shibuya - Shujin Academy |
| Palace | Kamoshida's Palace - Madarame's Palace - Kaneshiro's Palace - Futaba's Palace - Okumura's Palace - Niijima's Palace - Shido's Palace - Mementos |
| Other | Velvet Room - Hawaii |
| Music | |
| Songs | GROOVY - One Nightbreak |
| Albums | Persona Dancing P3D & P5D Soundtrack Advanced CD |
| Archive | |
| Lists | Social - Trophies - Patches and Updates |
| Development | |
| Corporate | Atlus Co., Ltd. |
| Personnel | Kazuhisa Wada - Shigenori Soejima - Ryota Kozuka - Shoji Meguro Toshiki Konishi - Atsushi Kitajoh - Jazztronik - tofubeats - Mito - Yukihiro Fukutomi - KAIEN - Shacho - Taku Takahashi |